Served with Love (in Charlotte): What to eat in Charlotte, NC

I travel usually once a year for work to attend a genetics educational conference.  This means I get to stay on top of my continuing education credits to continue to be certified but also that I get to try new restaurants in an often new city, which I love.

After a quick google of the “best restaurants in Charlotte” I found The Asbury.  From a quick look at the menu, it seemed like elevated Southern food which was exactly what I was wanting.  So I gave it a try and was not disappointed.

The chef, Matthew Krenz, won the NC Chef Showdown in 2017.  I am a sucker for young waiters being so excited to tell me things like this that I fall hook, line, and sinker in love with a place almost immediately.  I love that they seemed so proud to mention this about the place they work.  They are probably coached to do this because it works (case example: me).

When you enter The Asbury you are greeted with the kindness you expect in the South: people asking how your night is going and actually looking you in the eye like they care about your answer.  The hostess mentioned how they have a new spring menu.  When I asked what she recommended from it, she easily recommended her favorite from their dinner menu: Crispy Pork Cheek.

What I ordered:

  • Wine
  • Maw Maw’s Cast Iron Biscuits with Bacon jam
  • 2 oysters
  • Small Crispy Pork Cheek
  • Panna cotta
  • Asbury coffee

The run down:

The wine list wasn’t expansive but had great options of every type for every price range.  I was very happy with the glass I ordered.

Biscuits were good but maybe a little dry.  Bacon jam made them just right and I look forward to having my leftovers for breakfast tomorrow.

Oysters were small, creamy, and sweet.  As an oyster lover, I am often given the option of 6 or 12 oysters and depending on who I am dining with, that may work or be way to much.  I loved how you could order the exact amount you wanted.

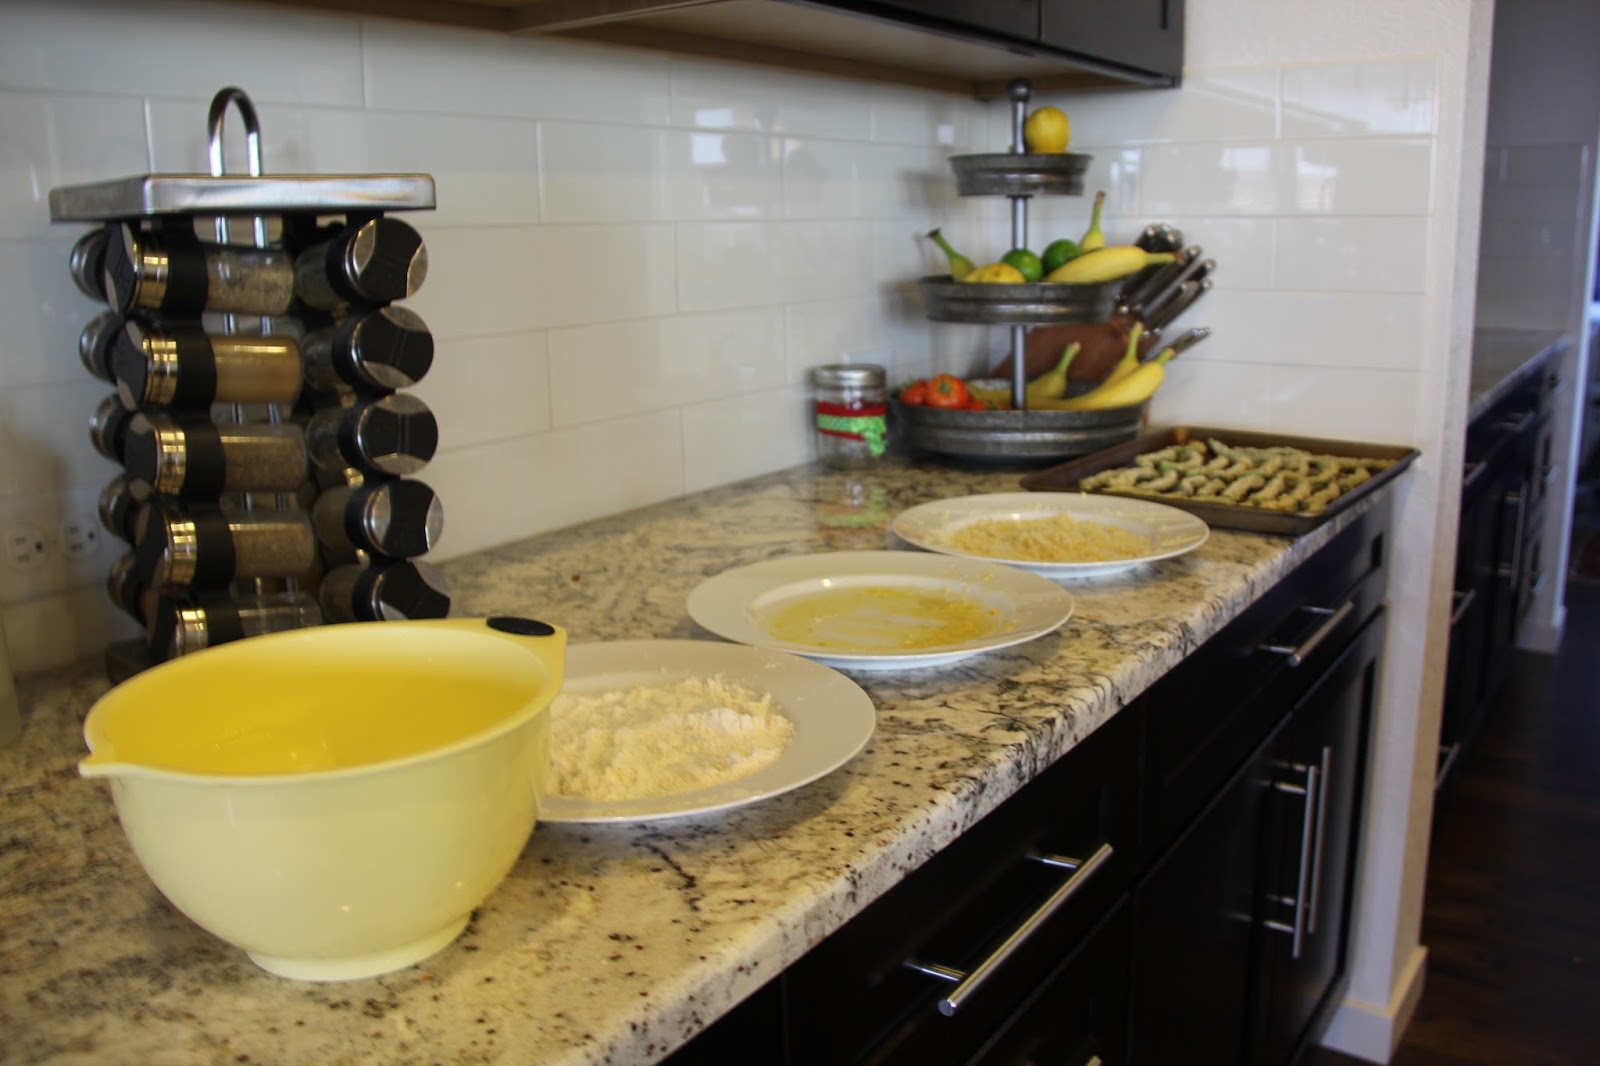
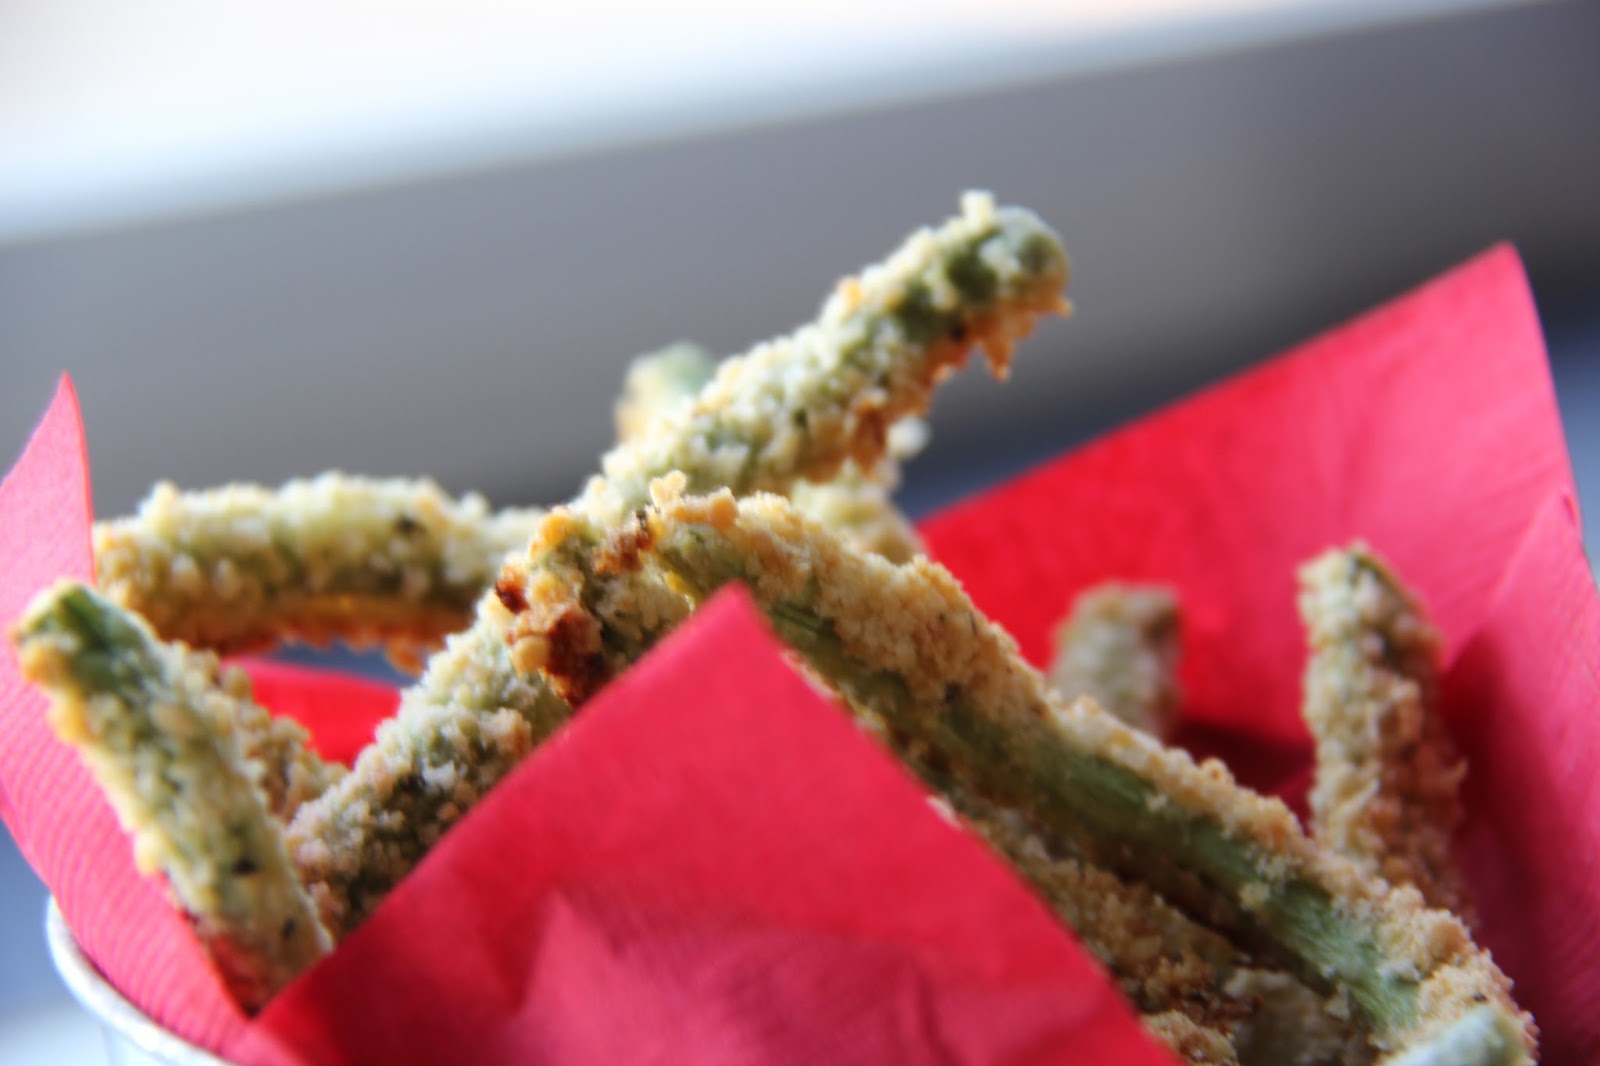
The Crispy Pork Cheek was fabulous.  This dish tasted like spring and made me excited for my garden.  The ginger and carrot bisque was a perfect compliment to the crispy pork and perfectly cooked fresh peas and black eyed peas.  It felt fancy Southern and I would have licked my plate if it was socially acceptable.  Did the pork cheek need to be fried?  No, in short.  BUT, the light tempura batter gave it a nice crunch and texture and made it feel even more Southern so my opinion was that it was worth the calories.  Also, the seasonal entrees come in small and large portions so you are able to get a small and try more things (which is what I did).  I loved this and if my hubby was with me, we probably would have tried three small entrees just to get a good sampling of what they had to offer.IMG_6795

I told the waiter I was having a hard time deciding on dessert and the panna cotta was what he recommended.  It was divine.  Creamy custard topped with shaved fennel and I believe an apple gel.  I loved the little crunchy bites of the fennel with the creamy custard.  I’d order it again.  And again.  And again.IMG_6797

The Asbury coffee was simply good coffee and various liquours but it was good and came in decaf (my waiter swore this was true and was willing to give me his home number to call at 3 AM if that wasn’t the case).

The food was fabulous.  Ambience was good.  I did think it was a little weird having mainly rustic barn paintings on one side and almost all modern cow paintings on the other.  You usually associate that “look” with a coffee shop that has little price tags on all the paintings but that wasn’t the case here.  So the art, if there permanently, could be more cohesive but that is a minor criticism of a place with such fabulous food and service.

I would definitely recommend The Asbury and if I am ever back in Charlotte, I’ll be checking out what’s on their seasonal menu and likely booking a table again.

Best $20 you will ever spend on Amazon: OK to Wake Clock

Sleeping and meal time are the two things we’ve decided to be pretty strict on.  Our kids have never slept in our room.  I know that makes us sound cruel but we have our reasons.  The main one being that I am such a light sleeper that I cannot sleep at all with baby/kid noises or extra motion in the bed.  We’ve always used monitors so we can hear if we are needed.  If the kids were ever sick or I thought I needed to be near to them at night for any reason, I would sleep in their rooms so they have never expected to sleep in ours.

But, like all kids, they did try to get up in the middle of the night and really early in the morning.  Thankfully, I found a fabulous product to help us keep them in their rooms at night and until an appropriate time in the morning so the entire house gets a good night’s sleep.

This is a product recommendation that probably every house with kids can use!  If you have children you would love to stay in bed longer in the morning or be better about staying in their rooms all night now, this one is for you: The OK to Wake Clock.

31GP5YnCFjL
Available on Amazon

We love this thing!  It turns green at a set time so if your kids wake up and see it green, they know they can come out of their room.  If it isn’t green, they need to stay in their room until it turns on.  You set a time for it to turn on in the morning and then you can set a duration for it turn on in during nap time.  It runs on batteries or can be plugged in and comes with a green face and pink or purple face.

While the product is fabulous, you do have to train your kids to follow it.  We started using these clocks when Bear and Ladybug were transitioning from their cribs to their toddler beds.  You certainly could start later than that as well but setting up the “rules” before moving to a toddler bed or right when you do move to the toddler bed probably help.


Explain the night before you use the clock the first time that the clock will turn green when it is okay for them to get up and come out of their room.  If they wake up before it turns green, they need to go back to sleep or read/play quietly in their bed.  We have books and stuffed animals in our kids’ rooms for that purpose.

Also explain that if they stay in their room and are quiet until their light turns green, they will get a reward.  We used M&Ms and then a sticker chart for a reward like a new toy or special date.  I like this because they get an immediate reward from the M&M but then something bigger to work towards.


Set the time in the morning for when they are normally waking and then gradually move it later by 15 minute increments every few days of them successfully staying in their room.  Example, if your kids are getting up at 6 am and you’d love that to be 7 am or later, set the clock to turn green at 6 am the first morning.  Once your kids have stayed in their rooms for a few days at that time, move it to 6:15 am.  Then 6:30.  Etc.

Same set up for nap time.  If they are napping for an hour and you would like to make that 2 hours, start with 1 hour for the time set and then gradually move it to 2 hours.


The most important thing: consistency.  Each and every time they get up before the light turns green, walk them back to their room and put them back to bed saying “you can get up when your light turns green.”  Say that and nothing more.  This means whether it is 5 minutes until the clock turns green or the middle of the night, you still walk them back to their room.  No stories, no extra hugs and kisses or cuddle time.  Just a quick walk back to their room.  Yes, in the early days they protested or were upset.  That ended quickly though when they understood that getting up in the middle of the night or early in the morning didn’t get them what they wanted.

Of note, our kids have a jack-and-jill bath between their rooms so they can use the restroom on their own without going out of their room.  If your kids need to go out of their rooms to use the restroom, you may need to adjust the rules slightly (can only go out before green to use the restroom BUT must go right back to room).  We also have video monitors in their rooms so if they are sick or need something, they can call to us and we can come help them.  If you don’t use monitors, you may need to say it is okay for them to come out if they are sick or need something.

Our kids now stay in their rooms until 7:30 am (or later if we have a later night and set the clock back a bit) and have 2-3 hour nap times depending on the day.  We also very rarely like I don’t remember when the last time was have them getting up in the middle of the night.

I hope this clock helps you get better sleep!  If you have any other products or tips for sleeping through the night, please use the comment feature above to share your thoughts!

*This post is not sponsored.  I have owned three of these clocks (one got dropped pretty badly on a trip so we quickly replaced it with another) and there is currently one in Bear’s room and one in Ladybug’s room.  As I write this, they are on hour 2 of their naps.  🙂


Roasted Root Veggies with Rosemary Chicken

This recipe is based on one of our favorites from the Whole 30 Cookbook.  I adapted it to use ingredients I’m more likely to have on hand (bacon instead of pancetta), to use only one pan (because why dirty two?), and to use radishes that I can grow in my garden (the little color pop they give is really pretty).  This is a perfect fall or winter work night dinner.  Yes, you’ll need about 15 minutes or so to chop the veggies but that is really all the hands on time necessary.  Then you have 30 minutes (while the one pan dinner cooks) to play with the kids or do whatever else you need to.

When roasting chicken, I prefer chicken thighs but I have included information in the recipe on how you can use chicken breasts if that is all you have on hand.  If you are using chicken breasts for this recipe, check out how I make my chicken breast so much better by beating them.

This recipe calls for 1-2 pieces of bacon.  You might be thinking, “Why would I open a whole pack of bacon for one piece?”  But that’s not what I do most of the time.  If we have bacon sometime during a weekend for breakfast, I frequently hoard a piece or two in a plastic baggie to cook with the rest of the week.

If you see radishes on the ingredient list and think “I’m out” please hear me out: roasted radishes taste completely different than raw.  They have a much milder taste when cooked that is very similar to other root vegetables.  I learned this when a good friend was telling me how she steams her radishes with butter for her kids who eat them faster than she can make a second batch.  I’d basically avoided radishes since was a kid up until she told me that.  And those cooked radishes were apparently a gateway into radish loving for me because now I can’t get enough of them, cooked or raw.

So try it out and let me know what you think!

Happy cooking!

IMG_3287

Roasted Root Veggies with Rosemary Chicken
This one pan dinner is perfect on a fall or winter work night. If you don’t have bacon, substitute olive oil. If you don’t have fresh rosemary or a lemon, salt and pepper will be just fine. (But the lemon and rosemary do make it extra special.)
Ingredients
  • 1 peeled sweet potato
  • 1 peeled rutabaga
  • 2 carrots
  • 2 parsnips
  • 1 small onion
  • 1/2-1 bunch, depending on size/preference radishes
  • 1-2 slices bacon
  • 3-6, depending on size chicken thighs or breasts
  • 1 Tablespoon fresh rosemary
  • 1 lemon lemon zest
  • 1 garlic clove
  • salt
  • pepper
Instructions
1) Preheat oven to 400 degrees
2) Cut onion into half moon slices
3) Chop vegetables (peeled sweet potato, peeled rutabaga, peeled parsnip, carrot, and radishes) into 3/4 inch cubes
4) Chop bacon into 1/2 in pieces
5) Combine vegetables, onion, and bacon in a shallow roasting pan or cookie sheet with edgesIMG_3270
6) Sprinkle with salt and pepper and toss to combine
7) Cover with foil
8) Bake for 10 minutes
9) While the vegetables are roasting, prepare the chicken. If using chicken breasts, put them in a plastic zip loc bag and flatten them to 3/4 in thick. If using chicken thighs, no flattening is needed.
10) Zest lemon
11) Chop fresh rosemary
12) Mince garlic clove
13) Combine lemon zest, rosemary, and garlic and run your knife through them together a few timesIMG_3280
14) Once 10 minutes is up on veggies, uncover the pan and mix the veggies. Push chicken pieces down into the pan, removing the large veggies from underneath them. (The occasional onion or bacon under the chicken won’t do anything but good.)IMG_3281
14) Sprinkle chicken with salt, pepper, and lemon/rosemary/garlic mixture
15) Roast chicken and veggies uncovered for 30-40 minutes
16) Serve with lemon wedges from the lemon you zested
IMG_3284
Details

Prep time: Cook time: Total time: Yield: 4 servings plus leftovers for lunches


Gift idea for stuffed animal loving littles

I feel like I struggle with gifts ideas for my kids each birthday and Christmas. Between two sets of grandparents and other relatives who spoil them rotten and fabulous hand-me-downs from friends, they don’t actually need anything. My idea for this Christmas came after I was struggling to help Ladybug and Bear clean up their rooms one day. Where on Earth, were all of their stuffed animals supposed to go?  I have tried to thin the herd several times but they genuinely love and play with all of them.  So off to Pinterest I went searching for stuffed animal storage ideas.

I stumbled on this plan and loved how simple it was.  Beast and I built two of these in basically 3 nap times: 1) for building 2) for painting and 3) for stringing the bungee cord.  We got the wood and spray paint from Home Depot and the bungee cords from Amazon. They are able to put their animals in this from the top or sides on their own and the bungee cords make it very easy for them to see and pull out the desired creature when they decide they want it.

IMG_8164

And now when I see that stuffed animals are spread throughout the house, I just have to say, “Please put your stuffed animals in your zoo!”  Within a matter of minutes, they can clean up the mess and enjoy doing it since they are filling up their “zoo.”  The “zoos” fit nicely in the corners of their rooms.

We combined this gift with a ticket to make their own stuffed animals at Build-A-Bear for Christmas.  So we had a bit of a theme this year.

IMG_6401

I hope this helps you if you’re in need of a birthday or Christmas idea this year!


From broken mayo to olive oil cake…

This weekend I got it in my head that I needed to make homemade tartar sauce (and therefore mayo) for a fish fry we were planning.  I was short on time so I thought I could skip over the recommendation for all of the products to be room temperature.  “Eh, it will probably just take a little more elbow grease to whip cold eggs into mayo,” I thought.  Wrong.  Cold eggs do not whip into mayo.  They whip into useless oil and egg liquid.  Or so I thought.

“Now what?” I was thinking looking at a $5 or more in oil, eggs, and fresh lemon juice that was looking like it just needed to get thrown out.  Thankfully, I remembered a recipe I had seen but never tried for olive oil cake.  I quickly pulled it up and realized that I could throw a few ingredients into my oily mess, bake it, and call it a planned cake.  So I did and it turned out just fine even though the ratios I had in my oily mess weren’t even exactly what the recipe called for.

Here is the olive oil cake recipe I used in case anyone else winds up with a broken mayo in need of resurrecting: https://www.bonappetit.com/recipe/olive-oil-cake

The next day, I tried a different mayo recipe and let the ingredients come to room temperature.  I wasn’t going to let homemade mayo stump me.  This time: Perfection.  I then mixed in some dill and finely diced cucumber and had a fresh tartar sauce that was delish.

Here is the mayo recipe I used: http://www.inspiredtaste.net/25943/homemade-mayonnaise-recipe/   (This recipe is Whole 30 compliant.)

Happy cooking!


Meal Planning Made Easy

IMG_3202

Meal planning is something that has been written about often and, in my opinion, way overcomplicated by many.  I’m sharing this to show how I do it easily for my family in a way that doesn’t take a bunch of time or effort.  It isn’t fancy but it is effective.

For me, I always need to know WHY I should be doing something before I would ever put any effort into doing it.  My whys:  Meal planning helps me to save time, save money, have less stress, and have less waste.  The weeks I don’t meal plan sometimes wind up with me coming home from work to frantically rummage through the fridge and pantry attempting to put whatever I have on hand together in a way that somewhat resembles a put together meal.  Basically, I’m playing “Chopped” in my own kitchen with my husband and children as the judges.

When I meal plan, things go so much better.  I come home work and execute the plan I had.  If Beast beats me home, he can check the plan and get started on dinner too.  No one attempting to make something out of nothing each and every night.

So here is how I do it.  I usually meal plan Sunday nights because I’m off on Mondays and can get groceries for the week then, if needed.  I typically do this while Beast and I watch Sunday Night Football or some other show so I can hang out with him, get his feedback/ideas, and not feel like I’m off doing this all on my own.  A regular time helps make sure you get in the habit of doing the planning regularly.

IMG_3201

What you need:

  1. Glass of wine
  2. Clip board
  3. Place to hang the clipboard
  4. Blank paper
  5. Binder for saved favorite recipes
  6. Go-to cookbook

Meal planning steps:

  1. Pour yourself a glass of wine.
  2. Stand in front of the fridge and pantry to take a quick look at what you have on hand already and need to use.  Jot these down on the corner of your paper if you need to.
  3. Take a seat and spread out your paper, go-to cookbook, and recipe binder.
  4. Outline the meals you need to plan for the week and any special circumstances for those meals.  (Work events, people coming over, celebrations, eating out, etc.)  If you have a spouse or partner, this gives you a chance to do a quick run down of the week to make sure everyone is on the same page about what is and isn’t going on.IMG_6455.JPG
  5. Put down any meals you already have the groceries for and can easily put together.
  6. Pick meals out of your favorite recipes binder or go-to cookbook for any of the single items you have on hand that need to be used.  Put these earlier in the week since these items are likely older than what you will purchase for the week.
  7. Ask your family if there is anything they would like to have this week (optional).  Don’t do this unless you are really willing to write down their requests.  I usually ask Beast (after the kids have gone to bed) if there is anything he’s craving for dinner this week. 
  8. img_6458.jpg
    I save my Hello Fresh recipe cards so I can recreate them on my own later.

    Put down one or two of your “regular rotators” (meals that you make well and easily that are loved by all).  My examples would be my go-to taco meat or my go-to pasta sauce.  We usually have one of two each week.  If I skip a week, I’m asked when we’ll be having it next, which I don’t mind since both are full of hidden veggies.

  9. If you are new to cooking regularly or like to have a break occasionally, add a “bring home” night for someone to bring dinner home.  I frequently have Beast bring dinner home on one of my work nights to give me a break from making dinner and also give me some extra time with the kids.  Our favorites are Panera, Chipotle or Qdoba, a local Greek restaurant, a local Italian restaurant, or our favorite sushi place (for celebrations).
  10. Fill in the holes with things you are craving or want to try from your binder or go-to cookbook.
  11. Put items you need to complete each of those meals on your grocery list as you go.

    IMG_6464.JPG
    I keep my plan behind the pantry door.
  12. Make sure to tuck any recipes behind your plan on the clip board or write the page numbers from your cook book to make finding recipes easy.
  13. Get what you need from the store the next day (either in store or through a pick-up/delivery service).
  14. Execute your plan.

What can help:

  1. Try a meal delivery service once a month: This gives you recipe cards for your binder and also gives you a break on the planning once a month.  We use HelloFresh once a month for these exact reasons and you can see more about why we love it here.
  2. Have a household grocery list: Beast and I use the Reminders app on our phones to make a grocery list so we can both add things to it and check things off of it once they have been purchased.  AND, most importantly, if one of us is going to the store, we make sure to get everything on the list.  This makes it really easy not to forget items you need because whenever you realize you are out of something you can easily add it to the list and make sure you get it the next time you’re at the store.

    IMG_6467.JPG
    Recipes below the plan.
  3. Use grocery shopping or delivery services when your time is limited to go to the store.  If you’ll be doing this, just add items to your order instead of your grocery list as you meal plan.  I use either ClickList from Kroger/Kings Soopers or Walmart To Go occasionally and both are great.  Yes, I let them pick my meats and fresh items and yes, I’ve been very happy with the result.  They probably pick some items better than I do.
  4. Be flexible.  If you come home later than expected and don’t have time for X that you have planned, make Y (the quick meal for another day) and draw a double sided arrow between the two on your planning sheet.  Problem solved.
  5. If you are new to cooking or meal planning, plan out two or more weeks and just repeat them over and over until you have additional recipes you want to add in.
  6. Build in meals to “clean out fridge.”  You can use these meals to clean out the leftovers.  We call these “smorgasbord” meals.  We heat up our leftovers and put everything out on the table.  Then everyone gets a chance to have what they liked best the last few days.  This helps to make less waste and more space in your fridge.

And in no time, I have enjoyed a glass of wine, talked through the week with my hubby, and planned our meals for the week (saving time, money, and sanity).

IMG_6462.JPG

I hope this is helpful for you!  If you have any questions or other ideas of your own, please use the “leave a comment” button above.

Happy cooking!

Someone else’s great idea: Green bean fries

Originally written 9/18/17

My garden went gangbusters in late August so we reached a point where we had more green beans than we knew what to do with.  I stumbled on this recipe and made it on a night where Beast had a bunch of friends over to watch a big fight.  I wound up making I don’t know how many batches because as soon as I set them down they were gone.

Breading is always a little labor intensive but I find when I get it set up in a row, it goes much faster.

I served mine with ranch dressing and had them in a metal can with a cute red napkin for a little color.

Do you have any go to recipes for dealing with the excess from your garden?  If so, please share!

Happy cooking!

How I am surviving (and thriving) during a Whole 30

Originally written 9/18/17

A good friend of mine and her husband decided they were going to do the Whole 30 program for 30 days and asked if Beast and I wanted to join them.  My gut answer: Absolutely not.  We’ve done diet tune ups several times over the last few years.  All of them seemed overly restrictive in some areas (how can fruit really be that bad for you?) and way too inclusive in some areas (I can’t have fruit but I can have bacon bits rolled up in cream cheese?).  I usually last a few days and then Beast powers through until the end.

Because my friend is a good one, I thought I’d look into the program before I told her a strong no.  After just a little research it was pretty clear that this was something I could actually get behind.  Basically it is a 30 day diet tune up that has you focus on real food and helps you identify problem areas in your diet.  You eliminate alcohol, dairy, sugar, and grains but can have proteins and almost all fruits and veggies so it doesn’t feel too restrictive.

We’ve been doing it for over a week now and it hasn’t been that bad at all in terms of overall effort and the food we’ve been eating is really good and satisfying.  Now don’t get me wrong, I would love a baguette, a whole wheel of cheese, and a big home pour of Cabernet right now.  But I feel good and know I will be able to have those things in moderation once this 30 day period is over.

I already know some areas that are my weak points (apparently I tend to carbo-load during my kids’ nap time like I’m going to run a marathon when they wake up).  Shopping and reading all the labels of things you buy to see if they are compliant makes you realize how much sugar is added in tons of foods.  While I think we eat very healthy the vast majority of the time, realizing all those little extras in our meals (sugar, dairy, grains) aren’t always necessary or really good for us has been helpful for sure.

So, overall I would say I’m looking forward to the next 22 days and I’m happy with how I am feeling and eating.

Here are a few quick tips I’ve learned over the last couple of weeks preparing for this challenge and then in the first week of the program.

1) Read the basics and go through some recipes.  I borrowed the original Whole 30 Book from a co-worker and read the basis of the program, which helped me to understand the WHYs behind the different rules.  It also gives you a FAQ guide and timeline for certain things you might be feeling as you go through the program.  Both very helpful.  Finally, it has some recipes to get you started. I also bought the Whole 30 Cookbook, which gave me even more recipes and ideas for my meal planning.  The program website (www.whole30.com) is also very helpful and has everything you would really need to know available for free.

This egg dish is from page 12 of the Whole 30 Cookbook (Bistro Breakfast Salad).  It was delicious and a nice way to have something on the lighter side since I’m not a big fan of a gigantic breakfast most mornings.

2) Get some pantry/fridge basics that you will want to have on hand for your 30 days.  For me, coffee creamer, salad dressing, mayo, and spice mixes (including taco seasoning) were a must.  I’ve been really happy with these products.

3) Think through how you can modify your current recipes to be compliant.  Probably a lot of what you make would be just fine if you substituted things for something else (rice for cauliflower rice) or removed added sugar (remove maple syrup from a meat marinade that has otherwise compliant ingredients).  Something that has been a big hit is my go-to taco meat.  I make it as usual other than substituting the regular taco seasoning for a compliant one and not deglazing the pan with a beer.  Instead of serving with rice and beans, I just made twice the amount of meat.  Beast and I ate it with butter lettuce leaves (double them up so your tacos don’t break on you) and got some mini soft tortilla boats for the kids.  They had cheese and sour cream since we had them in the fridge but we didn’t.  It was satisfying and easy modify a recipe that was already in my repertoire.

4) Meal plan a week at a time.  One of the biggest complaints I hear about this and similar programs is how many times people have to go to the grocery store.  What has worked for us is doing a meal planning session where I look through cookbooks and online to decide what we want to have.  As I add items to our meal plan, I add what we would need to our grocery list.  I go to the grocery store on Friday (one of my days off) and then one more time during the week, if needed, to get anything remaining that we maybe didn’t have enough of.  More apples, bananas, onions, or compliant snacks seem to be what we’ve needed on the second trip.  Some people use fancy templates or boards for meal planning.  I use a plain white sheet of paper from my printer and a clip board hung up in my pantry.  Not fancy, but it works.

5) Get some La Croix.  Sparkling water has been my go to when I just plain need something other than water.  Most grocery stores will have lots of flavors on hand.  Coconut has been my favorite and Cherry Lime has been Beast’s.  It has no calories or sweeteners so it is completely compliant.  I think it gives me just a little taste of sweet when I am having a craving.  We’ll be keeping it on hand after these 30 days for sure.

6) Make enough for leftovers.  If you are going to the effort of making great meals every night, give yourself a little break at lunch the next day by making enough at dinner time for leftovers.  This had made things during the day pretty easy.  For instance, I had leftover taco meat that I took to work.  I went to the salad bar to get some greens and tomatoes, topped it with my leftover taco meat, and had a compliant taco salad with minimal effort.

So those are the things that are helping me not only survive Whole 30 but appreciate what I am learning through it.  Hope that helps anyone thinking about doing it!

Happy cooking!

Tips to make your kids fabulous little eaters


When Beast and I started thinking about having kids and discussing what our family would look like and operate like, there were two things that kept coming up as important to us: meal time and sleeping.  Meal time was important to us because we wanted to be able to take our kids to restaurants and actually enjoy ourselves as well as have family meals around our own table each night.  (See this book for more topics we discussed before getting married.)

It was important to us so we put some work into figuring out how to get our kids to do a good job at the table and eat well.  They do a great job the vast majority of the time.  I’ve been asked several times why they are the way they are and it always seems like too big of an answer to just quickly spit out to a random person at a restaurant or to tell a friend over coffee (there are so many other things to talk about!).  So, I’ve outlined some things we did over the years here in case it is helpful to anyone.  These rules and methods worked for us and for the personalities of our kids.  

This post is long (sorry) but I tried to spend some time explaining some of the reasons behind the rules we had at various stages.  Now make sure your understand me, our kids are not perfect (whose are?) so they still have their moments and meals that don’t go so well but these are the things we try to enforce and really practice at home to make meal times everywhere go better.  And they are fabulous little eaters who I truly enjoy cooking for so I do think the rules we put in place after lots of reading or learning from others really did work.


Five overarching themes to our rules:

  1. “Begin as you wish to go”  This one is really the mantra for all of our parenting. Various versions of this quote are attributed to many individuals but it is the basis for many of the Baby Wise techniques (see books by Gary Enzo and Robert Buckham, MD).  Basically, it means that if you don’t want something to become a habit or your new ritual, don’t do it.  Not even once.  It may make for a hard meal or two to not give in on something, but you’re in it for the long game, not just a meal or two.  Sticking with your “rules” is worth it. 
  2. They eat what we eat.  As soon as we could, we got our kids eating the exact meal that we were eating.  We make dinner for the entire family with no separate meals or dishes for the kids.
  3. They sit at the table the whole time we do.  No one gets up early or runs around while we are eating.  Meal time is a ritual where we sit and eat and talk.  If they finish early, they sit at the table with us until everyone is done.
  4. We don’t sabotage ourselves.  If we want to have a good meal with our kids, it is worth pushing through them being hungry and making them wait instead of giving them a snack and then having kids at the table who aren’t actually hungry.  Schedules we followed are below.
  5. We remember that they are a little smarter than us at times.  Most kids only eat when they are actually hungry.  Often our kids would eat a big breakfast and not really be that hungry for lunch.  We wouldn’t force them to eat at lunch time but would still stick to our feeding schedule so the next meal would be snack time or dinner, depending on the stage they were in.  No extra or early snacks just because they didn’t eat a good lunch.  Because they eat well and eat good things, I don’t worry at all if they have a meal where they don’t eat much.  This takes a lot of stress away from the table and gives them the power to control how much they want to eat.

And now some of the things we did at different stages that helped develop good meal time habits:

4 m-1 year

  1. Use a variety of baby foods.  When I would go to the store for baby food, I would buy only one of each flavor in order to encourage my kids to eat different things.  If you make your own food, you could just make sure to make a bunch of different things and vary them with each meal.  
  2. Serve fruits and vegetables, individually and mixed.  We would serve a fruit or fruit blend for breakfast, mixed fruit and veggie for lunch, and vegetable or vegetable blend for dinner.  This helped them to get used to things that weren’t sweetened with fruit.
  3. If they don’t eat it, save it for the next meal.  If my kids turned their nose up to one kind of baby food, I would put whatever was leftover in the container in the fridge and serve it to them again at the beginning of the next meal.  This taught them that they didn’t get away from eating something by refusing it.  
  4. If it is gross, don’t serve it.  I tried the vast majority of the baby food I gave them and if it was truly gross, I would not buy it again.  I can remember one that was a black bean and grain puree which basically tasted like dirt.  I gagged when I tried it so I didn’t force Bear to eat it and definitely did not buy it again.
  5. Give little bites/purees of whatever you are eating.  As soon as we could, we would mass up bits of whatever we were having for dinner and let them try it.  
  6. Stay on a feeding schedule.  We had breakfast around 8 AM, lunch around noon, small snack around 4 PM, and dinner between 6-7 PM each day.  They knew when to expect food and to know that I didn’t give extra snacks in between.  
  7. Have them eat dinner with you.  As soon as they could sit in their Bumbos, we had our kids sitting on the table while we had dinner.  They would watch us eat, eat themselves, and get used to sitting in one spot during meal time.  If they were restless and done eating before we were, we would give them a toy or two to play with at the table but they had to stay in their seat.
Bumbo on the table

8. Start taking them to restaurants.  I started taking my kids to restaurants during my maternity leaves and continued to occasionally take them as infants out to lunch on my days off.  This helped them “practice” behavior at restaurants.  I would pick restaurants that were loud at first and times (mainly lunch) where they were less busy so it wasn’t as high stakes as say taking them to a busy restaurant for dinner.  

I swear this is the stage where Bear developed his love of salmon.  He was 6 months old and sitting on top of the table in his Bumbo.  We had my parents over and cooked up a huge piece of salmon.  He kept grabbing for it so my dad gave him the tiniest bit to try.  He loved it and my dad got a big kick out of feeding it to him.  He still eats salmon better than most adults.

I tried to make my own baby food but was unsuccessful.  I couldn’t quite ever get the texture right (probably needed WAY more water in hindsight).  Bear could not stand the food I was making but would gobble down store bought food so I quickly abandoned making my own.  This video is of Bear trying his first baby food (made by me).

1-2 years

  1. As soon as our kids could do “table food” we transitioned them away from baby food.  They had been getting small bites of what we were eating all along so it was easy to move them away from the baby food to exactly what we were eating.
  2. No toys at the table.  Coloring on the sheets given at restaurants was fine but at home they were sitting and talking with us while eating their food and learning that toys were not for the table.  
  3. Give small amounts of everything and more of whatever they like.  We would give small amounts of everything in our meal (usually a meat, veggie or two, and occasional starch or grain).  If they loved one thing and wanted more of it, we would keep giving it to them.  This meant sometimes they really only ate 1 item for dinner (with Ladybug it was often peas) but they were happy and eating something good so it wasn’t a big deal.  We would encourage trying the other items but not force it.
  4. Serve sweet items like fruit or dessert later.  Because of number 3, we wouldn’t serve strawberries, for instance, with dinner because if we did, Ladybug would only eat strawberries.  BUT, we would give strawberries after the meat and veggie as a dessert.
  5. Give water throughout the day and milk only at meal times.  We made sure they could always have water if they wanted it but milk was only available at meal times, not snack.  This was so they wouldn’t fill up on milk shortly before a meal or throughout the day.
  6. Have them eat dinner with you.  At this stage, we used a high chair with a little safety belt so they were literally buckled in at the table.  If they finished early, they sat with us until we were done.
Baby seat with buckle

7. Give lots of praise for trying new things or being good at the table.  We would constantly say things like “I love how you tried the X” even if it was only one bite or “You say very nice at the table.  That makes Mommy happy.”  

8. Give timeouts for inappropriate table behavior.  This is the stage where if they were being inappropriate at the table, we would put them in timeout away from the table (in our house it is the steps going upstairs).  They can still hear everything going on but not see it or participate in it.  When we told them why they were going to timeout, we would say something like “You were not acting nice at the table.  You can come back when you are ready to sit nicely and eat with the rest of us.”  

9. Start having them say “thank you for dinner” and ask to be excused.  Our kids know that when everyone is done they can get up if they say two things:  “Thank you for dinner, X” and “May I please be excused.”  I heard this from one of my friends and loved how it asked the kids to acknowledge the effort that was put in to making the meal.  Asking to be excused gives them a clear time when it is okay to get up.  If they haven’t been excused yet and get up, they are asked to go back to the table.

Watching this child eat is seriously one of my favorite pastimes.  I will see that she is done with a meal and realize I’ve barely touched mine because I was watching her the whole time.  This is her thoroughly enjoying eating corn on the cob.  Translations:  “CHEESE!”  “Mommy’s corn cob.”  “Switch sides.” “Where’s my chicken?”  (She had eaten it all.)

2-3 years

  1. Transition away from snack time.  By the time both our kids were 2, I noticed they were doing great at the table for breakfast and lunch, eating a small snack, and not really that hungry for dinner.  So we went to smaller and smaller amounts for snacks and eventually eliminated it all together.
  2. Treats/desserts are the exception, not the rule.  If you knew after every meal you would get a nice big dessert, would you eat as much of your meal?  Of course not.  If kids expect to get a treat or dessert after a meal then they will often focus on that and eat the minimum you deem acceptable in order to get the treat.  We have a treat (usually a cookie) or dessert after dinner only occasionally so that it is not expected.  The kids instead focus on their meals.  If they have eaten a good dinner AND had a good day otherwise with behavior then we’ll offer something after they are completely done about once or twice a week.  Never enough for them to expect it and if they start asking for dessert then we usually say “not tonight” for a few nights to get them back on track with not expecting it.
  3. “No thank you bites.”  If they wanted more of something at this stage, we would have them take a “no thank you bite” of something they had not tried first.  This could be a very small bite but would get them to try something different and possibly to start eating something else in addition to what they were really enjoying.  
  4. Transition to sitting in chair like “big kid.”  One of the rewards for our kids potty training was getting to sit at the table like a “big kid” in an adult chair or on a bench without a baby seat.  By this time they had been used to sitting at the table and not getting up during meal time.

Ladybug has recently decided that asparagus is one of her favorite foods.  Here is her method for chomping down a whole spear at a time.

3+ years

  1. “I’ll give you more X, if you eat 3 bites of Y.”  By age 3, they’ve had the “no thank you” bites and know that you’re not trying to poison them.  You can encourage them to take more bites of something in order to get more of what they are really enjoying.  That being said, we certainly have our exceptions.  My kids actually gag when I give them cottage cheese.  So I’m not going to force them to eat something that literally they physically cannot get down.  I feel like everyone should get to have a few things that aren’t their favorite, especially if they are doing a great job eating everything else.  We try to read our kids and determine if they are not eating something just because they like another item a lot or if they aren’t eating it because they are turning their nose up to it.  Bear will often devour all his meat and ask for more before he has even touched his vegetables.  He’ll ask for more meat but we’ll ask him to take 3 bites of veggies before we give him more.  Once he tastes the veggies and determines he likes them as well as the meat, he will typically start eating them just as well.  
  2. Table manners.  Up until 3, I feel like the main goal for meal time with kids is to get them to eat a variety of things and sit at the table without screaming.  Right?  By age 3, you can expect more from them in terms of table manners.  With Bear we are talking more about leaning over his plate so crumbs don’t fall, making sure to use his fork/spoon correctly and all the time (no fist shoveling), and using his napkin instead of his shirt or my tablecloth.  He seems much more receptive at this age as well as able to perform our requests compared to when he was 2.

Here is my sweet Bear asking for more politely when he had licked his plate clean.


The Grandma’s House Clause:  Now there are times when it makes total sense to relax the rules a little bit.  I am not going to tell my mom or mother-in-law that they can’t give my kiddo a treat at 10 AM because we have a food schedule that we stick to.  Grandma’s get a ton of enjoyment out of giving treats.  Special events at other people’s house are in the same boat.  Rules can be bent and broken when needed, especially when there is a solid foundation or meal time ritual at home.

And that is where we are now.  I’ll probably have to add to this post as we go through additional stages but that is what we have so far.

If anyone has any questions or additional thoughts/ideas on how to get kids to eat well, please put them in the comments.  I always love to hear what tricks other parents have up their sleeves!


Happy cooking!

Perfect High-altitude buttermilk biscuits with Colorado peach jam

Moving to Colorado throws you for a loop when you are used to baking by following standard recipes.  Shortly after I moved here, I quickly learned to search for high altitude recipes so I didn’t wind up with an deflated and not so tasty treat.

Several years ago, I got it into my head that I needed to be able to make biscuits from scratch.  This might have been due to some pregnancy induced nesting urge.  Who knows.  I had a hard time finding a high altitude biscuit recipe that worked perfectly each time so I started playing with a recipe I found until it was just right.  I played with the amount of baking soda, baking powder, and oven temperature until the recipe below was created.  Which means for a few months we had biscuits ALL THE TIME.

I finally got it right and the recipe below is our go to when people are over for breakfast or when we’re wanting to have a nice lazy morning making breakfast as a family.  It is probably the recipe I get asked for and share the most.  Now that I have kids, they really enjoy helping me make and cut the biscuits.

This mound of butter is when we were tripling the recipe for a crowd.

Apple butter or honey are perfect spreads for these biscuits.  But is it also fun to make something of your own.  We usually get a box or two of Colorado peaches each summer and I love to make peach jam to go on these biscuits, toast, etc.  This warm peach jam recipe is a perfect way to use a couple of peaches to add something seasonal, fresh, and sweet to a breakfast staple.  Start the jam first and while it simmers, make the biscuits.

Happy cooking!

print recipe

High Altitude Buttermilk Biscuits

This is the recipe I have spent the most time experimenting with and getting just right. My kids love to help me make these and you’ll find them sitting on the kitchen counter putting butter in the mixer many Saturday mornings.

Ingredients

  • 2 cups flour
  • 1 Tablespoon baking powder
  • 1/4 teaspoon baking soda
  • 1 Tablespoon sugar
  • 1 teaspoon salt
  • 1/3 cup (cut into small cubes) cold butter
  • 3/4 cup buttermilk

Instructions

1. Preheat oven to 400 degrees

2. Whisk dry ingredients in stand mixer bowl

3. Cut butter into small cubes

4. Turn stand mixer on medium speed

5. Add one cube of cold butter to the mix at a time until all butter is in the bowl

6. Dribble buttermilk down the side of the stand mixer while still running

7. Stop adding buttermilk when the mixture is a sticky dough ball and all dry ingredients have been absorbed

8. Flour hands and flat surface

9. Ball up mixture and knead two to three times on floured surface

10. Spread dough ball out to 1 inch thick with hands or rolling pin

11. Dip a glass or biscuit cutter into flour and use it to cut biscuits of desired size

12. Put biscuits on cookie sheet and bake for 12 minutes

Details

Prep time: Cook time: Total time: Yield: 8 biscuits or so, depending on size


Colorado Peach Jam

This recipe could probably be made a million different ways with whatever fruit is seasonal or whatever combination you would like to try. Start this recipe first and them start the biscuits. You’ll be able to finalize this one while the biscuits cook.

Ingredients

  • 2, pealed and diced Colorado peaches
  • 1 cup water
  • 1/4 cup sugar

Instructions

1. Peal and dice peaches 

2. Put all ingredients in saucepan on medium heat, turn to low once simmering

3. Simmer uncovered for 15 minutes

4. Stir occasionally and add 1/4 cup water as needed, if sauce becomes too thick

5. Once peaches are cooked through and sauce is thick, smash peach pieces with a fork or potato masher

Details

Prep time: Cook time: Total time: Yield: 2 cups