I know that all the world is crazed for The Lazy Genius Collective’s Change-Your-Life-Chicken right now, which is absolutely fabulous, but the chicken dish we’ve been making over and over again in our house this winter is Taste of Home’s Sheet-Pan Lemon Garlic Chicken.
This is an easy meal to throw together on a foil-covered pan which makes it perfect for a work-night dinner…
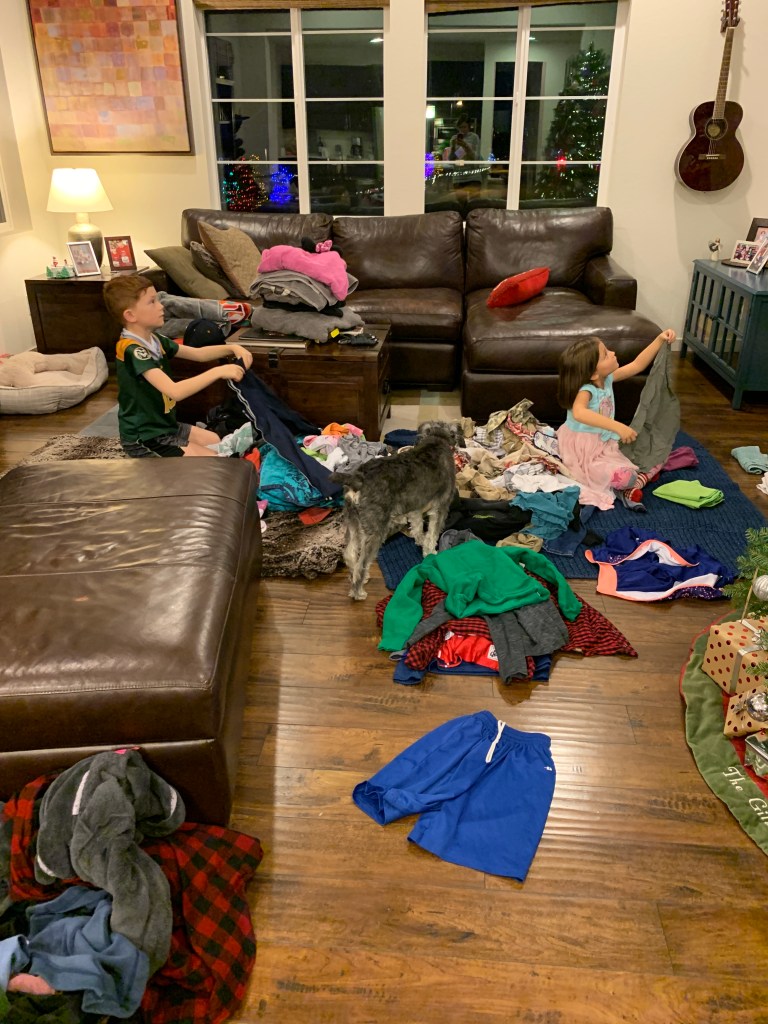
…or on a night when you need to do something else while dinner cooks. Recently I realized that the laundry had gotten completely out of control. As many parents have experienced in 2020, it is just about impossible to do all the things all the time. Adding teacher to my list of different roles meant that laundry just didn’t make the cut one week. Or more specifically, my least favorite part of the laundry: folding it and putting it away.
It was a serious pile of laundry…
So one night, I got this dinner in the oven, poured a glass of wine, put a show on for the kids, and dumped all of the laundry in the middle of the living room for us to all fold together. We paused the show to take “put away” breaks and we all took care of our own laundry. By the time the meal was done cooking, the pile was gone and I was feeling much better. Now, was everything folded and put away exactly the way I would have done? Absolutely not. Were the drawers and closets organized the way I would have loved them to be? Again, absolutely not. But the anxiety-producing pile of laundry was gone and that was what I needed that night.
My kids and husband LOVE this dinner! I usually just throw the pan in the middle of the table and serve it with a loaf of sourdough made previously (or easily bought). We all wind up breaking off bread and dipping it in the lemony sauce on the pan.
Hopefully this recipe can help you put an easy meal on the table sometime soon!
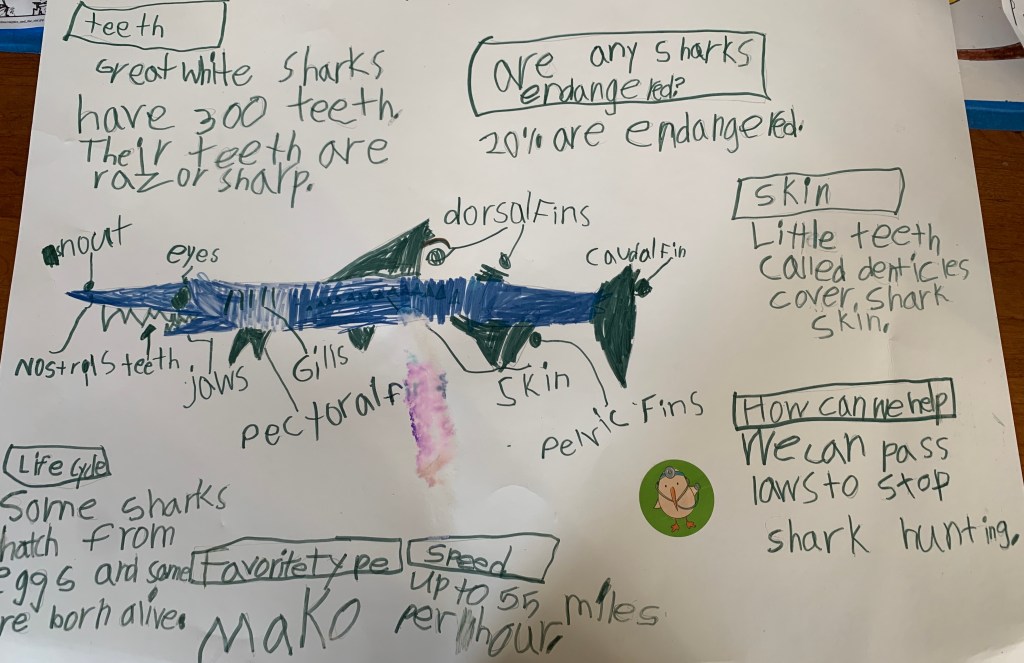
During the 2020 spring semester, Bear’s kindergarten teacher had him do what she called a “Passion Project” to allow him to go a little deeper with a subject and stretch himself. He took several weeks to research a subject of his choosing and then he presented his project to his teacher and another little boy who had done a project as well. It was great to see him excited about something he was doing for school (the pile of completed worksheets were not doing it for him) and he was very proud of what he had put together. He researched sharks and left his shark poster up in his room for months.
The shark poster was up in Bear’s room for months and gained some stickers and other marks along the way.
Fast forward to the end of the fall semester 2020 and both my kids were needing something more than worksheets to finish the rest of the school year. And let’s be honest, I needed something to take up their time while I was trying to work from home. We decided they could each do a Passion Project of their choosing and present to their grandparents and family via FaceTime and Zoom prior to Christmas. It worked out really well for our family so I thought I would share what we had them do in case anyone else is needing something to keep their kids busy and engaged with school.
First, discuss with each child what subject they would like to learn more about. For younger kids you will want to keep it to something simple: a specific type of animal or specific place. Older kids could choose something more broad: a sport or country. Once the topic is chosen gather the items they will need to do their research and present their project.
Items needed for each child:
1. Notebook
2. Pencils
3. Basket to put their research items in
4. Library books and DVDs, magazines, and your own books on the subject
5. White poster board
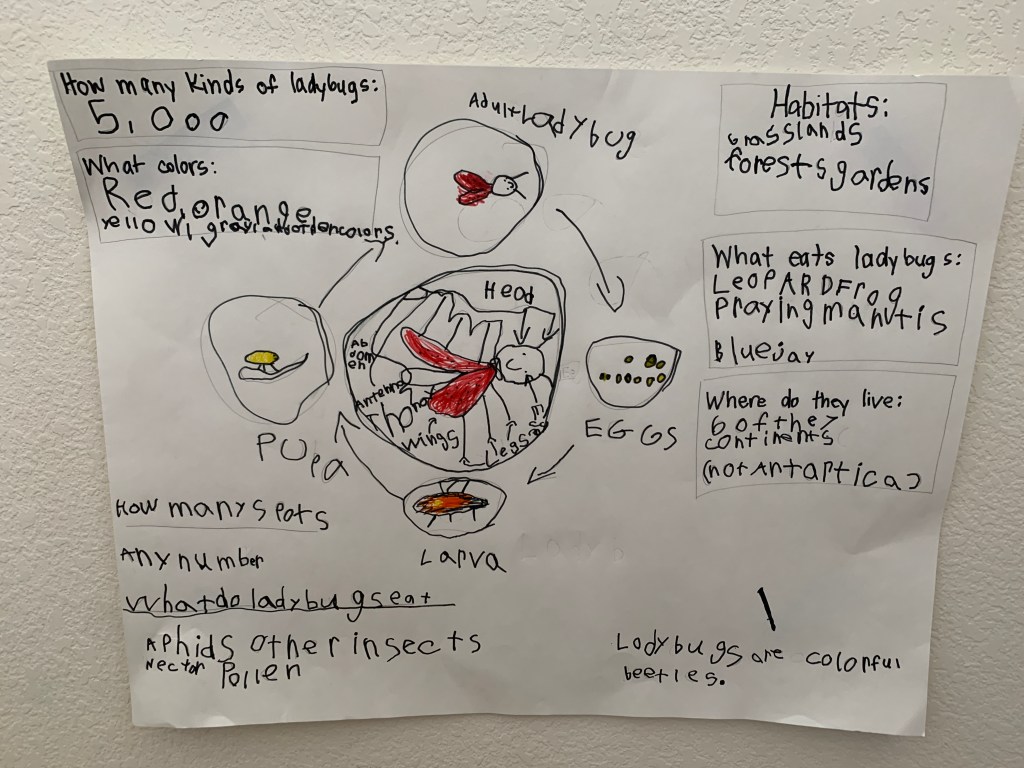
My kids chose to research ladybugs and bears and you guessed it, Ladybug researched ladybugs and Bear researched bears. Their nicknames really do fit them.
Once they had their subject chosen, I logged into our library website and requested literally every book and nature DVD on ladybugs and bears. I apologize if you needed a book or DVD on ladybugs or bears from the Douglas County Library system in December 2020. They were all at my house but we were putting them to good use. It took a few days for these holds to be ready so while we were waiting I also gathered the books and magazines we already had on these subjects and put them in the baskets we had ready to go. I then sat down with each child and talked to them about what they wanted to learn about their subject. On each page in their notebook, we wrote one question that they wanted to get answered from their research.
Example questions for an animal/insect subject:
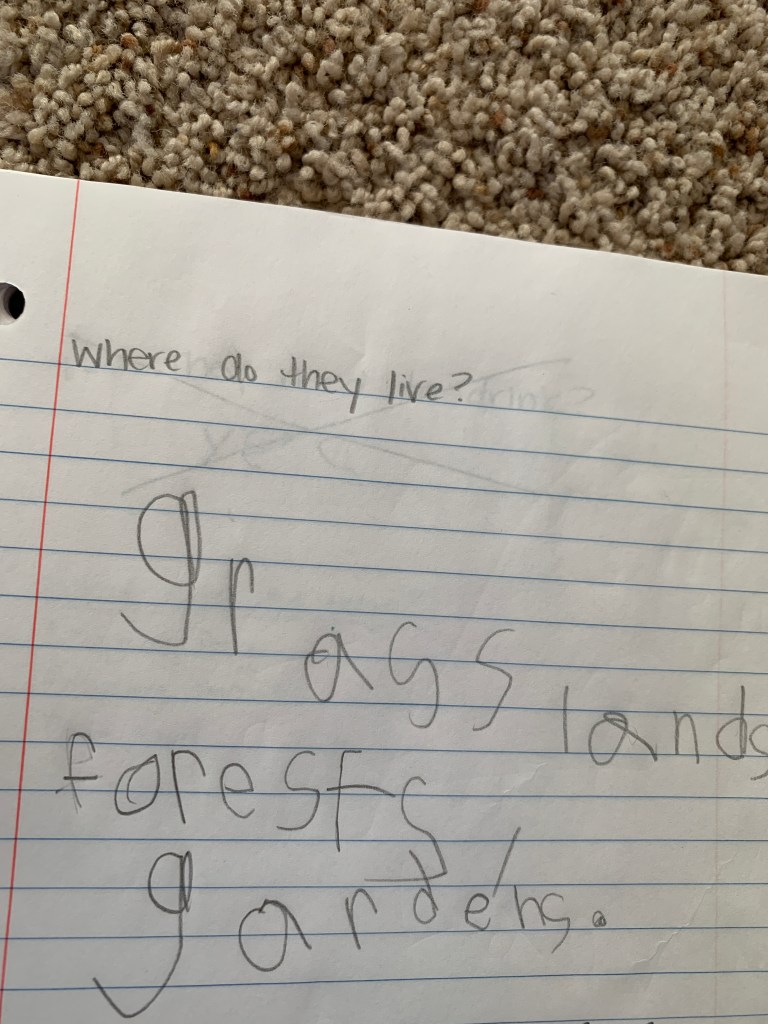
Where do they live?
What do they eat? What eats them?
What is their lifecycle?
What do they look like? Can they be different colors? Do males and females look the same?
Are they endangered? How can we help?
Etc.
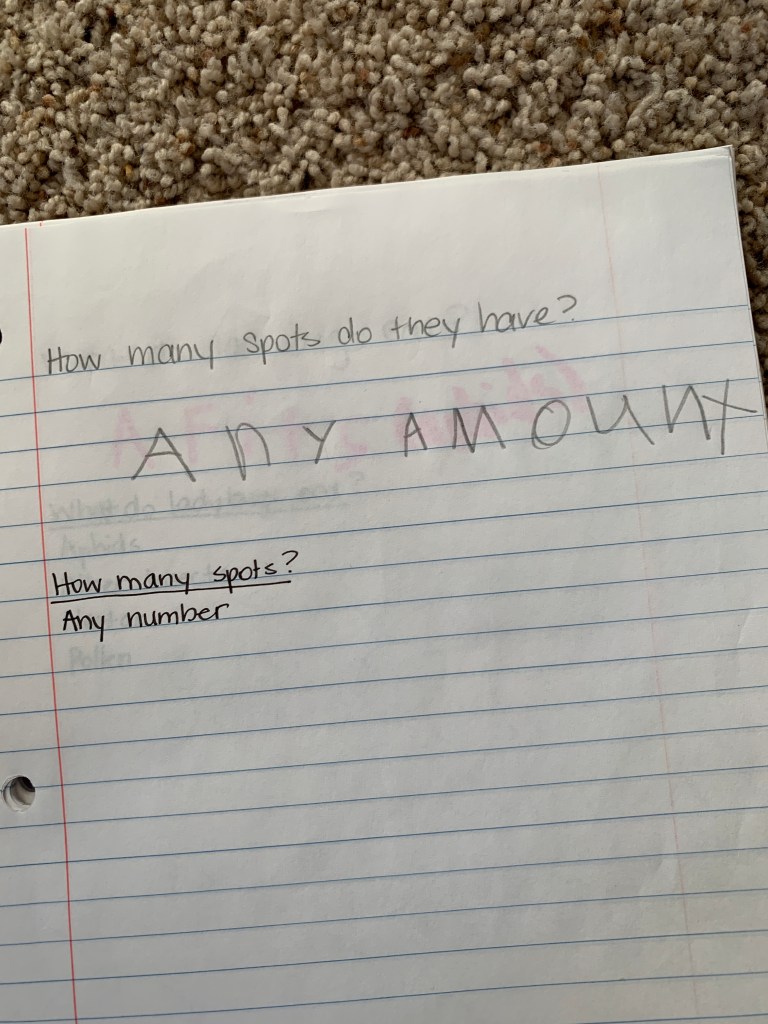
Ladybug’s Research Notebook
What to do:
1. Request every book and DVD can find at your local library.
2. Gather the books and magazines you already have on the subject.
3. Sit down with each child and talk about what they want to learn about the subject.
4. Write one question they want to be able to answer on each page in their notebook.
5. Allow them to watch their DVDs and read their books with their notebooks in hand so they can write answers to their questions.
6. Once they are done with their research, go through their notebook with them and help them with spelling and putting sentences together.
7. Have them create a poster with answers to their questions and a picture that represents their subject. They can first do it in pencil and then in marker once spelling has been checked.
We put their “research baskets” in their tent in our loft. They had a cozy space to read and work and all of their materials were in a set and organized spot. For days, these kids read to themselves and each other totally engrossed in the subjects they chose. And I was able to get SO much done!
Once their research was complete, I sat down with each kid and went through their notebooks with them. They could tell me what they learned and I could help them with spelling and putting sentences together. I then gave them a poster board and pencil and told them to draw a picture of their subject and to write their questions and answers around their board.
And, to all the other Type A parents out there, here is the hard part: Don’t help them put together their board beyond giving them those general guidelines and helping with spelling. Would you do it differently? Absolutely! But they will get more of a sense of accomplishment for doing this project if they actually do this project.
Once you spellcheck their work done in pencil, you can have them go over it with marker and add color. If they wanted, they could cut out pictures from magazines and add them as well. For older kids or for a different challenge, they could put together a Powerpoint or Keynote presentation instead of a poster board.
Bear’s bear projectLadybug’s ladybug project
Once their projects were done, the kids each took turns presenting what they had learned. We taped their poster boards up and took a video of them telling us all about their projects so we could share it with their teachers and any other family members. We later did Facetime/Zoom sessions with grandparents so they could see their work and ask questions as well.
Here is their finished work! They were incredibly proud of their projects and the boards are still proudly displayed in our stairwell.
Bear insisted on running out after his name was called like he sees his favorite athletes do…
This sweet girl can tell you facts about ladybugs for hours…
We’ll be doing Passion Projects like this for other school breaks and if we have to go back to virtual/remote school again for sure.
More information about the book is available on a previous post here.
I really do think this is a great gift this holiday season since we are all going to be spending more time at home and kids are playing more often with just their siblings.
Adventure Box items
The book has a recipe for how kids can make their own Adventure Box but it really is quite simple. All you need are different odds and ends from around the house (toilet paper or paper towel rolls, old t-shirts, old Halloween or dress up outfits, etc).
You could also add some fun new items that are inexpensive:
New box of crayons or markers
Small notebook to write down their adventure ideas
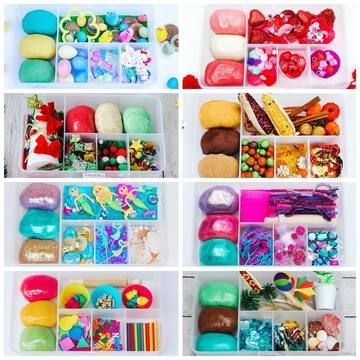
My kids have been asking for these kits because a couple of their friends have them. The kits each have a theme (mermaids and reptiles are what my kids asked for). Each kit has three different play doughs and then items that go with the theme so kids can create little scenes. I can see my kids playing at the kitchen counter with these for hours!
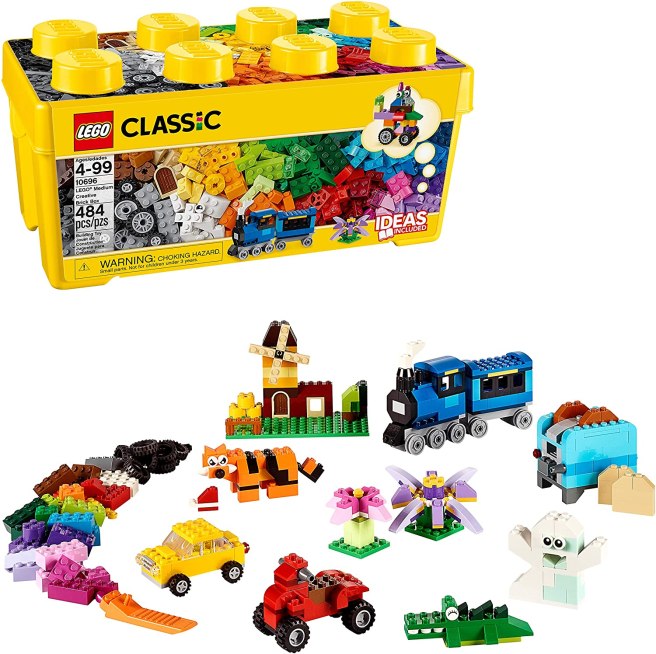
I know Lego kits are all the rage and my son loves these too BUT I’m not the biggest fan. Why? While they are great at teaching kids to follow directions they are not great at encouraging creativity. (Plus, how many kits can you possibly store/display the built items for?) I prefer the occasional kit and then just Classic Lego Bricks that are built, torn apart, and rebuilt again and again. We have large box of Classic Lego Bricks that fits under my son’s bed and we often find him and his sister in the mornings sitting around this box making random things.
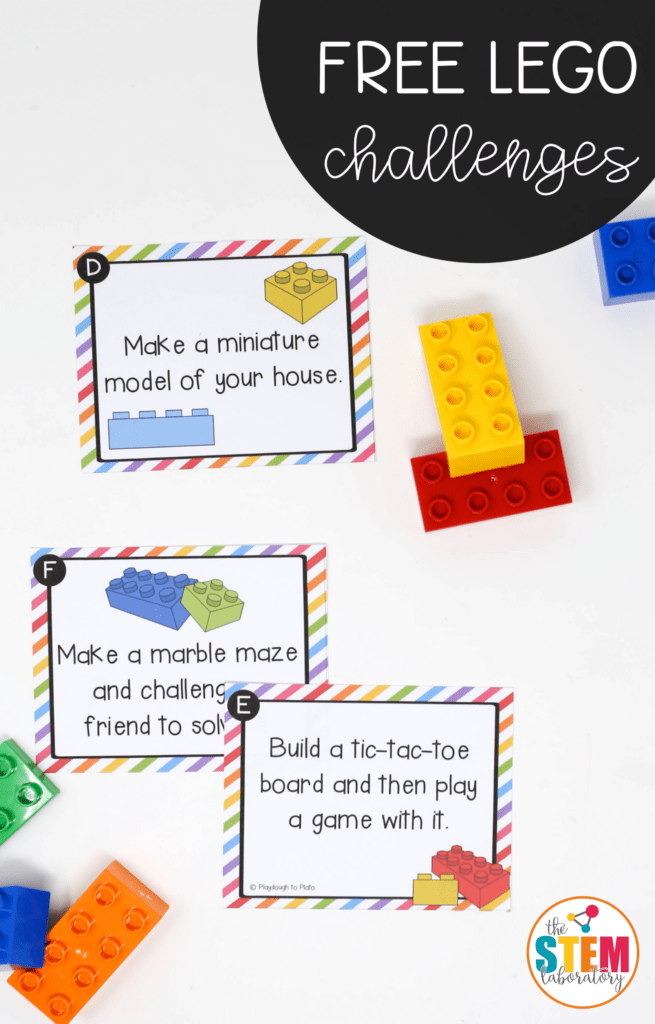
There are lots of different challenge cards you can find online with different themes. These challenge cards give kids an idea of something to make and then they have to figure out how to create it. During the first round of quarantine, my kids did a 30 day Lego challenge where every day I would send them upstairs with a challenge to do and 30 minutes to an hour later they would come back down with their creations. It is amazing what I can get done in that time!
Here are some options for challenge cards. They are easy to find on pinterest (for free) or on Etsy (low cost). You could even create your own as well:
A box of Classic Lego Bricks is a great way to encourage creativity. There are tons of lego challenge ideas online but some of my favorite are from The Stem Laboratory.
Those are my Bubby and Didi themed suggestions for this year! Some additional ideas from what Beast and I are getting our kids are below.
In our house, we have a gift or two from Santa, stockings, and then gifts from parents. We try really hard not to overdue gifts since we have two sets of grandparents and other people who love on our kids with gifts as well.
Beast and I gift the kids in the following categories:
Ornament from Hallmark (series or something special from the year)
I write a little note to each kid that stays in their ornament box for them to read each year when they get it out. The note explains why I chose that ornament or why the one in the series is meaningful for this year.
Something you want
Something you need
Something to wear
Something to read
This year our Santa gifts and some of our other gifts are camping themed since we ordered a Colorado teardrop camper that will be ready in April. We cannot wait for it to be done!!!
For ornaments, Ladybug gets the Brilliant Butterflies series because she is my little garden helper. Bear does not have a series yet so I’ve been picking an ornament for him each year. He’s received a few superheroes and last year was Patrick Mahomes, which he was very excited about. This year, I had to commemorate the Chiefs Superbowl win.
For something you want, my kids are each getting one of the Young, Wild, and Friedman sensory kits discussed above. I’m guessing we’ll be spending more time inside this year so I was happy to purchase these kits that I know will keep them busy!
For something you need, we went with camping blankets that they picked out from Rumpl with their favorite National Park picture. In the new teardrop they will have their own little bunks so we wanted in invest in some blankets that they like, will withstand the wear and tear of camping and match our decor inside.
For something to wear, we are filling needs this year with a new swimsuit set for Bear (in hopes we can actually go on a planned vacation after Christmas) and new boots for Ladybug. I also got some of their winter essentials from Primary.com as well as some really fun matching pajamas for the whole family (even our dog). We’ll see what Beast thinks about that… Dogs in clothes are not his favorite thing.
That is a summary of what we’ll be gifting the kids this year. I hope that helps spur some ideas for your kids as well.
Mel
*Disclosure: I only recommend products I would use or purchase myself and all opinions expressed here are my own. This post contains affiliate links. At no additional cost to you, I may earn a small commission if you choose to purchase an item. In addition, as the author of The Adventures of Bubby and Didi, I also receive compensation for each copy of the book that is purchased.
I’ve hinted before that I had a bit of a side writing project going on and just this week I was able share exactly what that was. I published a children’s book called The Adventures of Bubby and Didi. It is based on my kids, Bear and Ladybug as I call them in this space, and I could not be more excited to have it out in the world!
This book has been written for a couple of years. I have read it to my kids off and on and occasionally sent it to random publishers to see if anyone was interested in it. During the spring quarantine of 2020 I decided to get more serious about getting it published. I used my Fridays off to begin working with Archway Publishing, the self-publishing arm of Simon and Schuster, and six months later the book has been published.
The inspiration and the result. I am so happy with the illustrations by the Archway team.
The book is all about how two siblings use a cardboard box full of odds and ends to have creative playtimes at home. I do not think the timing could be any better since we’re all staying at home a bit more these days, siblings are playmates even more than before, and the cooler fall/winter weather is arriving making indoor play more frequent. I really hope this book can be used by families to help inspire creative playtimes for their kids during the craziness of 2020 and beyond.
More details about where you can find the book and the story are below.
*Authors receive a higher percentage of the purchase price when a book is ordered directly from the publisher instead of a retailer like Amazon or Barnes and Noble.
Details about the book:
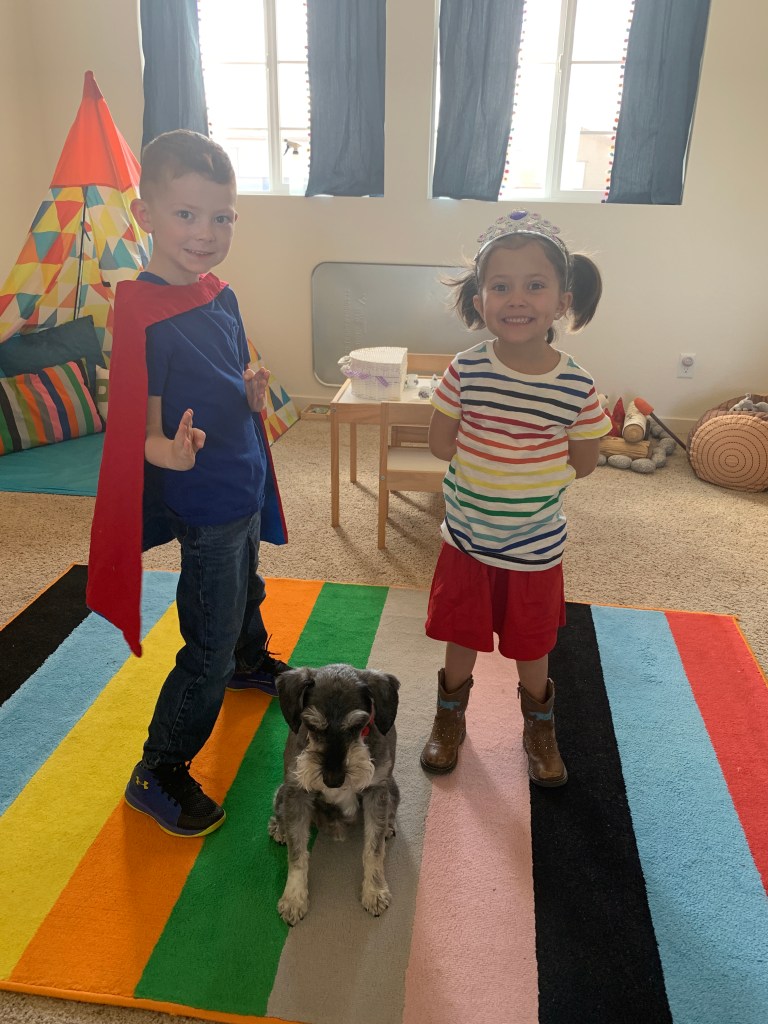
Bubby and Didi are not just brother and sister. They’re best friends, too! Together, they use an “Adventure Box,” filled with odds and ends to help them go on adventures throughout the day——with their dog, Charlie, of course.
One moment, Bubby and Didi are superheroes stopping the bad guy. The next moment, they’re chefs whipping up tasty treats for their biggest fan: Charlie. Their Adventure Box lets them travel to far-off places in their imaginations, like the jungle and even space.
At the end of the day, it’s time to rest, but Bubby and Didi aren’t finished having fun yet. Now, it’s time to read books, and those books give them ideas for tomorrow’s playtime!
Follow @bubbyanddidi on Instagram for updates about the book.
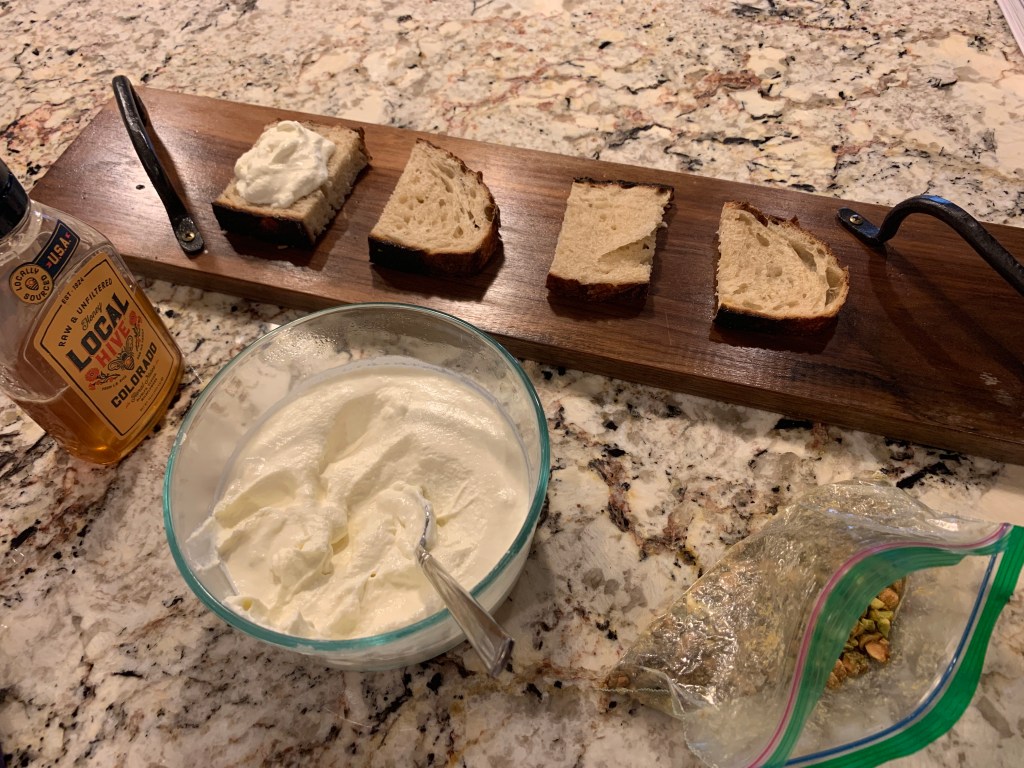
If you read my last post you already know I picked up sourdough baking during quarantine. Very original, I know. Well, I also picked up making homemade ricotta. A friend and colleague of mine shared her recipe with me and said she had been working on it in quarantine so it sounded like something I should try as well. And it doubled as an eLearning science lesson.
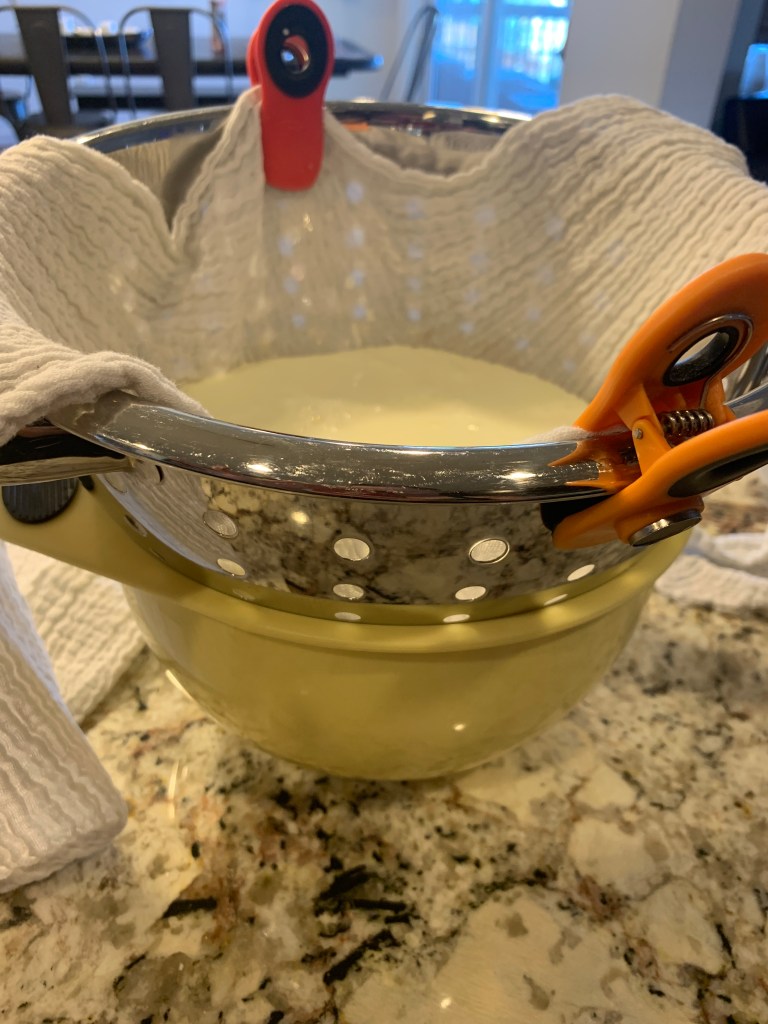
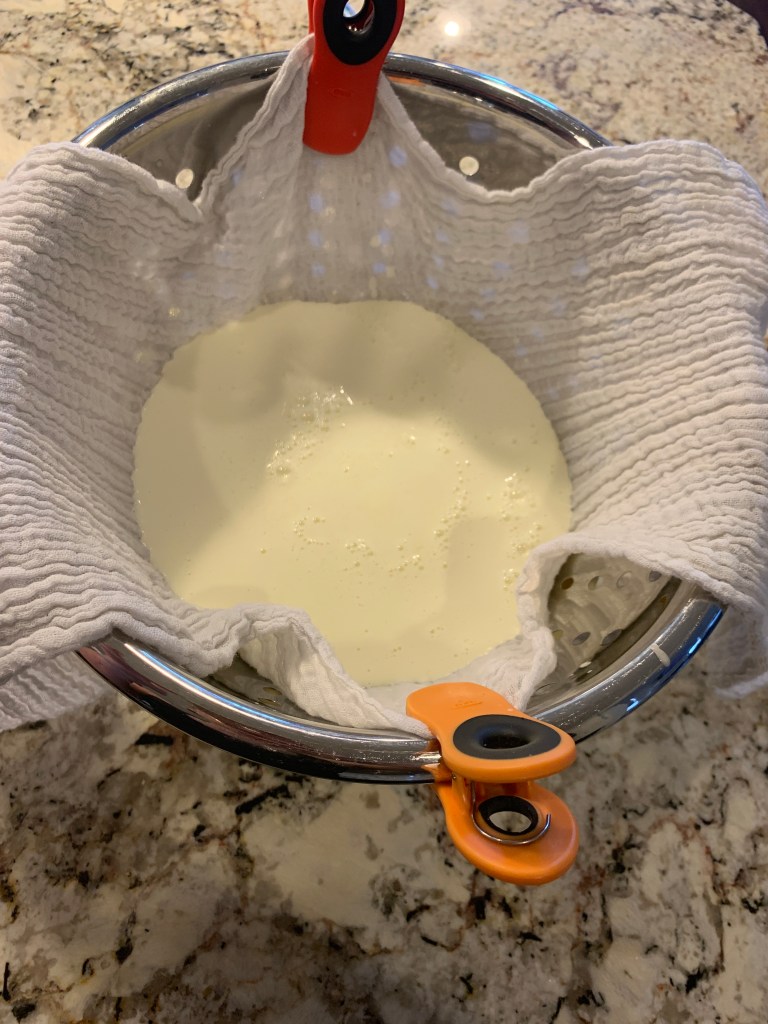
If you choose to make homemade sourdough and/or ricotta there are lots of recipe options. Here is my set up for draining the ricotta through a cheesecloth. Make sure to save the whey that drains off the ricotta. I use it like buttermilk in biscuits or pancakes and just store it in a mason jar in the fridge.
You can make your own sourdough and ricotta or you can buy the store bought versions. I will say that I do love how creamy homemade ricotta is instead of the slightly grainy texture of store bought. BUT, both would work here. If you are going to make your own homemade sourdough (recipe here) and ricotta (recipe here), there are lots of recipes online. I would suggest making those the day before and then assembling this appetizer to have on hand while you make a Sunday Supper. This recipe goes best with a Johnnyswim Live From The Backyard or Songs with Strangers episode on and a glass of wine in your hand.
Ingredients:
Sourdough bread or baguette cut into slices
1 cup ricotta cheese
Honey
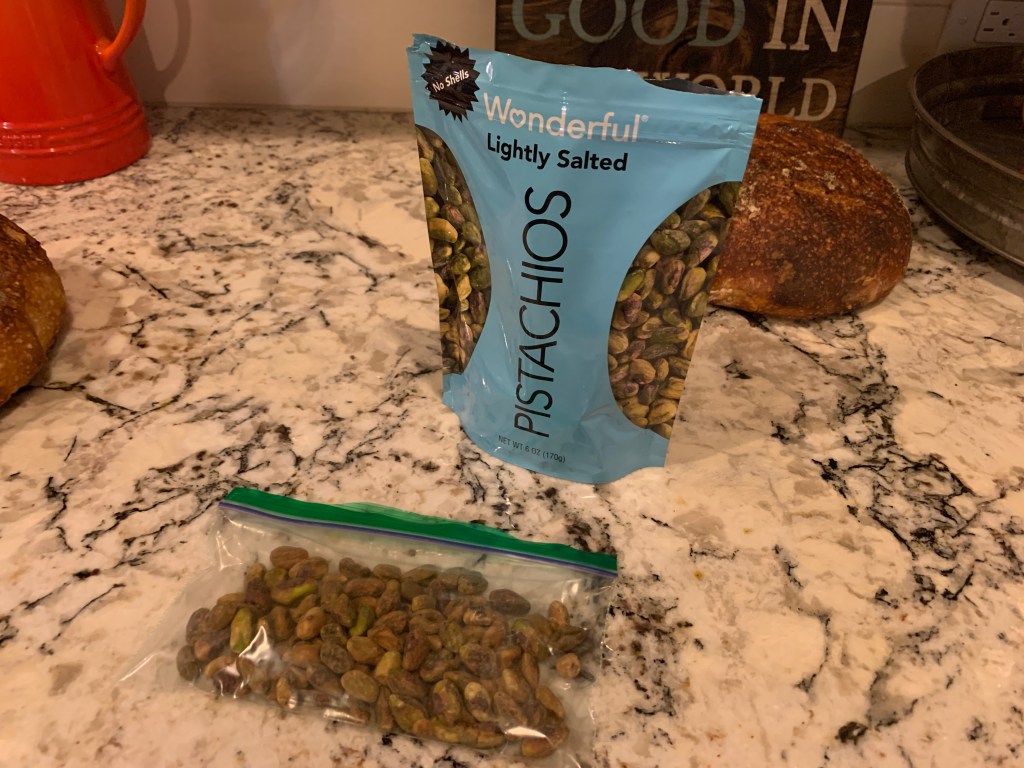
1 cup crushed pistachios
Let kids help crush the pistachios. They will be more likely to eat them if you do.
Recipe:
Heat oven to 350 degrees
Slice bread and place on cookie sheet
Bake bread for 10 minutes
While bread bakes, put pistachios is a plastic baggie
Crush pistachios with the back of a ladle or meat tenderizer
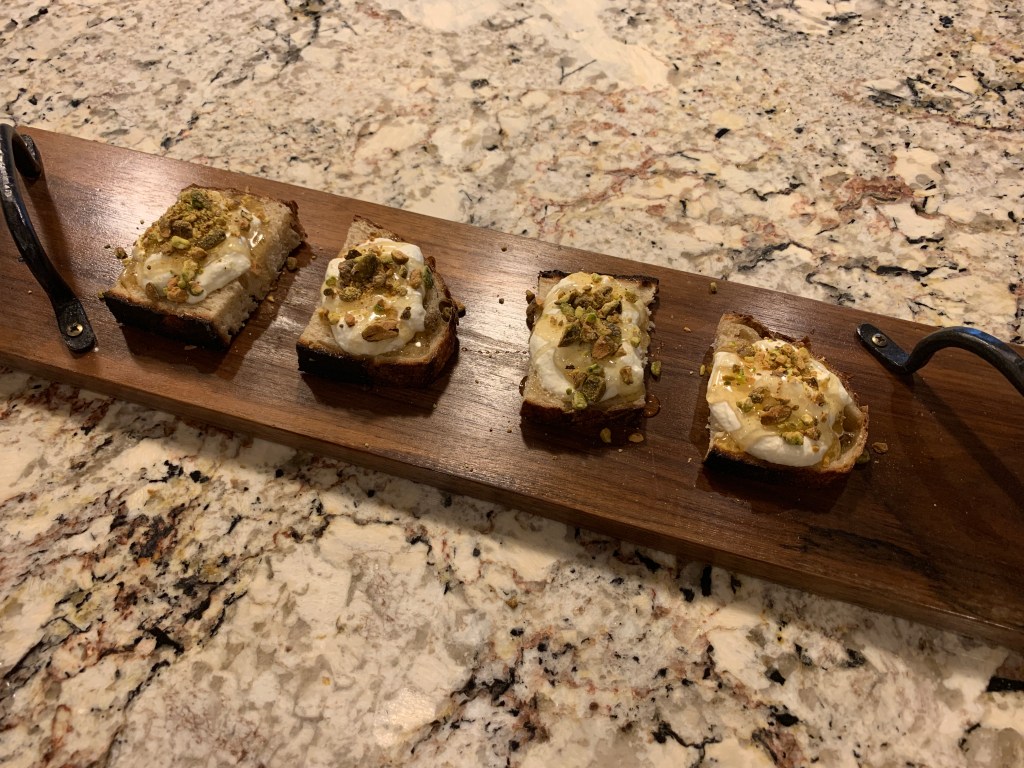
Take bread out of oven and spread as much ricotta as you’d like on each piece of bread
Drizzle each slice with honey
Sprinkle pistachios on each piece
Enjoy the creamy, salty, chewy deliciousness
If the kids are not super excited about the ricotta, skip the ricotta and just top with honey +/- the nuts
This is a favorite in our house. I can barely get one piece assembled before someone is grabbing it off the plate. I hope you will enjoy it too!
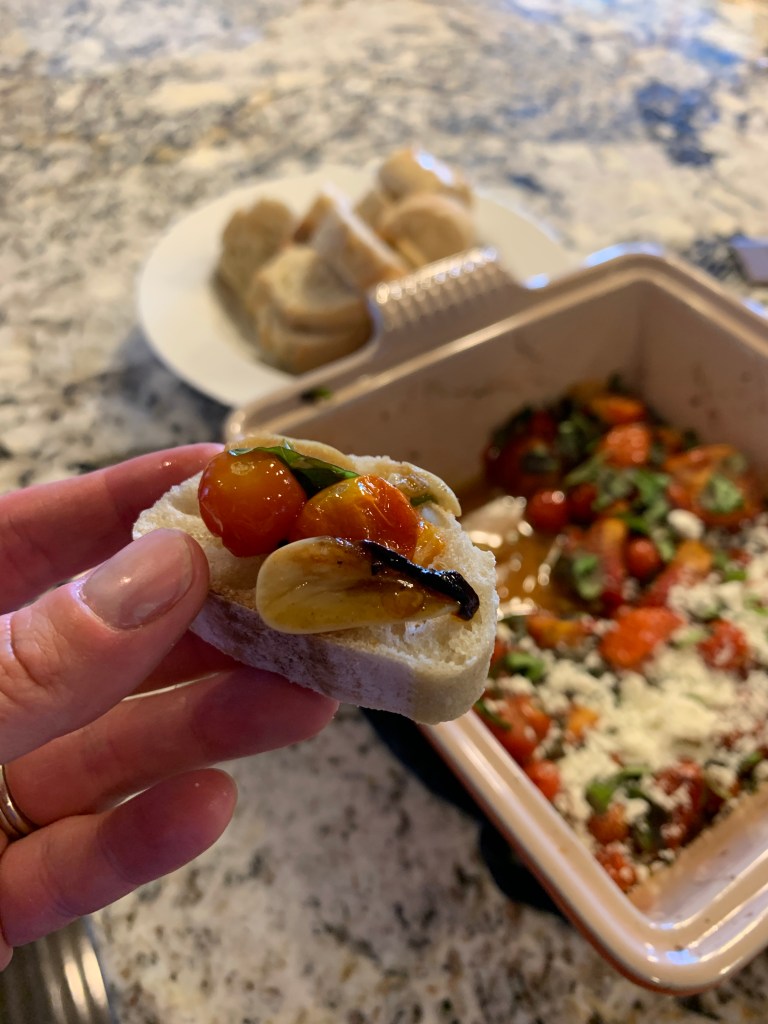
One of the hobbies I picked up during quarantine was baking sourdough. Like so many other people, it seemed like a good skill to develop when I had more time on my hands. Baking two loaves a week meant that I had to figure out how to use all that bread so this appetizer has become something of a regular at our house. This time of year the garden is spilling over with tomatoes of all sizes and basil. Add a little garlic, olive oil, and balsamic reduction and you’ve got yourself something quite delicious. This recipe goes best with a little Leon Bridges on Spotify and a glass of wine.
Quarantine hobby: Baking sourdough
Ingredients:
3 large tomatoes cut in large chunks on a mix of large and cherry tomatoes
Keep cherry tomatoes whole
3 garlic cloves
2 Tablespoons olive oil
Salt and pepper to taste
Balsamic reduction
Handful of chopped fresh basil
Chiffonade the basil if you want to get fancy with it
Crumbled goat cheese (optional)
Homemade or store bought sourdough cut into slices and halved
A french baguette would also work well
Recipe:
Preheat oven to 400 degrees
Slice bread and place on sheet tray
Rub one side bread with a garlic clove
Wash tomatoes and cut in large chunks (if large)
Slice garlic cloves
Add tomatoes and garlic to an oven safe pan
Add olive oil and salt and pepper to taste
Stir mixture so every bit of tomatoes are coated with olive oil and garlic is spread out
Bake at 400 degrees for 10 minutes
Change oven setting to broil
Broil for 5-10 minutes until tomatoes are blistered
Let cool 5 minutes
While tomatoes are cooling, switch oven back to bake at 400 and toast bread for 5 minutes
Top tomato mixture with a drizzle of balsamic reduction, basil, and the optional crumbled goat cheese
Dip the warm bread right into the pan to soak up the olive oil goodness and make sure to get some of everything in every bite.
We love this appetizer when we’re having a lighter dinner or having a nice slow night. I just love everyone gathered around the kitchen island kids usually sitting on the island around a yummy, warm dish. We usually top half of this with the crumbled goat cheese so the kids can avoid that if they so choose.
Since we’re supposed to have a super early freeze this next week, I will likely be making this a time or two to use up my tomatoes and basil.
The last couple of weeks have been surreal to say the least. Due to the coronavirus pandemic, many of us are now trying to work from home while homeschooling our kids. We’re all cooking a lot more simply because we have to so I wanted to share 5 of my work night meals and a few tips to help make dinners easier during this situation. Finally, there is also a grocery list to make all of these meals at the end.
Tips:
Meal plan: Make a plan so you only have to go to the grocery store once a week. We’re trying really hard to do this just to limit our potential exposures. My guide for how I meal plan is here.
Make double batches: If you’re getting tired of all the cooking, make double batches of anything you can. Then you get two meals out of one cooking effort. You can then:
Save the second batch for another meal that week
Use the leftovers for lunch the next day
Freeze the second batch for another meal later on
Eat fresh: There are many items unavailable at groceries store right now but fresh produce has been well stocked. Finding fresh products is easier and has also helped us feel good during the day. We also have our freezer stocked with meats, veggies, and fruit just in case we don’t want to get out for several days but still want to eat healthy items instead of non-perishable items.
Cook your way through a cookbook: Open up that cookbook you’ve been meaning to cook out of for awhile. Add a couple of different dishes to your meal plan each week and try something new. My friend starting doing this and I thought it was a brilliant way to mix things up. We’re both cooking through The Defined Dish by Alex Snodgrass, which I highly recommend.
The Plan:The 5 meals listed below are lined up for the work week. You could have leftovers/carryout Saturday and something from your favorite cook book Sunday to fill your plan.
Soak up some fresh air and sunshine while you make this easy dinner. If the weather isn’t good for grilling, switch to a oven roasted chicken and veggies instead (400 degrees for ~30 minutes.)
Grocery List:
This list has all the items for these 5 meals for 4 servings each meal. Add your lunch, breakfast, and other staples and you’ll be ready to go for your grocery trip. Make sure you have olive oil, salt, pepper, and butter on hand.
Salmon (1.5-2 lbs)
Ground beef (1 lb)
Ground turkey (1 lb)
Chicken breasts (6-8 pieces)
Broccoli crowns (3)
Carrots (2 lbs)
Red pepper (3)
White onion (2)
Red onion
Zucchini (2)
Tomato
Avocado
Salad mix
Croutons
Lemon
Pineapple (or container of fresh prepped pineapple)
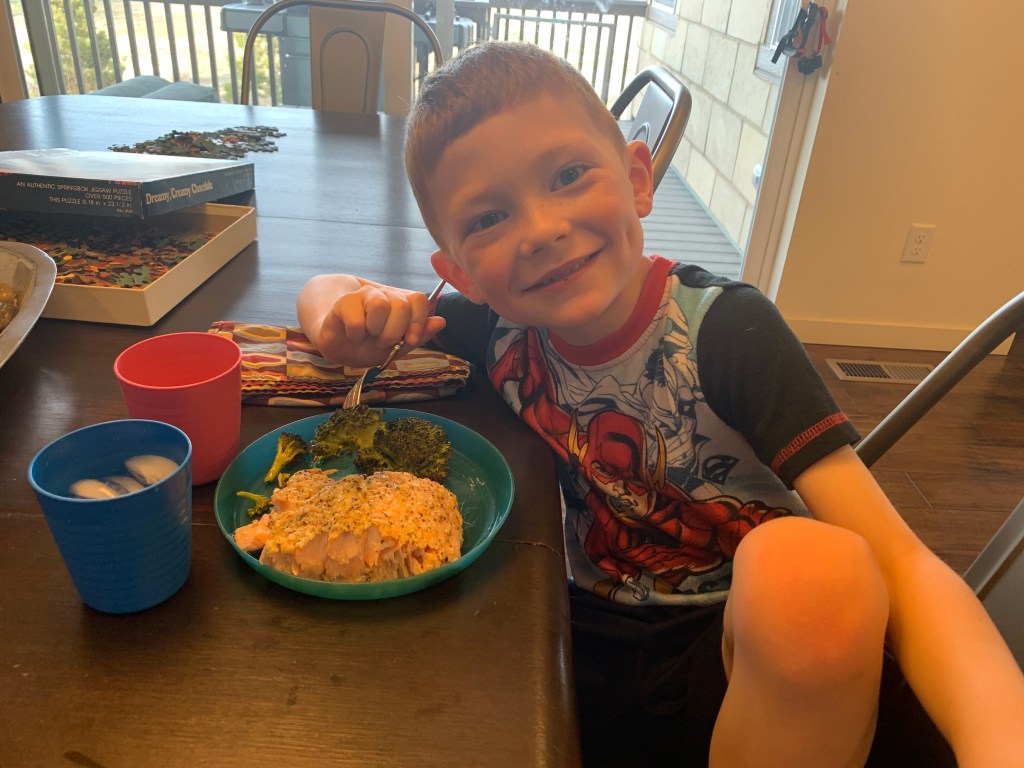
If you ask my son, Bear, what his favorite food is he will typically say salmon. And he means it. Whenever I make salmon he will eat at least a half pound by himself (at age 6). I can’t imagine how much he will eat as a teenager! If I ever ask what he would like for dinner while I’m meal planning, he’ll request salmon. So, we eat salmon at least 3-4 times a month.
Bear eating his massive piece of salmon.
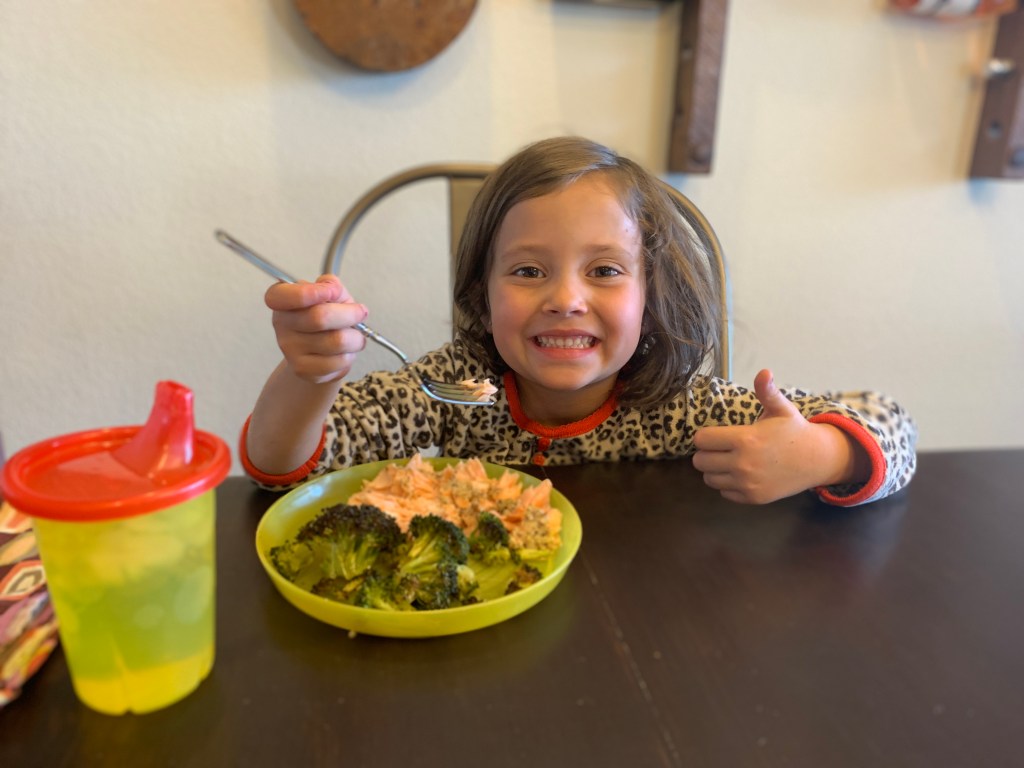
Ladybug can do a number on salmon as well, hence why we have to buy 2 lbs of salmon for our family of four!
Ladybug eats her fair share too.
I sometimes hear from friends that they do not like fish but that they especially do not like salmon. I think in most cases that means they do not like poorly cooked fish and salmon is often very, very poorly cooked. Typically, it is way overdone which makes it taste fishy. Properly cooked salmon does not have that overly fishy taste. Moral of the story: Don’t overcook salmon and you may actually like it (or love it)!
Today I am sharing the way I cook salmon most often. This recipe is great for when you want to have a light, healthy dinner that is made quickly on one pan. If you wanted a heartier meal, you could add some roasted potatoes as well.
Ingredients:
1.5 to 2 lbs fresh salmon
Lemon pepper or other seasoning mix
2 Tablespoons butter
substitute with olive oil or ghee to make Whole30 compliant
3-4 slices of fresh lemon
3 crowns broccoli
Olive
Salt
Pepper
Recipe:
Preheat oven to 400 degrees
Open up a bottle of rosé and pour yourself a glass
Put down a layer of foil to cover half of a large baking tray
Place the salmon skin side down on the foil
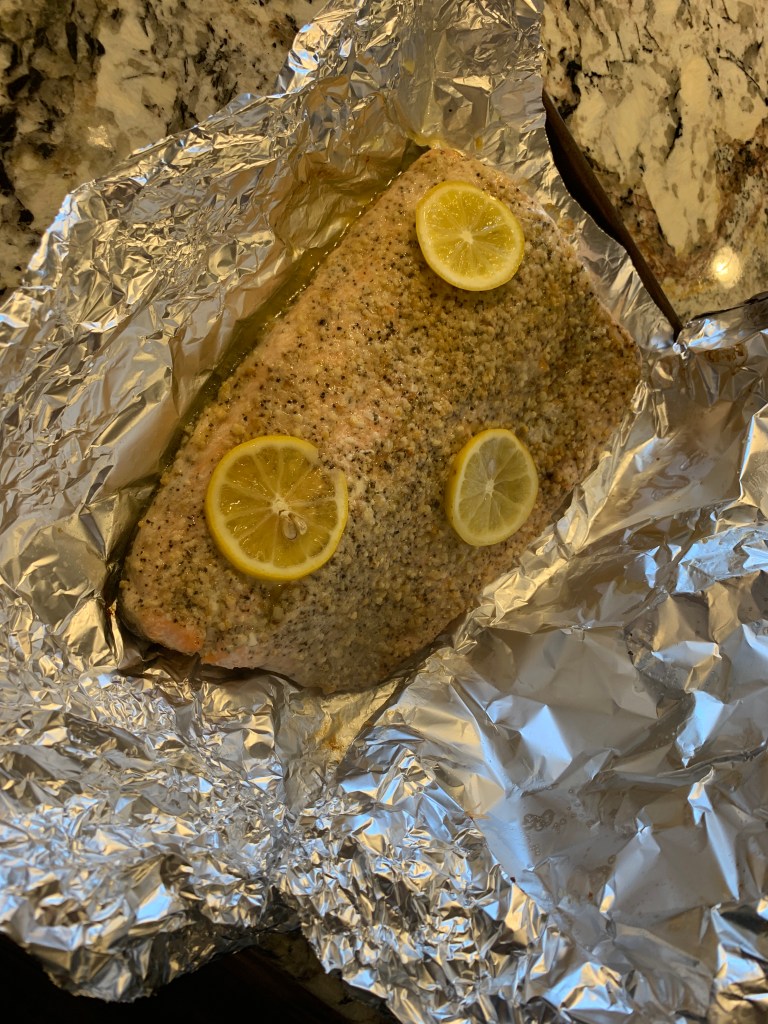
Sprinkle a nice layer of lemon pepper or other seasoning mix directly on the salmon
Cut pads of butter and lemon slices
Arrange butter and lemon slices on top of salmon
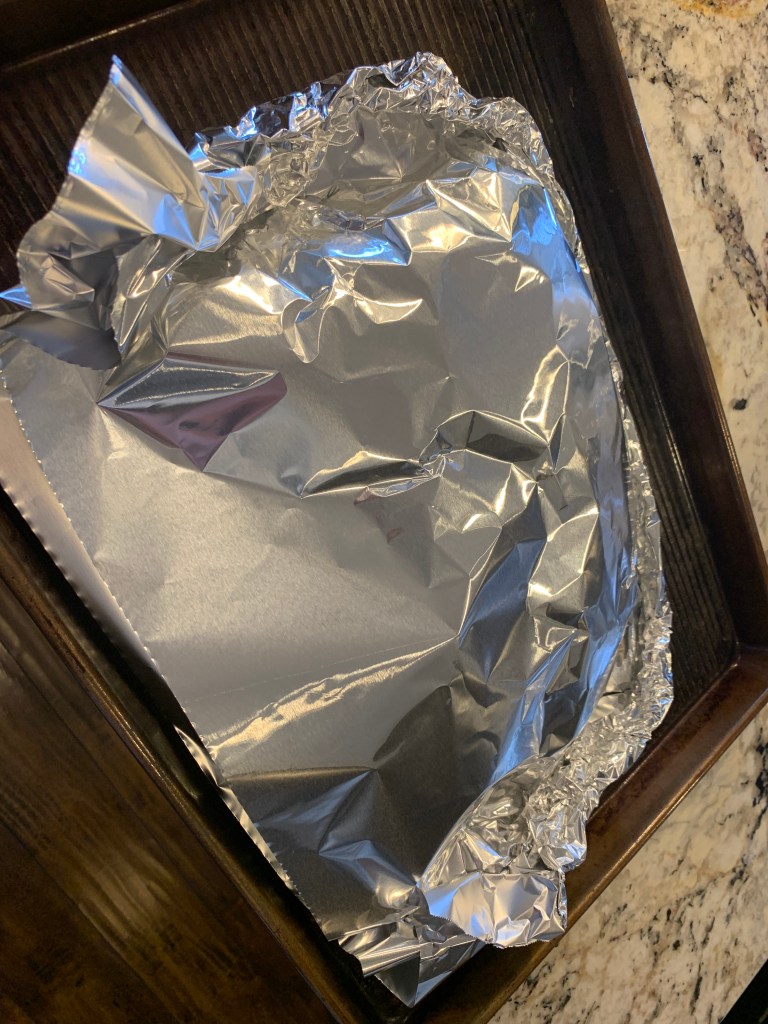
Place another layer of foil on top of the salmon
Roll the edges of the foil together to create a packet around the salmon
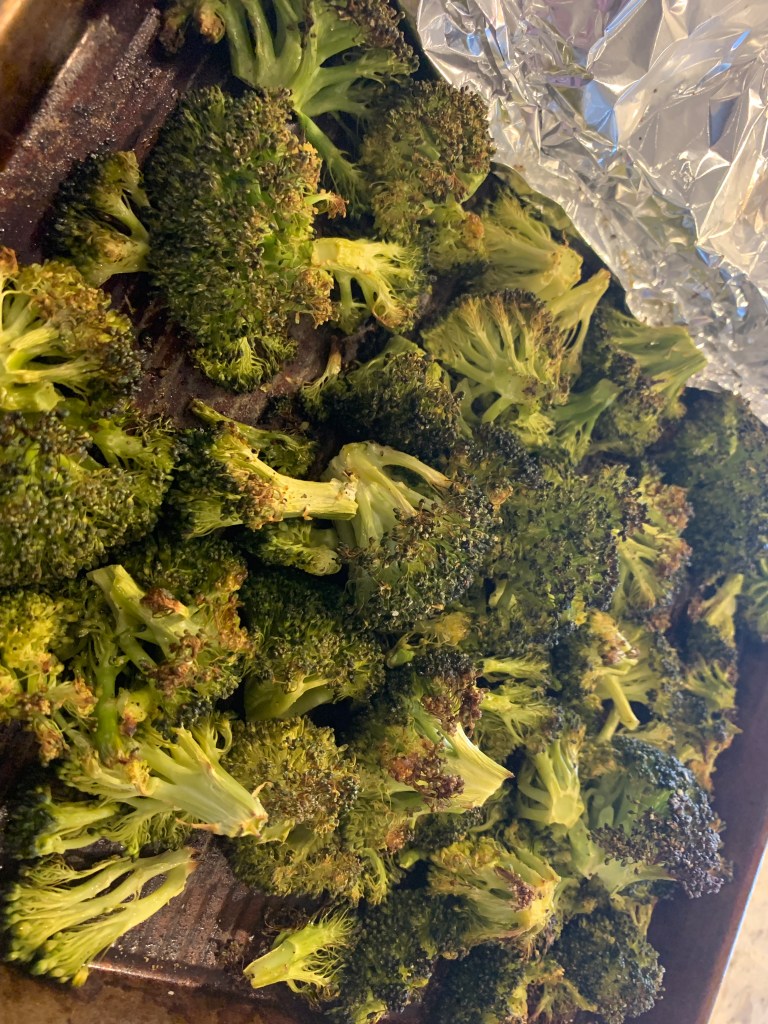
Cut florets of broccoli off the broccoli crowns
Wrap salmon in foil packet.
Place broccoli on the other half of the pan
Drizzle broccoli with olive oil and sprinkle with salt, pepper, and lemon pepper or other seasoning mix
Place pan in oven for 30 minutes
30 minutes will give you salmon that is cooked just all the way through. If you like more of a medium rare cook, reduce the time to 20-25 minutes.
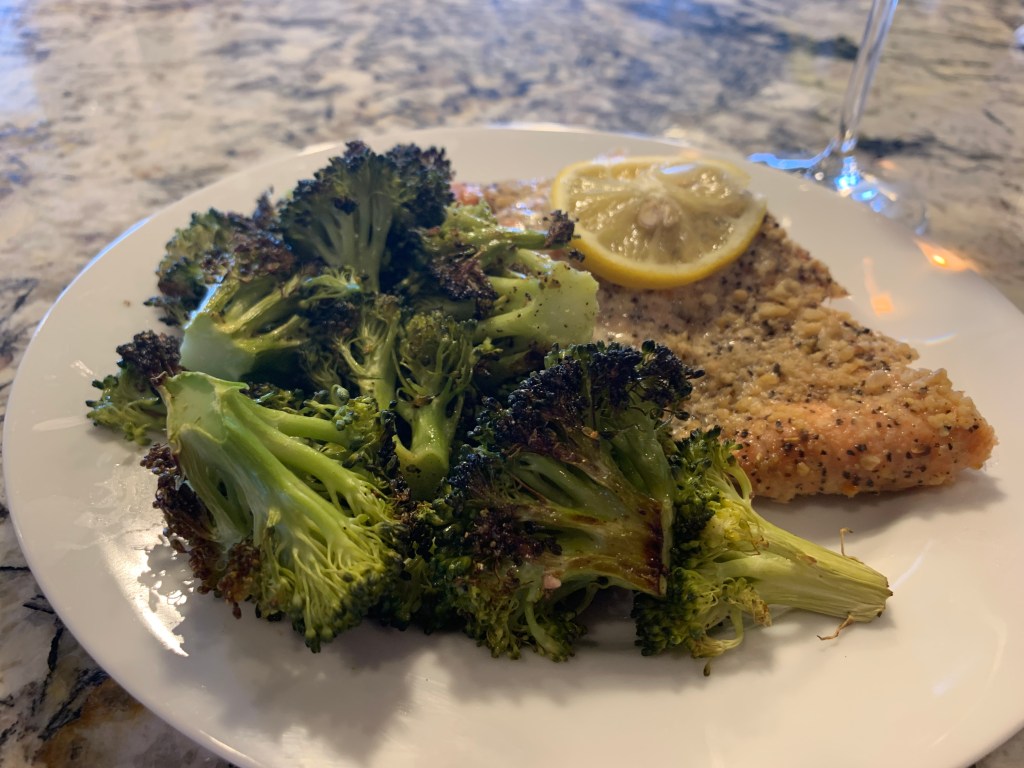
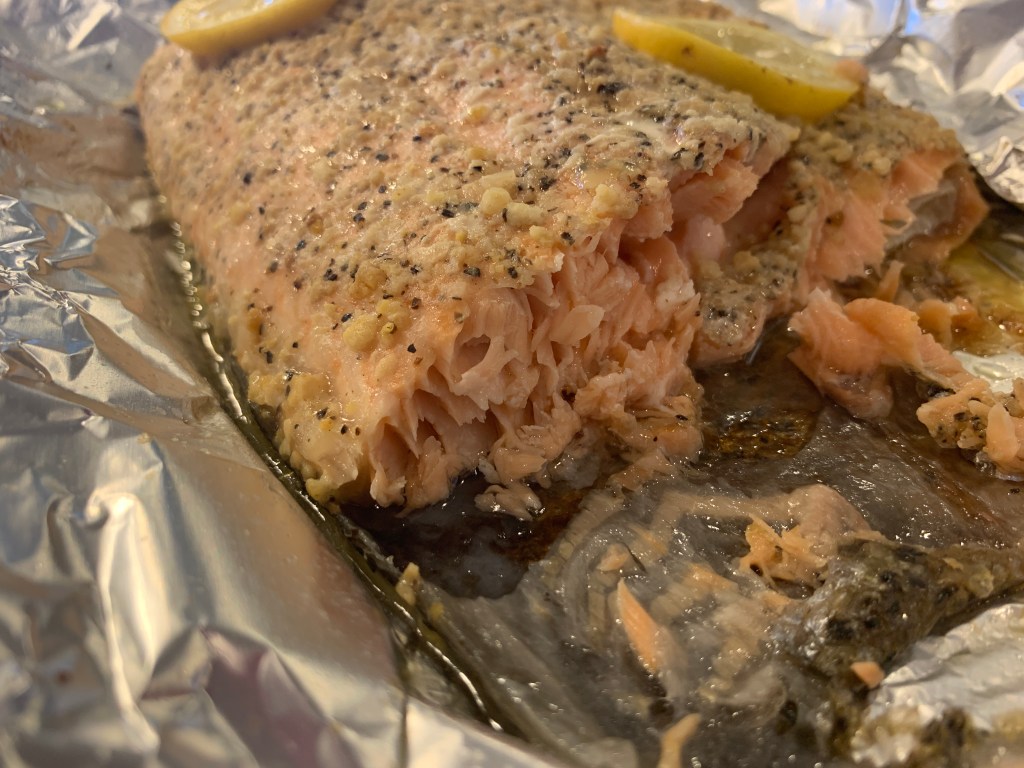
After 30 minutes, open foil packet and slice salmon
The salmon should be moist and tender, not firm.
Use a turner/flipper to slide between the salmon and skin so you can serve it skinless
Add broccoli to the plate and serve
This salmon is not overdone or fishy tasting.
And just like that, a healthy dinner is done and on the table!
I started gardening in Colorado the summer of 2008 when we bought our first house. It came with raised beds that had sprinklers and I quickly over-planted and over-watered. Each year has been a bit better than the last mainly thanks to the many classes offered at Tagawa Gardens, my favorite garden center, and making sure to utilize plants and seeds that grow well in our high altitude climate.
I highly recommend the High Altitude Bucket from Seeds Trust. I have been using seeds from this bucket for several years now so the $64 investment has been well worth it.
Probably the biggest thing I have learned over the years is that you cannot just do it all on Mother’s Day (as many people recommend) and think everything will work out. Mother’s Day is perfect for about 1/3 of what you will plant but too early for another 1/3 and too late for another 1/3. It is best to spread everything out from March to June and plant when it is ideal for that individual vegetable.
Here is my Colorado gardening timeline, tips, and some of my favorite resources learned from over 10 years of amateur gardening experience.
March 1:
Clean up your beds
Add a good mix of garden soil, compost, and composted manure (do not use fresh manure because it will burn your plants)
Cover the beds with plastic sheeting so the soil will start to get warm
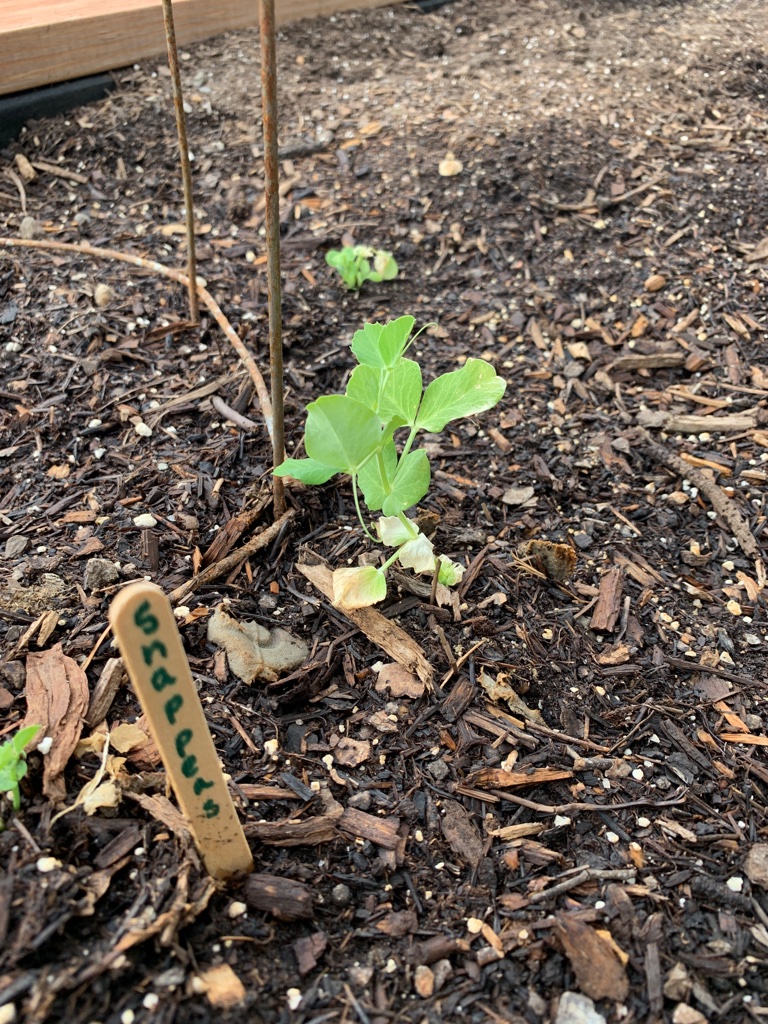
Sow peas, snap peas, or snow peas directly in your garden (old American tradition that brings good luck to your garden)
Also sow kale, radish, and spinach seeds directly in your garden.
Start seeds for warmer weather crops (tomatoes, cucumber, zucchini, green beans, herbs, broccoli, cabbage, peppers, etc) inside
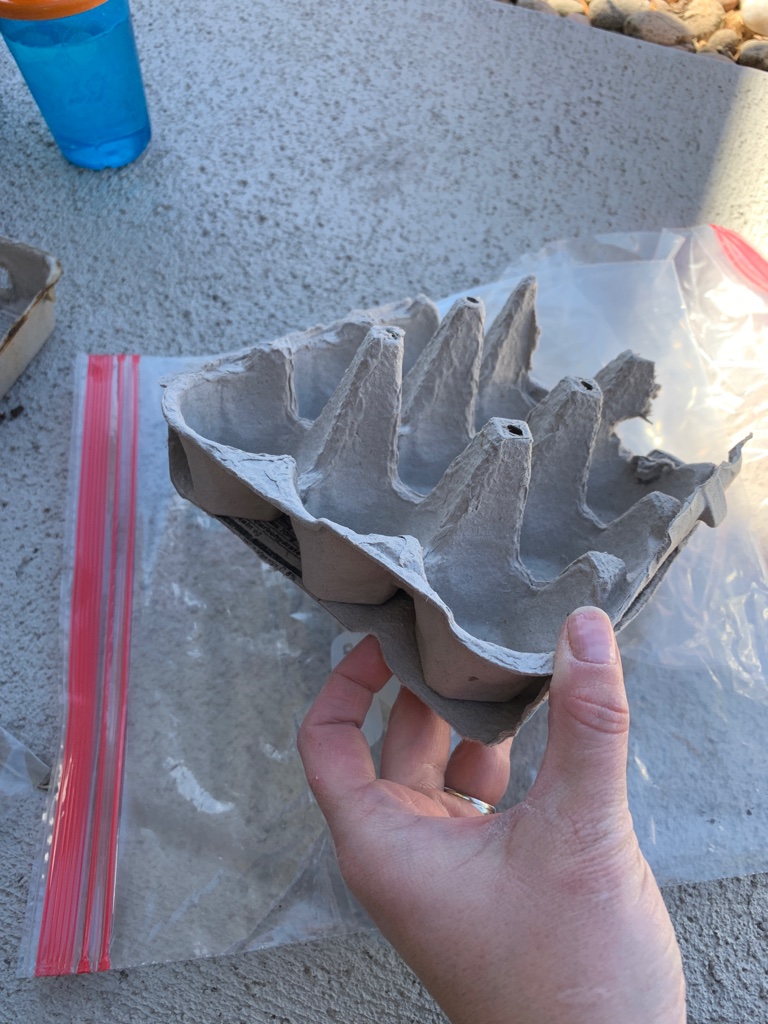
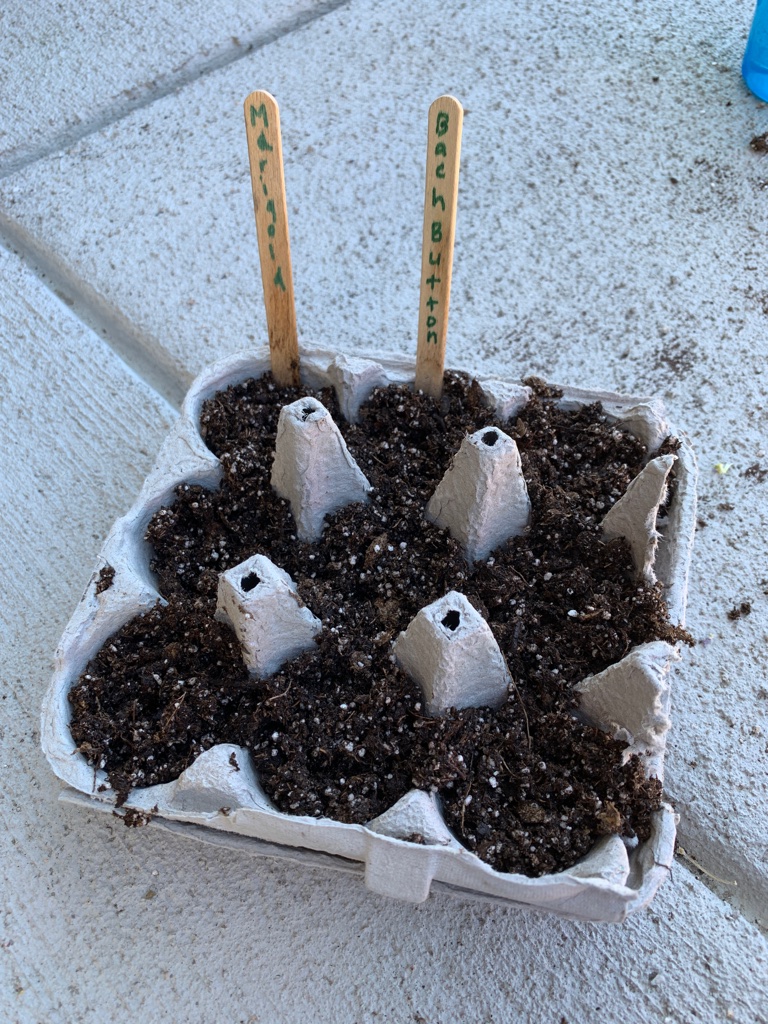
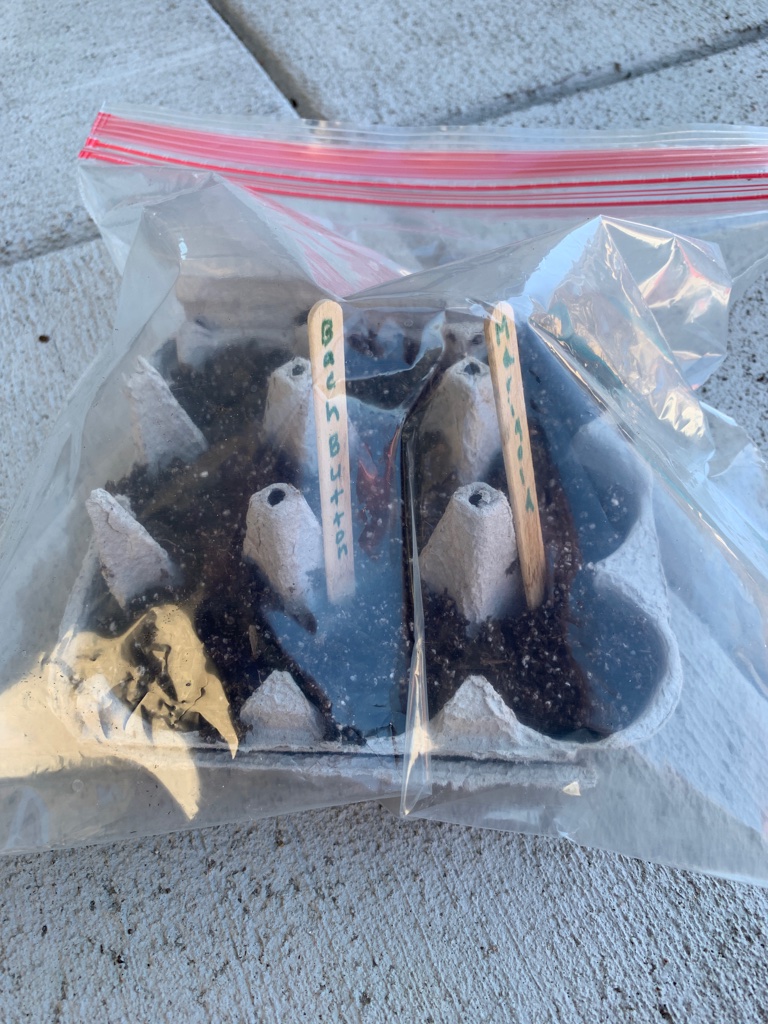
I like to make mini greenhouses with egg crates, seed starting mix, labeled popsicle sticks and gallon sized plastic bags. You can buy lights to help things get started but I have had success simply placing my mini greenhouses in windowsills on south-facing windows.
Mini greenhouses are a cheap and easy way to start seeds indoors.
April 1: April Fool’s Day
Plant seedlings of cool crops in garden (broccoli, cabbage, cauliflower, Brussel sprouts etc)
Plant bare roots of asparagus
Sow beet, carrot, celery, and lettuce seeds directly in your garden
Some green beans and other vegetables waiting to be planted outside.
Mother’s Day:
Uncover warm crop bed
Plant green bean and herb seedlings
Sow additional green bean and pea seeds
Plant additional cool crop seedlings and sow second round of seeds
Take pictures with family by garden and celebrate what feels like the real start to gardening season!
Mother’s Day 2017
June 1:
Plant tomato, cucumber, zucchini, other squash, melon, eggplant and pepper seedlings or plants purchased from garden center
Do not feel like you are cheating if you purchase plants!
Garden caprese is for sure one of my favorite things to make.
Perennial plants I highly recommend:
Asparagus (ask for bare root variety recommendation at local garden center)
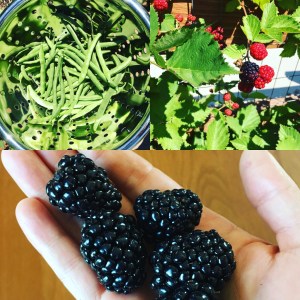
Blackberries: Triple Crown
This is a variety recommended by the CSU Master Gardener Program. It does not produce suckers and does not have thorns. The berries are huge and sweet. I have two of these plants now and plan on adding more due to how well they are producing and how much fun it is to see my kids enjoy eating straight from the vines.
Grafted fruit trees:
Fruit salad or multi-variety apple trees are a great option for small gardens. These trees are self-pollinating so you do not need multiple trees to achieve pollination, which is necessary for fruit to grow. It is worth going to a quality garden center and spending a bit more on your tree to make sure you get every variety that is advertised and varieties that will grow well in your climate.
Your garden center will likely advise you to pick 100% of the flowers off the first year, 75% the second year, 50% the third year and 25% the fourth year. While that is hard to do when you really want to see fruit growing on your tree, it will help the tree to put down good roots and grow strong branches that will not break under the weight of the heavy fruit.
Triple Crown Blackberry
My kids absolutely love being able to go out to pick blackberries and eat them right off the vine.
Tips:
Keep trying! Gardening in Colorado is a little hard. Sometimes it feels like a bit of an experiment each year. Our summers can be very different year-to-year so if something doesn’t work well one year, ask your local garden center for advice and try again. If something works really well, write down what you did (when and how you planted, etc) so you can do it the same next year.
They have lots of advice, how-tos, etc. I always consult this before making a perennial purchase in order to make sure it is a variety that will do well in Colorado.
Hold your seedlings and plants carefully by the leaves, not the stem
I probably crushed the stem of a 100 fragile plants before I learned this one and then the plants would promptly die after I planted them outside.
Let the ground around your plants dry between waterings
Watering too much can cause lots of problems including bug infestations that are hard to control.
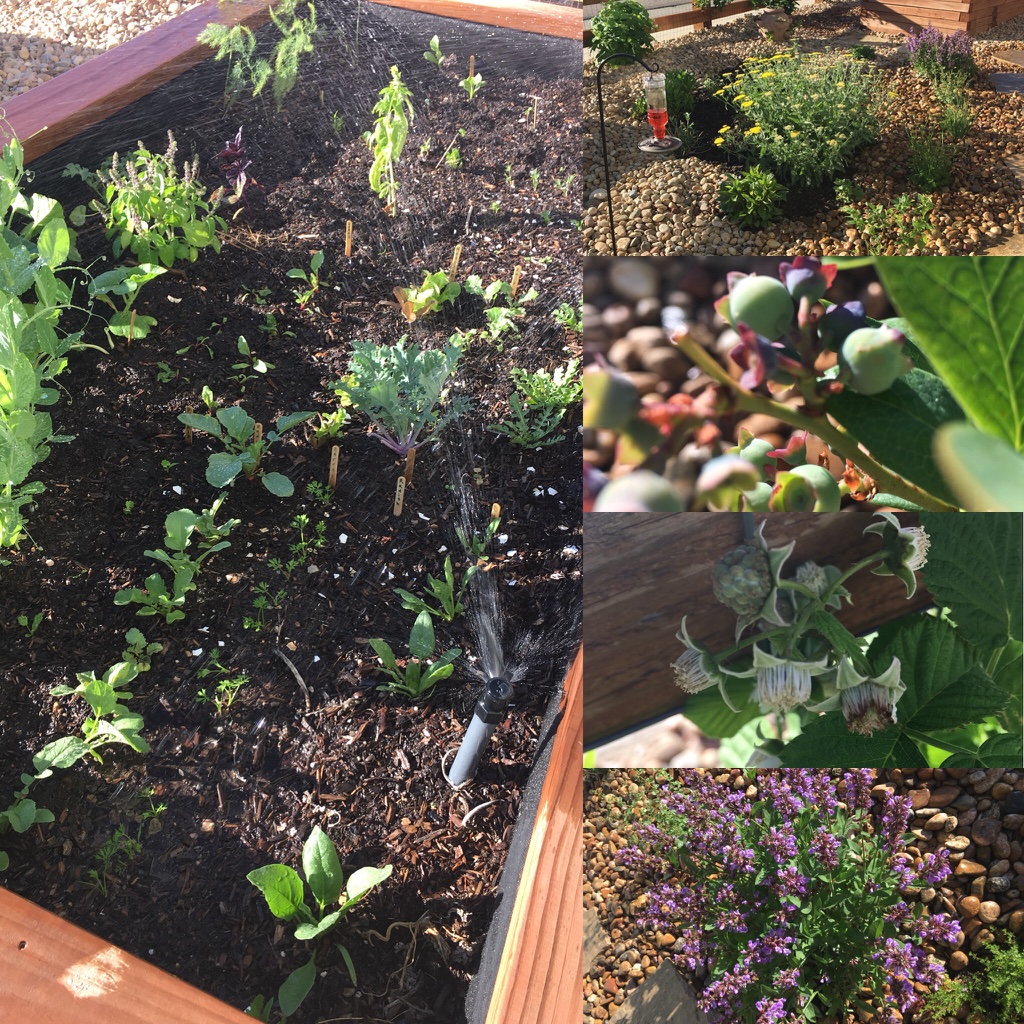
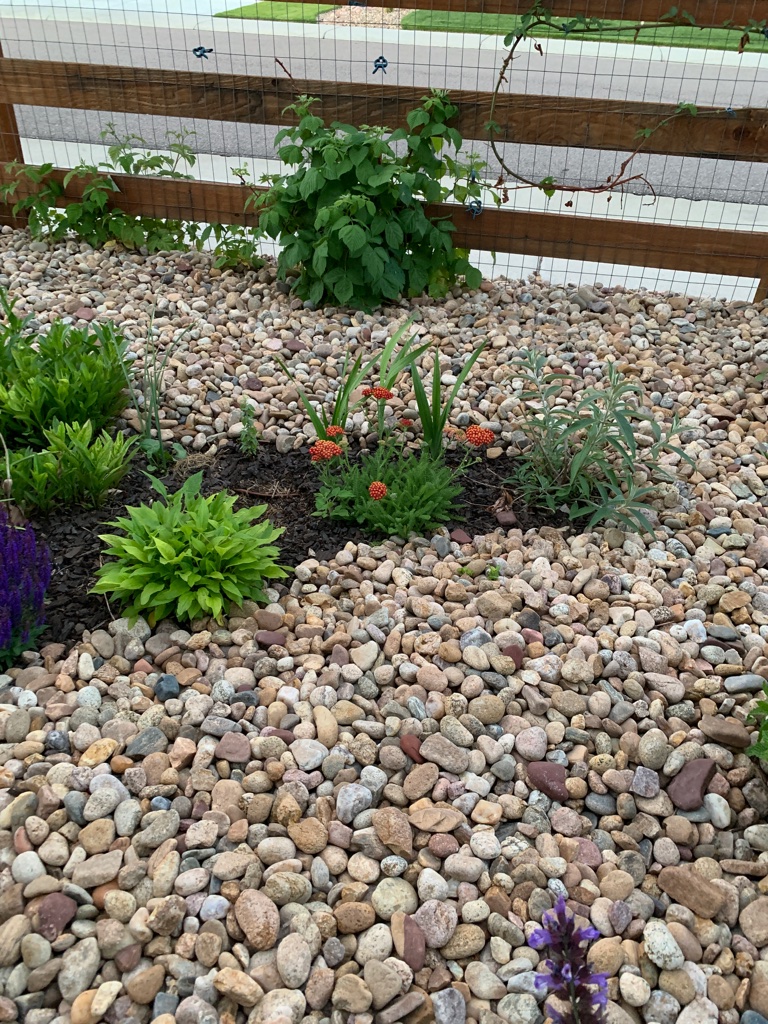
Plant a flower or butterfly garden near your vegetable garden
This will encourage bees to visit your garden and pollinate your vegetables.
I have a butterfly garden surrounded by perennial herbs.
I will make sure to add things as I learn them but this is what I have for now.
Bear and Ladybug had been asking us to have a lemonade stand all summer last year and unfortunately, we just never got around to it. When Christmas rolled around, we thought they would still be excited to have a lemonade stand even if it was a few months late.
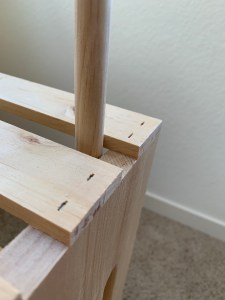
I built the stand in our entryway in one afternoon.
I started pinterest searching and found lots of different plans. The plan we went with is here: Fantabulosity Lemonade Stand. Building this took one trip to Home Depot and one afternoon of time. It was built entirely my yours truly with some simple power tool use. I did make a few small changes to the plan:
Only one crate is flipped to the front. I did this in order to provide more storage in the back.
I put the rods for the sign on the inside of the crates, not the outside. This was to clean up the outside edge of the stand and make sure little bodies wouldn’t bump into the rough edges of the rods.
I used a drill and sturdy screws in addition to hammering in small nails. This was just to make sure it would last, especially since we were planning to have it live in their playroom when not in use outside.
Examples of the small edits I made to the plan.
We celebrated our family Christmas a little early since we were traveling over the holiday. They ran first to the stand and were most excited about that gift.
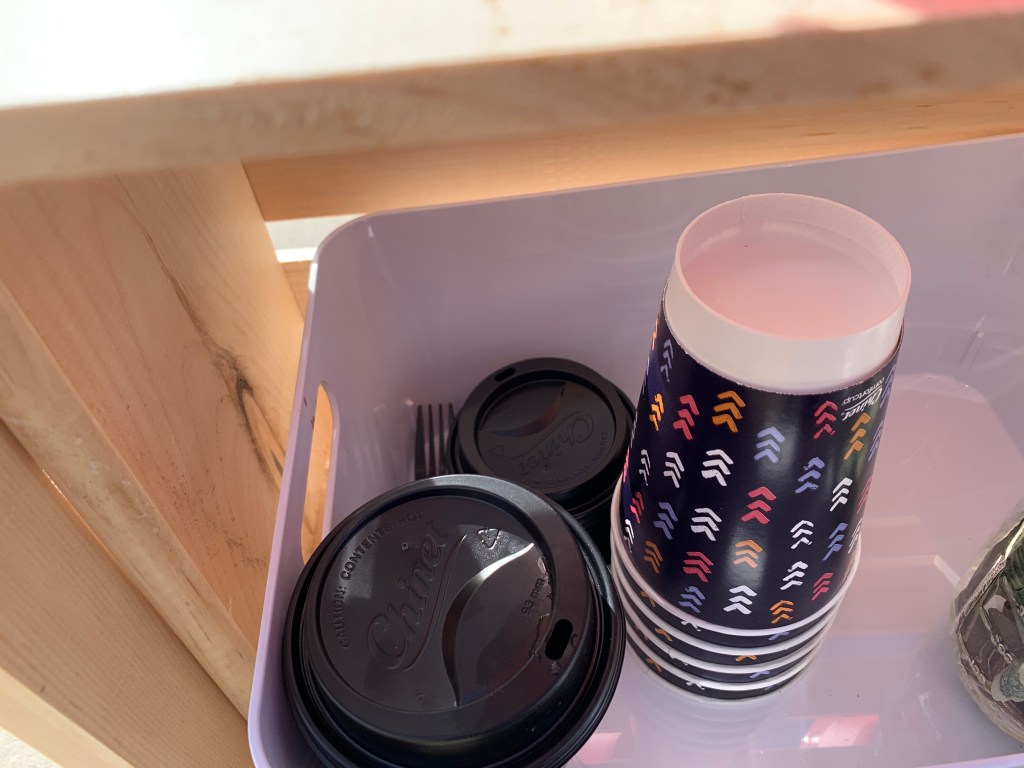
And the result…. Very happy kids who happily sold hot cocoa and homemade cinnamon rolls to our neighbors on a December Saturday morning. I posted on our neighborhood facebook page that the kids were out and what they were selling. I also put a cup with some quarters at the corner just in case someone didn’t have cash but still wanted to come by. The kids had a lot of fun and were excited to count the money they earned and put it in their banks. They are looking forward to having a lemonade stand this summer already.
We had hot cocoa with marshmallow and peppermint toppings plus homemade cinnamon rolls.
They had a lot of fun!
When the stand is not in use in front of our house, we have it in their playroom where they use it as a grocery store and restaurant.
They have used it to sell groceries, cookies, meals, toys, and all sorts of things.
I thought I would share this now in case anyone was looking for Easter or birthday ideas for their kids.