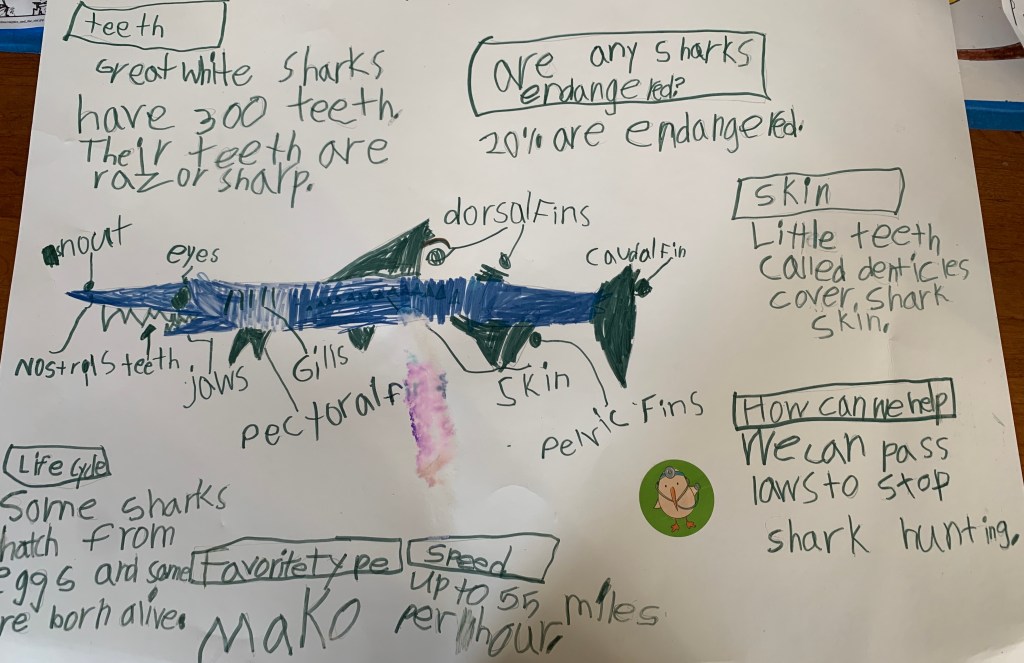
During the 2020 spring semester, Bear’s kindergarten teacher had him do what she called a “Passion Project” to allow him to go a little deeper with a subject and stretch himself. He took several weeks to research a subject of his choosing and then he presented his project to his teacher and another little boy who had done a project as well. It was great to see him excited about something he was doing for school (the pile of completed worksheets were not doing it for him) and he was very proud of what he had put together. He researched sharks and left his shark poster up in his room for months.
Fast forward to the end of the fall semester 2020 and both my kids were needing something more than worksheets to finish the rest of the school year. And let’s be honest, I needed something to take up their time while I was trying to work from home. We decided they could each do a Passion Project of their choosing and present to their grandparents and family via FaceTime and Zoom prior to Christmas. It worked out really well for our family so I thought I would share what we had them do in case anyone else is needing something to keep their kids busy and engaged with school.
First, discuss with each child what subject they would like to learn more about. For younger kids you will want to keep it to something simple: a specific type of animal or specific place. Older kids could choose something more broad: a sport or country. Once the topic is chosen gather the items they will need to do their research and present their project.
Items needed for each child:
1. Notebook
2. Pencils
3. Basket to put their research items in
4. Library books and DVDs, magazines, and your own books on the subject
5. White poster board
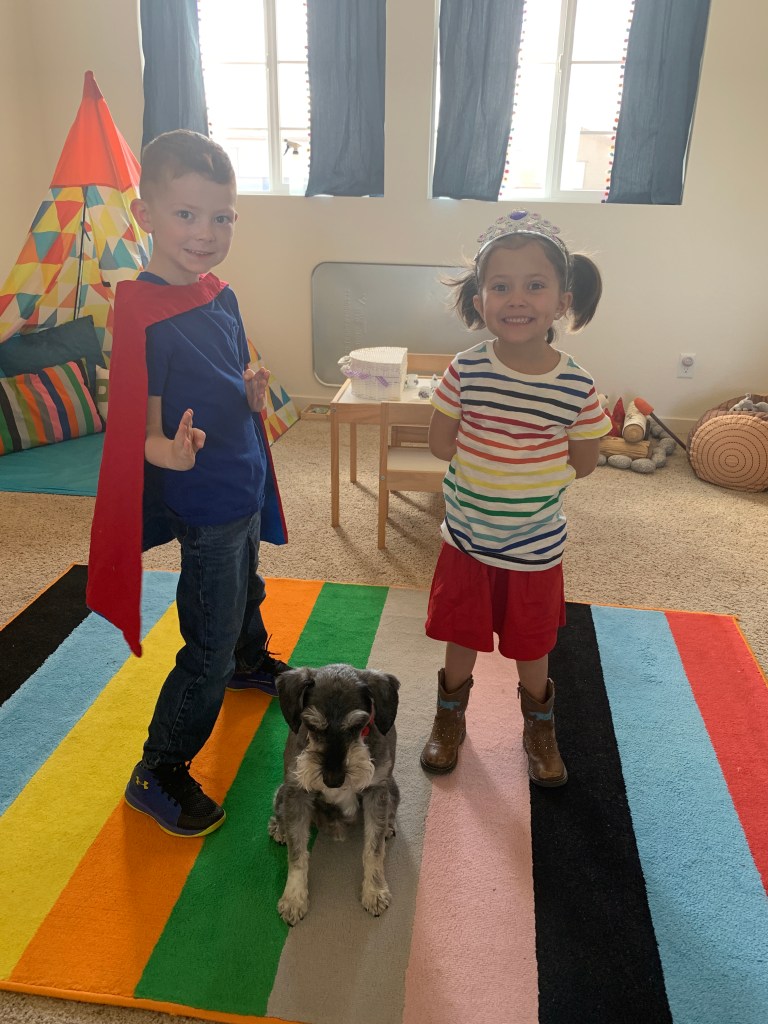
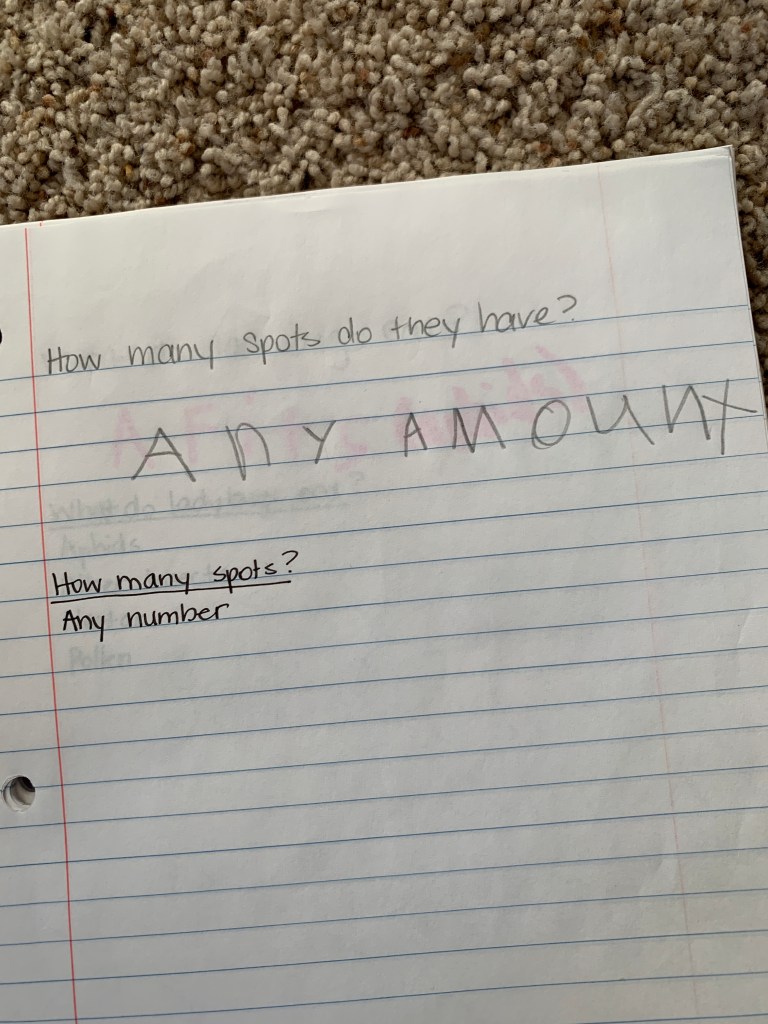
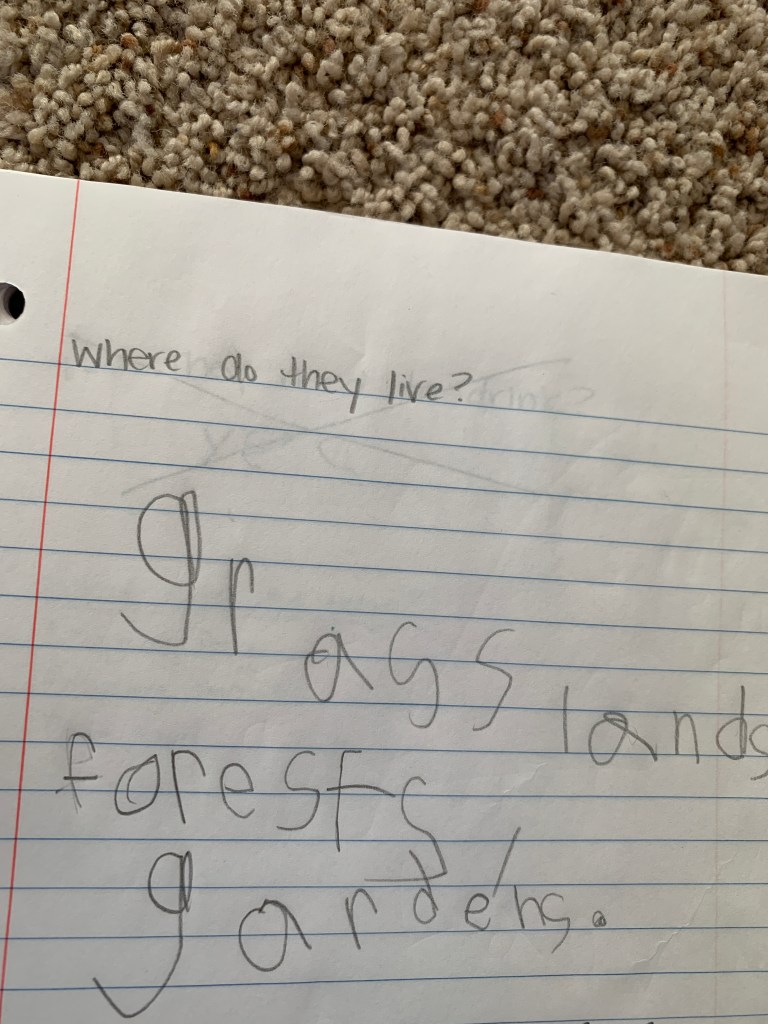
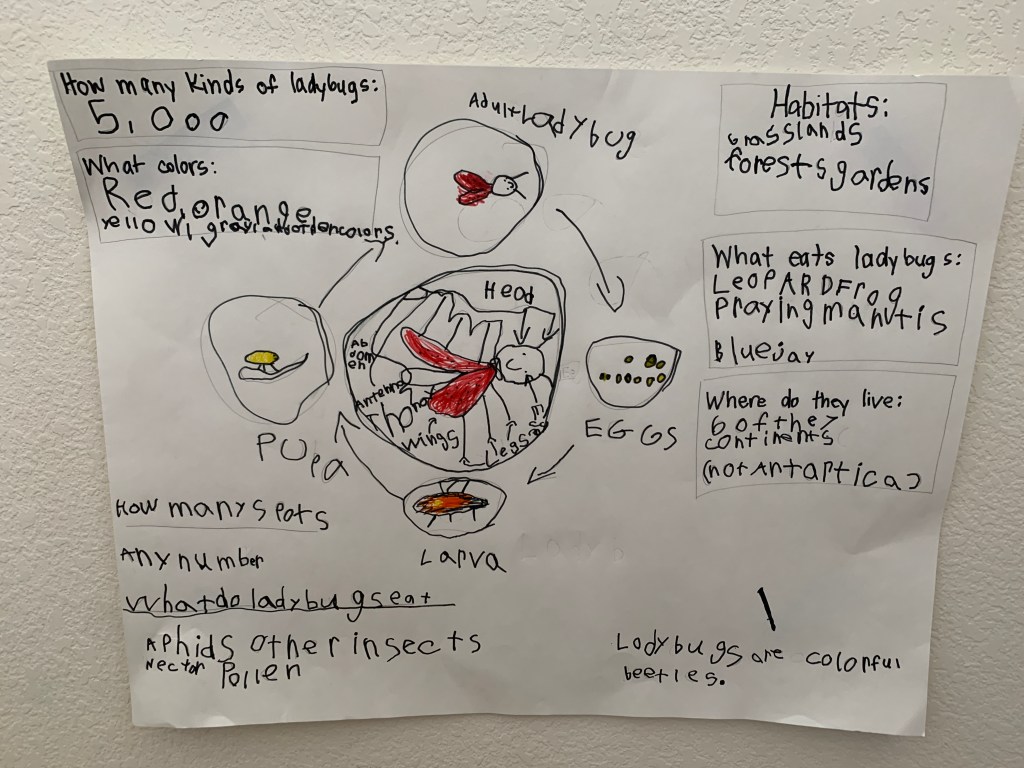
My kids chose to research ladybugs and bears and you guessed it, Ladybug researched ladybugs and Bear researched bears. Their nicknames really do fit them.
Once they had their subject chosen, I logged into our library website and requested literally every book and nature DVD on ladybugs and bears. I apologize if you needed a book or DVD on ladybugs or bears from the Douglas County Library system in December 2020. They were all at my house but we were putting them to good use. It took a few days for these holds to be ready so while we were waiting I also gathered the books and magazines we already had on these subjects and put them in the baskets we had ready to go. I then sat down with each child and talked to them about what they wanted to learn about their subject. On each page in their notebook, we wrote one question that they wanted to get answered from their research.
Example questions for an animal/insect subject:
- Where do they live?
- What do they eat? What eats them?
- What is their lifecycle?
- What do they look like? Can they be different colors? Do males and females look the same?
- Are they endangered? How can we help?
- Etc.

What to do:
1. Request every book and DVD can find at your local library.
2. Gather the books and magazines you already have on the subject.
3. Sit down with each child and talk about what they want to learn about the subject.
4. Write one question they want to be able to answer on each page in their notebook.
5. Allow them to watch their DVDs and read their books with their notebooks in hand so they can write answers to their questions.
6. Once they are done with their research, go through their notebook with them and help them with spelling and putting sentences together.
7. Have them create a poster with answers to their questions and a picture that represents their subject. They can first do it in pencil and then in marker once spelling has been checked.
We put their “research baskets” in their tent in our loft. They had a cozy space to read and work and all of their materials were in a set and organized spot. For days, these kids read to themselves and each other totally engrossed in the subjects they chose. And I was able to get SO much done!
Once their research was complete, I sat down with each kid and went through their notebooks with them. They could tell me what they learned and I could help them with spelling and putting sentences together. I then gave them a poster board and pencil and told them to draw a picture of their subject and to write their questions and answers around their board.
And, to all the other Type A parents out there, here is the hard part: Don’t help them put together their board beyond giving them those general guidelines and helping with spelling. Would you do it differently? Absolutely! But they will get more of a sense of accomplishment for doing this project if they actually do this project.
Once you spellcheck their work done in pencil, you can have them go over it with marker and add color. If they wanted, they could cut out pictures from magazines and add them as well. For older kids or for a different challenge, they could put together a Powerpoint or Keynote presentation instead of a poster board.

Once their projects were done, the kids each took turns presenting what they had learned. We taped their poster boards up and took a video of them telling us all about their projects so we could share it with their teachers and any other family members. We later did Facetime/Zoom sessions with grandparents so they could see their work and ask questions as well.
Here is their finished work! They were incredibly proud of their projects and the boards are still proudly displayed in our stairwell.
We’ll be doing Passion Projects like this for other school breaks and if we have to go back to virtual/remote school again for sure.
I hope this idea can be helpful to you!