Cinnamon apple pork chops with sweet potatoes

My kids (and hubby) love their sweets.  This is a dinner that to them tasted like dessert but I felt fine about it because there was plenty of fruit and veggies in every bite.  Ladybug decided that forks should be optional during this meal because she was able to shovel in the goodness with her hands better. 
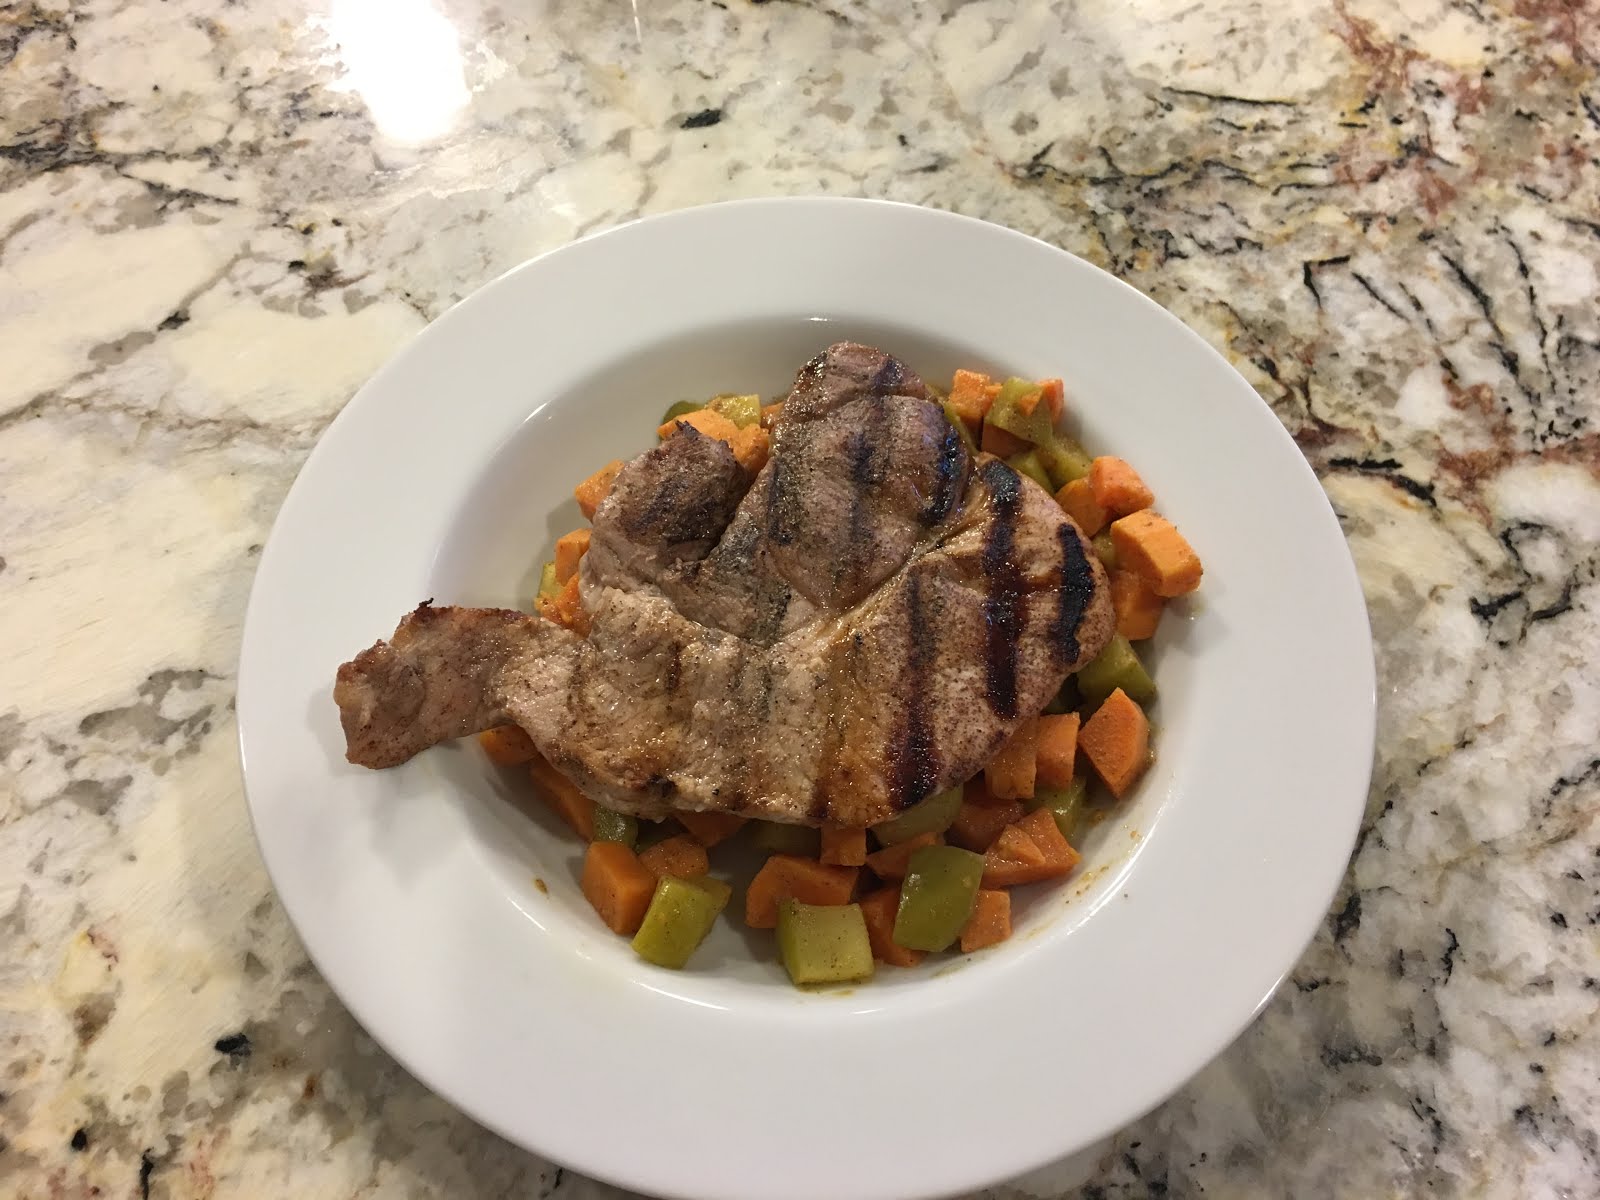
Ingredients:

  • Pork chops
  • 1 c (or one juice box) apple juice
  • 2 Tablespoons cinnamon
  • 1/4 c honey
  • 2-3 sweet potatoes
  • 2 apples
 Directions:
  1. Night before (or right when you get home) put pork chops, apple juice, honey, and cinnamon in a large ziplock bag to marinate the meat. Cooking/Meal planning tip:  Even if I haven’t meal planned, I like to know what I am making for dinner by the night before.  That way I can make sure any meat needed is thawed and ingredients are on hand.
  2. Get home from work and put a cartoon on for the kids.
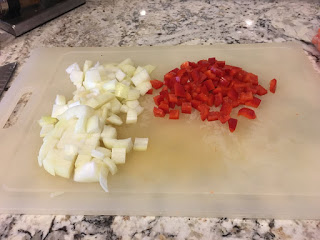
  3. Peel and cube sweet potatoes (~1/2 inch cubes are perfect)
  4. Cook the sweet potatoes with some coconut oil or olive oil for about 10 minutes, stirring frequently.
  5. Preheat the grill.
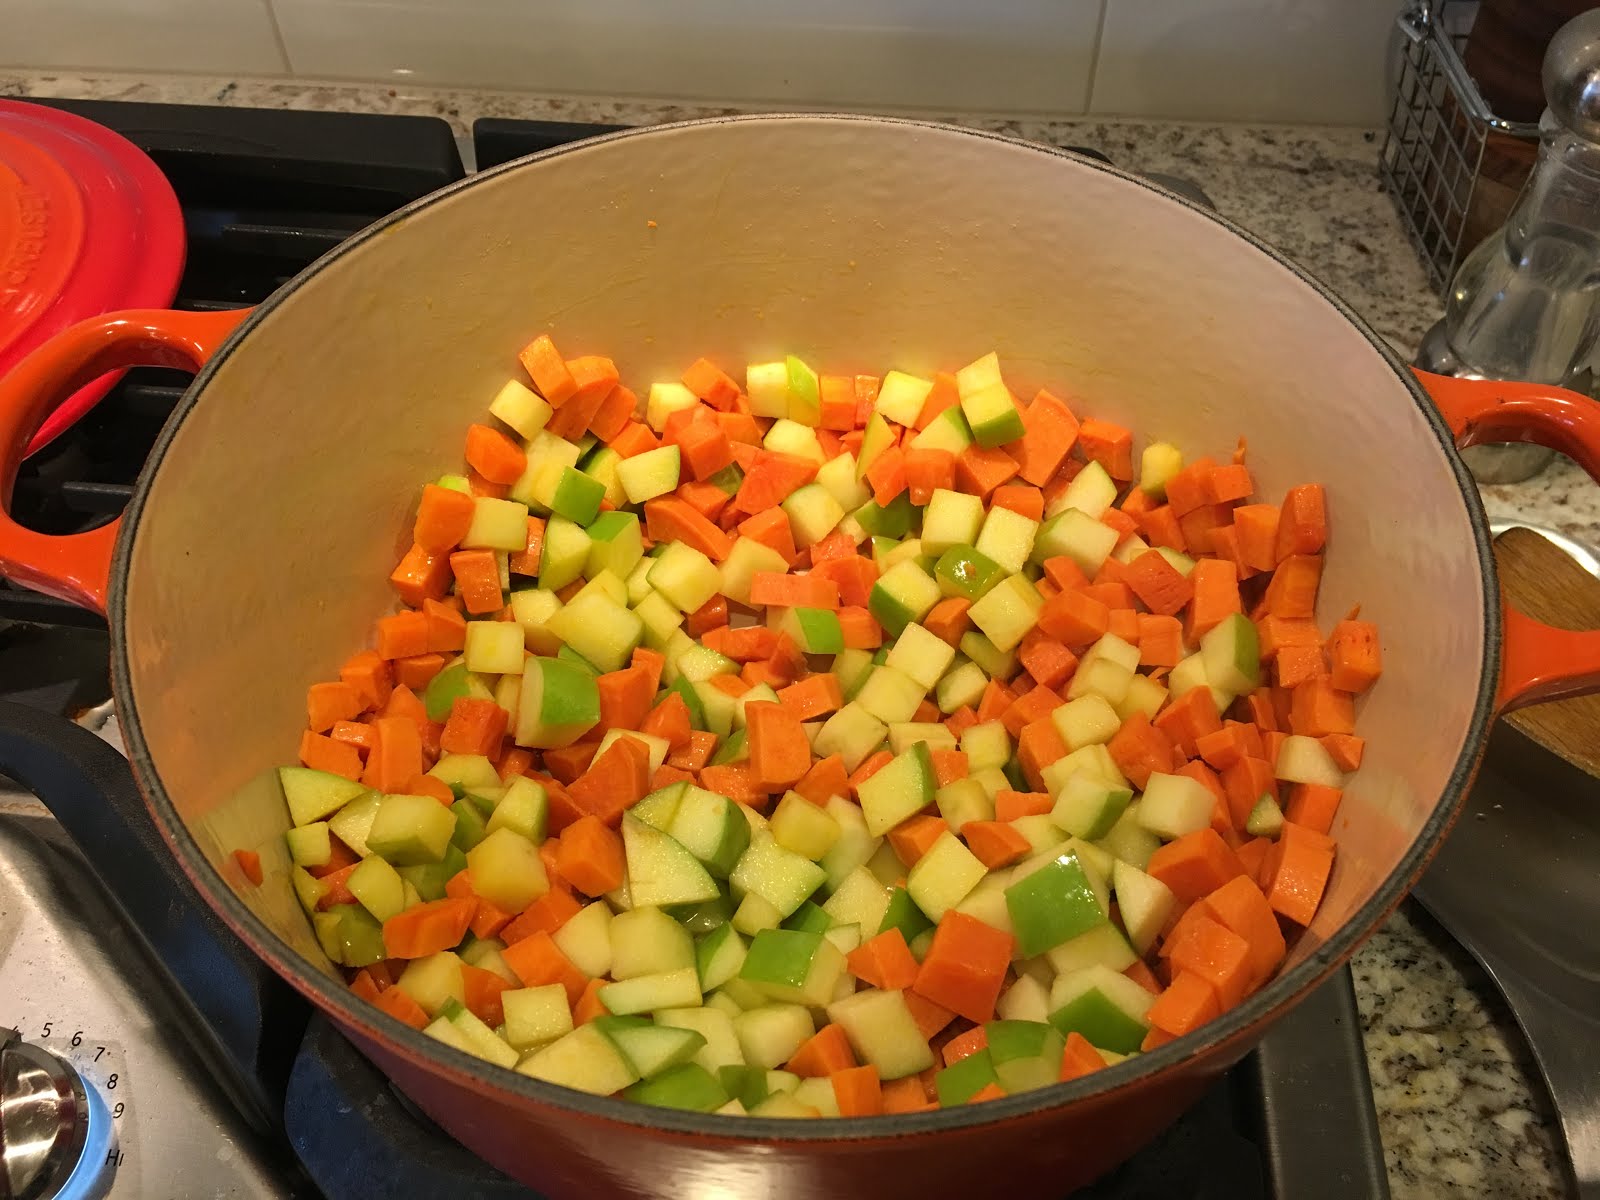
  6. While sweet potatoes are cooking, cube the apples (I leave the peel on)
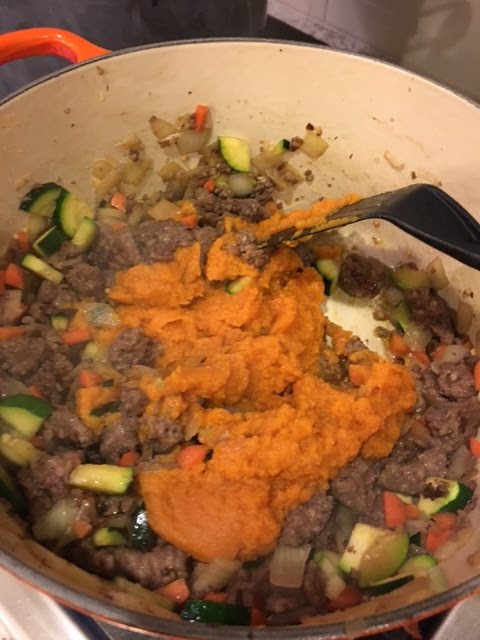
  7. Once the sweet potatoes are starting to soften, add the apples and a little more oil. 
  8. Put the meat on the grill, keeping the marinade.
  9. Pour 1 cup of the marinade into the sweet potatoes and apples and cover.
  10. Flip the meat when it is no longer sticking to the grill (about 4 minutes)
  11. Pull the meat off the grill when again, it is no longer sticking to it and let it rest while the apples and sweet potatoes finish cooking.                                                                                                        

  12. Once the sweet potatoes and apples are softened, pull off the heat.  
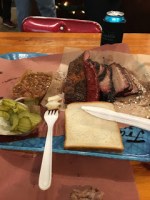
  13. Serve in a bowl with the sweet potatoes and apples in the bottom and the pork chop on top.  We served in a bowl because the sweet potatoes and apples mixed with the apple juice and cinnamon makes a yummy sauce that is great to dip the cut up pork chop in.

Beast was excited because he thought we were going to have enough for a great lunch for him the next day.  But Ladybug kept going back for seconds, thirds, fourths and beyond (I actually lost track).  His lunch whittled away to a tiny snack by the time she was done.

As I was originally typing this, Bear is looking over my shoulder and he just said, “That was good!”

Definitely something we will be having again!

Same meal different way:  So sometimes we get sick of making the same things the same ways.  An alternative way to make this meal would be to slice the apples and cook them with cinnamon, a little water, and honey.  Then roast the sweet potatoes with a little olive oil and cinnamon.  Grill the pork chops as recommended above.  Then the plate looks different with each item separated but it is essentially the same thing.

When you cook with booze, which should be often…

If you’ve taken a look at my recipes, a lot of them include deglazing with wine or beer.  Is this just an excuse to open up a bottle of something on a weeknight?  Well, maybe.  But really the goal is to deepen the flavor of whatever I’m cooking, which brings me to this cooking tip:

Never, EVER,  cook with booze you wouldn’t enjoy drinking.  


Seriously.  Never.  If they sell it as “cooking wine” in a grocery store DO NOT cook with it.  Ever.  If you have a can of Natty Light in the fridge that’s been there forever DO NOT put it in your food.

Why?  If you don’t like the flavor of it enough to drink it, you won’t like the flavor it adds to your food.

A lot of the cooking wine I’ve tasted honestly tastes nothing like wine at all so it doesn’t have the same effect as adding a glug of chardonnay.

Here’s my rule:  If you like it and genuinely enjoy drinking it, then it is good enough for your food.  It doesn’t have to be expensive.  If you wouldn’t drink it, don’t let it touch your food.

There you have it.  Now crack open a bottle of something and deglaze a pan with it.  And pour yourself a glass while you’re at it.

Served With Love: Humor

Originally written 10/24/17

Last week I made something delicious.  It was also appalling to look at.  I share this story in order to show that even people who like to cook and think they are pretty ok at it still have meals that don’t go so well.  Ultimately, these are meals you learn from and get better because of.  All you can do is laugh and try again the next meal.

Beast was out of town for a few days last week so I was trying to make a healthy meal that would be super easy.  And I was craving something that tasted like fall.  Pork chops, sweet potatoes, apples, and cider were on hand so I was planning to make my Cinnamon Apple Pork Chops but thought maybe it would be even easier if I put it all in the crock pot instead.

Yes, this was easy.  Yes, it tasted fabulous and the pork chops were super tender and tasty.  But…  Sweet potatoes and apples when left in a crock pot for hours become a not so attractive mush of orange and brown.  I’m sparing you from a picture on purpose but I’m sure you can imagine it.

Bear, who eats EVERYTHING, looked at the plate I put in front of him and without so much as smelling my foul appearing concoction said, “I don’t think I like that.”  Well said, my son.

He and Ladybug both did try it and both did eat it well because after you got over the visual appearance, it really did taste exactly how I wanted it to: sweet and cinnamony, tender and juicy.

Now there was plenty leftover but I could not imagine myself actually pulling these leftovers out of the fridge and thinking, “Mmmm, yeah that looks good.”  I also could not imagine throwing a whole pork chop and bowl of veggies away simply because they looked bad.  So our dog, Charlie, ate well the next two meals.

Next time, I’ll put the pork chops, onions, cider, and spices in the crock pot and leave the sweet potatoes and apples for cooking later.  Once again a reminder that we first eat with our eyes and the appearances of our meals are important.  I’m sure Charlie is hoping I forget that fact again soon.

Served With Love (in Austin): What to do and eat in Austin/Waco

Beast and I just got back from a little getaway in Austin so I thought I would share some of the recommendations we received and the places we found on our own that were fabulous.  When the two of us visit a city together we pretty much always plan out our time the same way:  we find a place to stay that is within walking distance to some fun areas and then we make reservations for brunch and dinner each day.  The rest of the trip has a way of filling itself in naturally along the way.

Here’s our thoughts on what to do (and eat) in Austin/Waco:

Stay: North of 6th Street on the western end of the bar/music district.  We did not listen to this advice.  While we were very close to 6th Street and lots of great things, our walks home at night were maybe not as safe as they could have been if we were 4 blocks west.

Get in line for: Franklin BBQ.  It opens at 11 AM and most days you’ll need to be in line by then to make sure you get some of their now world-famous brisket.  We literally drove straight from the airport to get our spot in line.  The wait was 2 hours which sounds like a lot for BBQ but it really, really is worth it.  While you are waiting, they have lawn chairs you can sit in and move along the line.  You can also walk up to the counter to order drinks to enjoy while you wait.  Once you do get to the counter, make sure you get a mix of fatty and lean brisket (1 lb) at least and save a couple of slices for a late night snack.  We had some sausage, ribs, and beans as well but the star really is the brisket, which I will gladly wait in line for again.


Walk around: 6th Street.  Lots of bars and live music.  Food trucks galore.  We’re suckers for a piano bar and enjoyed a couple hours at Pete’s Dueling Piano Bar.  Sit upstairs for a great view of the piano show and fabulous people-watching.

Fancy dining: Walk to wink restaurant.  They have a daily menu with new creations and 5 or 7 course pairing menus with the option of very reasonable wine pairings.  We were VERY happy with everything we tasted and would highly recommend the 5 course menu with the wine pairings.  The service was fabulous.  Since we were there celebrating our anniversary, our waitress took a copy of the menu they had printed with our names on it and had the chef sign it.  Sweet touch.

Casual, local flavor: Uber to Matt’s El Rancho.  This one came recommended to us by a colleague of mine who grew up in Austin.  It did not disappoint.  Margaritas were great as was their signature appetizer: The Bob Armstrong.

Walk around: The State Capitol and UT.  Wander around the capitol and when you see a tour going through, just start following them as long as you want to.

Hole-in-the-wall find: Arturo’s Underground Cafe for breakfast or lunch.  Beast loved the migas and I loved my The Works breakfast tacos.  The Texas Pecan coffee they had was delicious.  Go ahead and pay the extra dollar for bottomless coffee because you’ll want a refill.

Brewery: Uber to Lazarus Brewing.  This might be the find of the trip.  A place that sells coffee, tacos, and beer would intrigue us already but then you walk in this place and WOW.  It is gorgeous.  Deep, moody colors on the walls, cognac leather and natural wood everywhere, everything looking 100% curated and thought out.  Not the typical stainless steel and butcher block bar you see at 90% of the breweries we’re visited.  I kept telling Beast “This doesn’t look like a normal brewery.  I think a woman is involved in this somehow.”  And after we got talking to the incredibly friendly staff, we learned that yes, that is true.  A pastor and his wife started the brewery and she is the one behind the hospitality and coffee.  And their daughter is an apprentice brew master.  They clearly make a great team along with some other folks that help them brew and run the place.  They have only been open about a year and have already won a gold medal at the Great American Beer Festival.  They also have this cool crowd funding thing they did where they sold gorgeous glass beer steins for $1000 and then the “Patron Saint” who bought it gets their first drink free for life and keeps their special glass displayed at the brewery behind the bar.  A bunch of people apparently use this brewery (and their free wifi) as their home office so in the morning you’ll see a bar full of people with laptops drinking coffee and by 5 pm they’ve switched to beer.  Just a really cool place run by really cool people and definitely worth a stop if you are in Austin.

Bar: Across the street from Lazarus Brewing is an old granary-turned-bar called Whisler.  They only have two kinds of beer but they mix up some very tasty cocktails.  Candles are lit throughout the space making it a cozy, old find.  Out back is a well-known food truck called Thai Kun (from the same folks as East Side King), which we thoroughly enjoyed.  The panang curry left our mouths on fire, but Whisler’s “Root Down” cocktail with a piece of candied ginger was all we needed to get back on track.  We then went back over to Lazarus to have another new favorite to end the night.

Brunch: Uber to Stubb’s Gospel Brunch (Sunday).  The food was great and they bring in various gospel groups to sing while you’re eating.  I’d highly recommend the ticket with a “view of the band” so you get the full experience.

Drive to: This whole trip was planned by Beast so he could take me to Waco for Magnolia Market at the Silos.  I’ve been a fan of the HGTV show “Fixer Upper” for some time and think Chip and Joanna Gaines are just adorable.  The market was very fun and totally worth the trip to shop and enjoy the grounds.  The cupcakes from the Silos Bakery were delicious and also worth the short line we waited in.  The whole operation was a well-oiled machine with lots of friendly people making everything run super smoothly.  After we shopped and ate some samplings from the various food trucks, we took the free trolley around town.  It took 15 minutes and basically showed us the rest of the downtown area.  We then knew where we wanted to be dropped off on the next go around so we could visit other shops and the Farmer’s Market (Saturday).  I would say a half day in Waco was good for us but you could probably find enough to do to stretch it to a full day.  Staying in Austin and then renting a car for a day to drive there worked perfectly.

On the way back: Stop in Salado, TX.  We happened on this town trying to find a brewery and stumbled on “the best art town in Texas.”  There are lots of cute shops, art galleries, and then Barrow Brewing Co.  Beast and I played Trivial Pursuit at this brewery while sipping on their creations for at least 2 1/2 hours.  When we went it was the town Christmas Market and it felt like every person in town was out and about shopping and chatting.  It is a great place to stop right off I-35.

So there you have it!  If you’re visiting Austin, check out these spots!  If you’ve visited Austin before and have other favorite spots, please leave them in the comments.

Happy Traveling!

Mel

Go-To Pasta Meat Sauce

This is the recipe for my Go-To Pasta Meat Sauce that I seriously make almost every week.  Without fail.  My family loves it.  It makes plenty for dinner and next day lunches too.  And the kids have no idea how many veggies they are eating.  Seriously, no idea.  


Ingredients:

  • 1 lb. ground beef or Italian sausage
  • 1 onion, chopped
  • 1 cup carrots, chopped
  • 1 jar of your favorite pasta sauce
  • 1 box of your favorite pasta
  • 1 Tbsp Italian Seasoning
  • 1 Tbsp minced garlic
  • Red peppers flakes (to taste)
  • Red wine for deglazing the pan
  • Parmesan cheese

Other possible additions:

  • Chopped zucchini
  • Chopped fresh spinach
  • Chopped red peppers
  • Canned pumpkin Seriously, you can’t taste it at all and it adds lots of vitamins and fiber.  And gets that can out of the fridge that you had to use half of for another recipe.

Directions:

  1. Put on a Daniel Tiger episode for the kids.  Choose their sermon.  Today you need to hear about sharing…
  2. Open red wine and pour taster glass.  You have to make sure the bottle is good before using it in a recipe.  Seriously.  Really this might be step one depending on the work day…
  3. Put on your favorite Pandora mix.  I recommend “A Dinner Party Ambience Radio” or “Indie Singer-Songwriters Radio.”
  4. Put on a big pot of water to boil for the pasta.
  5. Brown meat.
  6. While meat is cooking, chop onion and carrots.
  7. Once meat is browned, drain if there is a pourable amount of fat.
  8. Add onions and carrots and cook about 5 minutes (until onions are tender)
  9. While onions and carrots are cooking, chop anything else you will be adding and get it ready.  Tonight I added zucchini so here is where I chopped that.
  10. Add the zucchini or any other fresh veggies.
  11. While the additions are cooking, add the Italian Seasoning, red pepper flakes, and garlic.
  12. If at any time the bottom of the pans starts to get crusty technical term deglaze the pan with a glug of wine.  Once the wine is in, scrape the bottom of the pan to get all the good stuff off flavor off the bottom.
  13. Add in any other additions.  Tonight I added canned pumpkin since I had still had one can leftover in the pantry from all the pumpkin recipes I was making in the fall.
  14. Cook until the carrots are tender.
  15. Add the pasta sauce and turn heat down to low to simmer.
  16. Depending on how long it is going to take Beast to get home, I’ll sometimes simmer the sauce stirring it occasionally for 15-30 minutes or just go straight to serving.  You can be flexible.  
  17. Once I have “Find iPhone” stalked Beast and determined he is 10 minutes from home, I drop the pasta and cook according to the directions on the box.  
  18. Once the pasta is cooked, drain and add to the pot of sauce.  I have toddlers so we use a lot of penne or other small pastas that they can more easily eat than spaghetti.
  19. Stir to get sauce in every nook and cranny.
  20. Top with parmesan cheese or “sprinkle cheese” as it is known in my house and serve.
  21. Watch your children eat carrots, spinach and other goodness they have no idea about.  Evil cackle quietly to yourself.

So there you have it.  This is not anything fancy but it goes over really well with my family and tastes great for lunch the next day.  It is also really flexible and you can make it different depending on what you have on hand.


Hope it works for you too!

Media use and kids

This is something that is often a hot topic in mom circles and one that I am interested in for sure: Media use for kids, especially really young kids.

While I was pregnant with Bear, Andrew and I saw so many families using media (iPads, iPhones, etc) while out and about to essentially soothe kids or keep them entertained so they didn’t have to interact with the adults.  One family we can both still picture was sitting at dinner at a restaurant, both parents on their phones and both kids with headphones and iPads, all mindlessly eating and not interacting with each other at all.  Might have worked for them but Andrew and I knew that is not what we wanted for our family.

I researched this quite a bit and chatted with our pediatrician as well and these guidelines kept coming back as a good place to start in deciding your “rules” on this topic:

Media Use Guidelines from the AAP

https://www.healthychildren.org/English/family-life/Media/Pages/Healthy-Digital-Media-Use-Habits-for-Babies-Toddlers-Preschoolers.aspx

Whenever I’m wondering if something has been researched or if there is a good recommendation for anything having to do with kids, I go to the American Academy of Pediatrics first.  They have all sorts of great publications and guides for parents from allergies to media use to pacifiers, all sorts of things.

Now there are certainly exceptions and sometimes giving an iPhone to a toddler who is hangry while checking out at Target is a Godsend (can I get an Amen!) but having the toddler not expect to get an iPhone to entertain them every time they are in Target is probably a good thing too.  Because then you get to talk about what you are seeing and buying.  You get to answer all the questions and whys.  Yes, it will take longer but it will also be worth the extra time.

So that’s where I go if I am wondering if a certain type of media use is acceptable or not.  Hope this helps!

Some additional reading:

CNN Article 2019: More screen time for toddlers is tied to poorer development a few years later https://www.cnn.com/2019/01/28/health/screen-time-child-development-study/index.html

Journal of the American Medical Association 2019 Article: Association Between Screen Time and Children’s Performance https://jamanetwork.com/journals/jamapediatrics/fullarticle/2722666?guestAccessKey=879c6c87-141e-48f8-8c95-4d684600a644

CNN Article 2017: Letting a baby play on an iPad might lead to speech delays, study says http://www.cnn.com/2017/05/04/health/babies-screen-time-speech-delays-study/index.html

Financial Time Article 2018: Apple faces activist pressure over children’s iPhone use https://www.ft.com/content/a4a0d8d0-f3fc-11e7-8715-e94187b3017e

Go-To Taco Meat

This is the recipe for my Go-To Taco Meat that I seriously make almost every week.  Beast looks at my weekly menu more on that later for it each week and will ask if it isn’t there when I’m making it next.  This recipe makes plenty for dinner and next day lunches too.  And the kids have no idea how many veggies they are eating.

Go-To Taco Meat
Ingredients
  • 1 pound ground beef or turkey
  • 1 onion, chopped
  • 1 cup carrots, chopped
  • 1 red pepper, diced
  • 1 can fire roasted diced tomatoes
  • 1 can diced green chilies
  • 1 can black beans
  • 1 box hard taco shells
  • 1 packet taco seasoning
  • few glugs your favorite beer
  • topping shredded cheddar cheese
  • 1 cup zucchini, chopped (optional)
  • 2 cups fresh spinach, chopped (optional)
  • sour cream for topping (optional)
  • shredded lettuce for topping (optional)
  • fresh tomatoes, diced  for topping (optional)
Instructions
1. Put on Sesame Street for the kids
2. Open a beer and take a swig. You have to make sure the bottle is good prior to using it in a recipe. Seriously.
3. Put on your favorite Pandora mix. I recommend “Today’s Indie Radio.”
4. Brown meat.
5. While meat is browning, chop onion, red pepper, carrots and any other veggies. (Do carrots first since you add them next.) 
6. Once meat is browned, drain (if there is a pourable amount of fat).
7. Add carrots and cook for 5 minutes.
8. Add other vegetables and cook about 5 minutes (until onions are tender).
9. Add seasoning packet to the meat and stir.
10. If at any time the bottom of the pan gets crusty (technical term) deglaze the pan with a glug of beer. Once beer is in the pan, scrape the bottom of the pan to get all the good stuff (flavor) off the bottom.
11. Add can of green chilies.
12. Drain and rinse can of black beans.
13. Add can of black beans.
14. Serve meat in taco shells with cheese, sour cream and other toppings. Can serve with a side of spanish rice (prepared box).
15. Watch your children eat veggies they have no idea about. (Evil cackle quietly to yourself.)
Details

Prep time: Cook time: Total time: Yield: 6-8 servings

Taco meat when it is finished.

So there you have it.  This is not anything fancy but it goes over really well with my family and tastes great for lunch the next day.  It is also really flexible and you can make it different depending on what you have on hand.


Hope it works for you too!

Happy cooking!

How to make your grilled chicken better: Beat it

I don’t know about you, but when I first started cooking grilling chicken was one thing I could not figure out.  I’d throw a chicken breast on the grill.  Flip it.  Pull it off.  Result: Half was already dry and gross.  Half had pink in the middle.

The problem: chicken breasts don’t come in a uniform thickness.  You can easily have a chicken breast that is 2 inches thick on one side and 1/2 inch thick on the other.  There is no way to cook that completely without overdoing one half.

My solution: Beat it.  I put the chicken breasts I plan to grill in a large plastic bag with whatever marinade I am planning on (barbecue sauce, lemon and olive oil, etc).  Get out my metal ladle, put the bag on the floor and go at it until the chicken is a uniform thickness.  The kids can even help.

At this point, my kids know what I am up to when I start walking over to our rug with a bag of chicken and a metal spoon.  They run and get their ladles and join in the fun.

This time I was using Bryant’s BBQ sauce.  A favorite for KC natives.

I focus on the large ends of the chicken breasts and work to get them even (or much closer to even) with the other half.

The result:  Easily grilled chicken.  I preheat my grill on high, place the chicken on the grill, and then turn the grill down to medium.  I flip the chicken once it has released from the grill (you shouldn’t have to pry it off), which is usually about 5 minutes.  Around 4-5 minutes on the other side and you have tender, moist chicken that is done all the way through.

Bonus: The kids say they “helped cook” the chicken.  And my kids always eat things even better when they’ve helped make it.  This is an easy and safe way for them to help cook chicken without getting completely gross or making a total mess.

Happy cooking!

Pantry organization: From mess to magnificent

Y’all, I had a complete tantrum the other day.  Seriously.  A full on toddler-esque tantrum.  What caused it?  My pantry.

I wish I had a “before” picture for you but this description may be enough to help you understand the chaos that had become our food storage.  I went to grab something up high and a glass vase and lightbulb fell down on me.  The glass vase I ninja-like shoved into a shelf mid air by sheer luck and the light bulb hit a nice soft landing on my bare foot.

This was while my children were eating breakfast.  Before they were done the entire pantry was emptied onto the kitchen counters and island.

The problem:  We had so much random crap in our pantry that it has ceased to become the place dedicated to dry food storage.  It truly had become a dumping ground.

The solution: Full decluttering with putting the non-food away where it goes and a trip to IKEA.  A hilarious trip with two toddlers where the stroller became a shopping cart and Bear became my assistant.

Here are the “afters” and then I’ll tell you the process and products that worked for me.

Now Angels sing when I open this door.

A spot for everything and everything labeled to tell the individuals who dump things in here that “Oh no!  That doesn’t go here.”  (Basically that is a note to Beast.  And me.  Mainly me.)

“This week” bin for items that are claimed for meals I’ve already planned.  This helps when you go to the store.  I know I need more of X because while I have one in the pantry, it will be gone before the end of the week.

Lazy susans for the oils and cooking products.  Perfect in these deep corners of the pantry that if I put things in there, would disappear.  I kid you not, I found 18 breakfast bars of various types pushed back in the recesses of these corners.  No more.

Several large, rollout bins for the floor that have rarely used or surplus items.  I have one for baking items, vases, and surplus.  Surplus has an extra bag of sugar (again found in one of the back corners), one of those half giant bags of rice from Costco, etc.

Not so healthy stuff up top so it is not at Ladybug and Bear’s eye level.  And now I can have one jar of cookies and one jar of snack crackers.  I don’t need 3 half empty boxes.

My meal planning clip board is behind the door and removable.  More on meal planning here.  Perfect for those occasional nights when Beast beats me home.  He knows what I was planning and can get it started.  And I always know where to find it when I am ready to plan.

So here is how I did it.  I bought 8 bins (4 small, 4 big) initially and then went back and bought 4 more (2 small, 2 big).  I bought 5 jars initially and then went back and bought 3 more. I already had a few bins and one small lazy susan on hand.

Here is what I have my items divided into:

Lazy susans:

1) Canned goods

2) Oils and vinegars

3) Kids vitamins, medicine, band-aids, and my ibuprofen

Jars with removable glass lids:

1) Snack nuts

2) Breakfast bars

Jars with sealable lids:

1) Cookies

2) Snack crackers

3) White rice

4) Brown rice

5) Lentils

6) Cereal

Large pull out bins for ground storage:

1) Vases

2) Surplus

3) Extra baking items (rarely used)

Large bins:

1) Potatoes

2) Onions

3) Drinks

4) Pasta/sauce

5) Breakfast

6) Treats

7) Chips/crackers

8) Baking (regularly used)

9) This week

Small bins:

1) Stock

2) Spreads

3) Seasoning packets

4) Rice/beans

5) Nuts

6) Popcorn

Mason jars:

1) Chia seeds

2) Quinoa

As I said, I pulled everything out, put the stuff that didn’t belong the other places in the house where it ACTUALLY was supposed to go, and then started putting everything back in.

I used this time to get rid of the junk that we didn’t need like a bunch of old candy and expired items.  Then we lived with it.  I went to get a few more items when I realized I had the space and wanted to separate out a few more items.

After I was 100% sure that I had everything separated out how I wanted them, I labeled everything.  I used chalkboard labels and a white paint sharpie.  Bought from Amazon Prime, of course.  Laminas labels and a Sharpie marker.  The labels peeled off really easy if I needed to move them a little bit and the paint marker wiped off when wet really easy which was important since it took me two times to figure out that I was actually spelling “quinoa” right.  It just looked really wrong.

I’m super happy with how everything turned out.  My fit was worth it!