Roasted Root Veggies with Rosemary Chicken

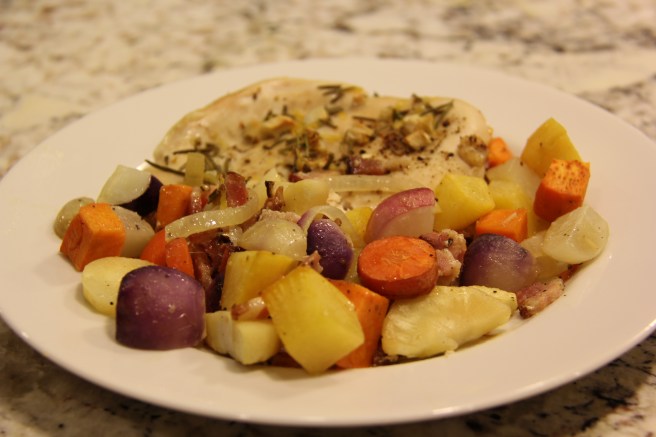
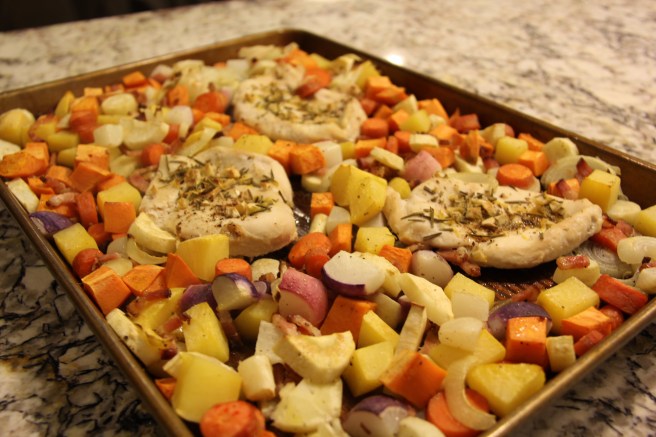
This recipe is based on one of our favorites from the Whole 30 Cookbook.  I adapted it to use ingredients I’m more likely to have on hand (bacon instead of pancetta), to use only one pan (because why dirty two?), and to use radishes that I can grow in my garden (the little color pop they give is really pretty).  This is a perfect fall or winter work night dinner.  Yes, you’ll need about 15 minutes or so to chop the veggies but that is really all the hands on time necessary.  Then you have 30 minutes (while the one pan dinner cooks) to play with the kids or do whatever else you need to.

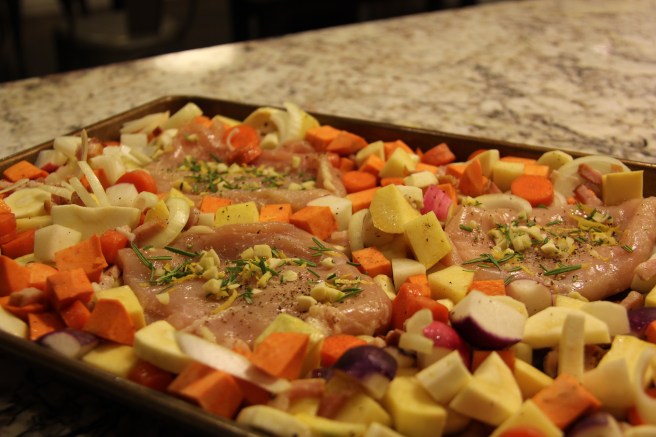
When roasting chicken, I prefer chicken thighs but I have included information in the recipe on how you can use chicken breasts if that is all you have on hand.  If you are using chicken breasts for this recipe, check out how I make my chicken breast so much better by beating them.

This recipe calls for 1-2 pieces of bacon.  You might be thinking, “Why would I open a whole pack of bacon for one piece?”  But that’s not what I do most of the time.  If we have bacon sometime during a weekend for breakfast, I frequently hoard a piece or two in a plastic baggie to cook with the rest of the week.

If you see radishes on the ingredient list and think “I’m out” please hear me out: roasted radishes taste completely different than raw.  They have a much milder taste when cooked that is very similar to other root vegetables.  I learned this when a good friend was telling me how she steams her radishes with butter for her kids who eat them faster than she can make a second batch.  I’d basically avoided radishes since was a kid up until she told me that.  And those cooked radishes were apparently a gateway into radish loving for me because now I can’t get enough of them, cooked or raw.

So try it out and let me know what you think!

Happy cooking!

IMG_3287

Roasted Root Veggies with Rosemary Chicken
This one pan dinner is perfect on a fall or winter work night. If you don’t have bacon, substitute olive oil. If you don’t have fresh rosemary or a lemon, salt and pepper will be just fine. (But the lemon and rosemary do make it extra special.)
Ingredients
  • 1 peeled sweet potato
  • 1 peeled rutabaga
  • 2 carrots
  • 2 parsnips
  • 1 small onion
  • 1/2-1 bunch, depending on size/preference radishes
  • 1-2 slices bacon
  • 3-6, depending on size chicken thighs or breasts
  • 1 Tablespoon fresh rosemary
  • 1 lemon lemon zest
  • 1 garlic clove
  • salt
  • pepper
Instructions
1) Preheat oven to 400 degrees
2) Cut onion into half moon slices
3) Chop vegetables (peeled sweet potato, peeled rutabaga, peeled parsnip, carrot, and radishes) into 3/4 inch cubes
4) Chop bacon into 1/2 in pieces
5) Combine vegetables, onion, and bacon in a shallow roasting pan or cookie sheet with edgesIMG_3270
6) Sprinkle with salt and pepper and toss to combine
7) Cover with foil
8) Bake for 10 minutes
9) While the vegetables are roasting, prepare the chicken. If using chicken breasts, put them in a plastic zip loc bag and flatten them to 3/4 in thick. If using chicken thighs, no flattening is needed.
10) Zest lemon
11) Chop fresh rosemary
12) Mince garlic clove
13) Combine lemon zest, rosemary, and garlic and run your knife through them together a few timesIMG_3280
14) Once 10 minutes is up on veggies, uncover the pan and mix the veggies. Push chicken pieces down into the pan, removing the large veggies from underneath them. (The occasional onion or bacon under the chicken won’t do anything but good.)IMG_3281
14) Sprinkle chicken with salt, pepper, and lemon/rosemary/garlic mixture
15) Roast chicken and veggies uncovered for 30-40 minutes
16) Serve with lemon wedges from the lemon you zested
IMG_3284
Details

Prep time: Cook time: Total time: Yield: 4 servings plus leftovers for lunches


Gift idea for stuffed animal loving littles

I feel like I struggle with gifts ideas for my kids each birthday and Christmas. Between two sets of grandparents and other relatives who spoil them rotten and fabulous hand-me-downs from friends, they don’t actually need anything. My idea for this Christmas came after I was struggling to help Ladybug and Bear clean up their rooms one day. Where on Earth, were all of their stuffed animals supposed to go?  I have tried to thin the herd several times but they genuinely love and play with all of them.  So off to Pinterest I went searching for stuffed animal storage ideas.

I stumbled on this plan and loved how simple it was.  Beast and I built two of these in basically 3 nap times: 1) for building 2) for painting and 3) for stringing the bungee cord.  We got the wood and spray paint from Home Depot and the bungee cords from Amazon. They are able to put their animals in this from the top or sides on their own and the bungee cords make it very easy for them to see and pull out the desired creature when they decide they want it.

IMG_8164

And now when I see that stuffed animals are spread throughout the house, I just have to say, “Please put your stuffed animals in your zoo!”  Within a matter of minutes, they can clean up the mess and enjoy doing it since they are filling up their “zoo.”  The “zoos” fit nicely in the corners of their rooms.

We combined this gift with a ticket to make their own stuffed animals at Build-A-Bear for Christmas.  So we had a bit of a theme this year.

IMG_6401

I hope this helps you if you’re in need of a birthday or Christmas idea this year!


From broken mayo to olive oil cake…

This weekend I got it in my head that I needed to make homemade tartar sauce (and therefore mayo) for a fish fry we were planning.  I was short on time so I thought I could skip over the recommendation for all of the products to be room temperature.  “Eh, it will probably just take a little more elbow grease to whip cold eggs into mayo,” I thought.  Wrong.  Cold eggs do not whip into mayo.  They whip into useless oil and egg liquid.  Or so I thought.

“Now what?” I was thinking looking at a $5 or more in oil, eggs, and fresh lemon juice that was looking like it just needed to get thrown out.  Thankfully, I remembered a recipe I had seen but never tried for olive oil cake.  I quickly pulled it up and realized that I could throw a few ingredients into my oily mess, bake it, and call it a planned cake.  So I did and it turned out just fine even though the ratios I had in my oily mess weren’t even exactly what the recipe called for.

Here is the olive oil cake recipe I used in case anyone else winds up with a broken mayo in need of resurrecting: https://www.bonappetit.com/recipe/olive-oil-cake

The next day, I tried a different mayo recipe and let the ingredients come to room temperature.  I wasn’t going to let homemade mayo stump me.  This time: Perfection.  I then mixed in some dill and finely diced cucumber and had a fresh tartar sauce that was delish.

Here is the mayo recipe I used: http://www.inspiredtaste.net/25943/homemade-mayonnaise-recipe/   (This recipe is Whole 30 compliant.)

Happy cooking!