Sunday Supper: Extra Everything Chicken Piccata

Chicken piccata is a favorite in our house. It has been a longtime favorite meal of mine and Beast made it for me the night we got home after having Ladybug. Our kids started really enjoying it when they were 4 and 5 and it is often requested when I am meal planning. Normally chicken piccata is chicken, noodles, and sauce without much in the way of vegetables. When they started eating it more frequently, I felt the need to try to sneak some additional veggies in. Also, we are a caper-loving family. It has taken me a bit of time to get this recipe ready to share because I kept being told “more capers.” I drew the line at one whole jar but I know Bear would edit this to include two jars if he had his way! So this recipe is just a little bit extra in a variety of ways. You simmer the sauce for quite a while to get it just right but it is well worth the time for this yummy Sunday Supper!

Ingredients:

  • 3/4 to 1 whole bag egg noodles (12 to 16 oz)
  • Olive oil
  • 2 Tbsp fresh parsley
  • Loaf of crusty bread

For the chicken:

  • 1 package chicken breast tenders or chicken breast cut into strips
  • 1/3 cup mayonnaise
  • 1/2 cup panko bread crumbs
  • 1/2 cup grated parmesan
  • 1 Tbsp garlic powder
  • 1 tsp salt
  • 1/2 tsp pepper
  • 1/2 tsp paprika

Sauce:

  • 2 cups chicken stock
  • 1 cup white wine
  • 1 Tbsp or 4 cloves minced garlic
  • 1 3.5 oz jar (or less) capers
  • 1 shallot
  • 2 lemons (for zest and juice) or 1/3 cup lemon juice
  • 1 Tbsp butter
  • 3 Tbsp water
  • 2 Tbsp cornstarch

Optional add-ins:

  • Spiralized zucchini as another type of noodle
  • Sliced mushrooms
  • Jar of artichoke hearts
  • Handful or two of fresh spinach

Recipe:

  1. Preheat oven to 400 degrees.
  2. Open bottle of white wine and pour a glass to enjoy while cooking.
  3. Put the Just Good Music mix on Spotify.
  4. Lightly grease cookie sheet.
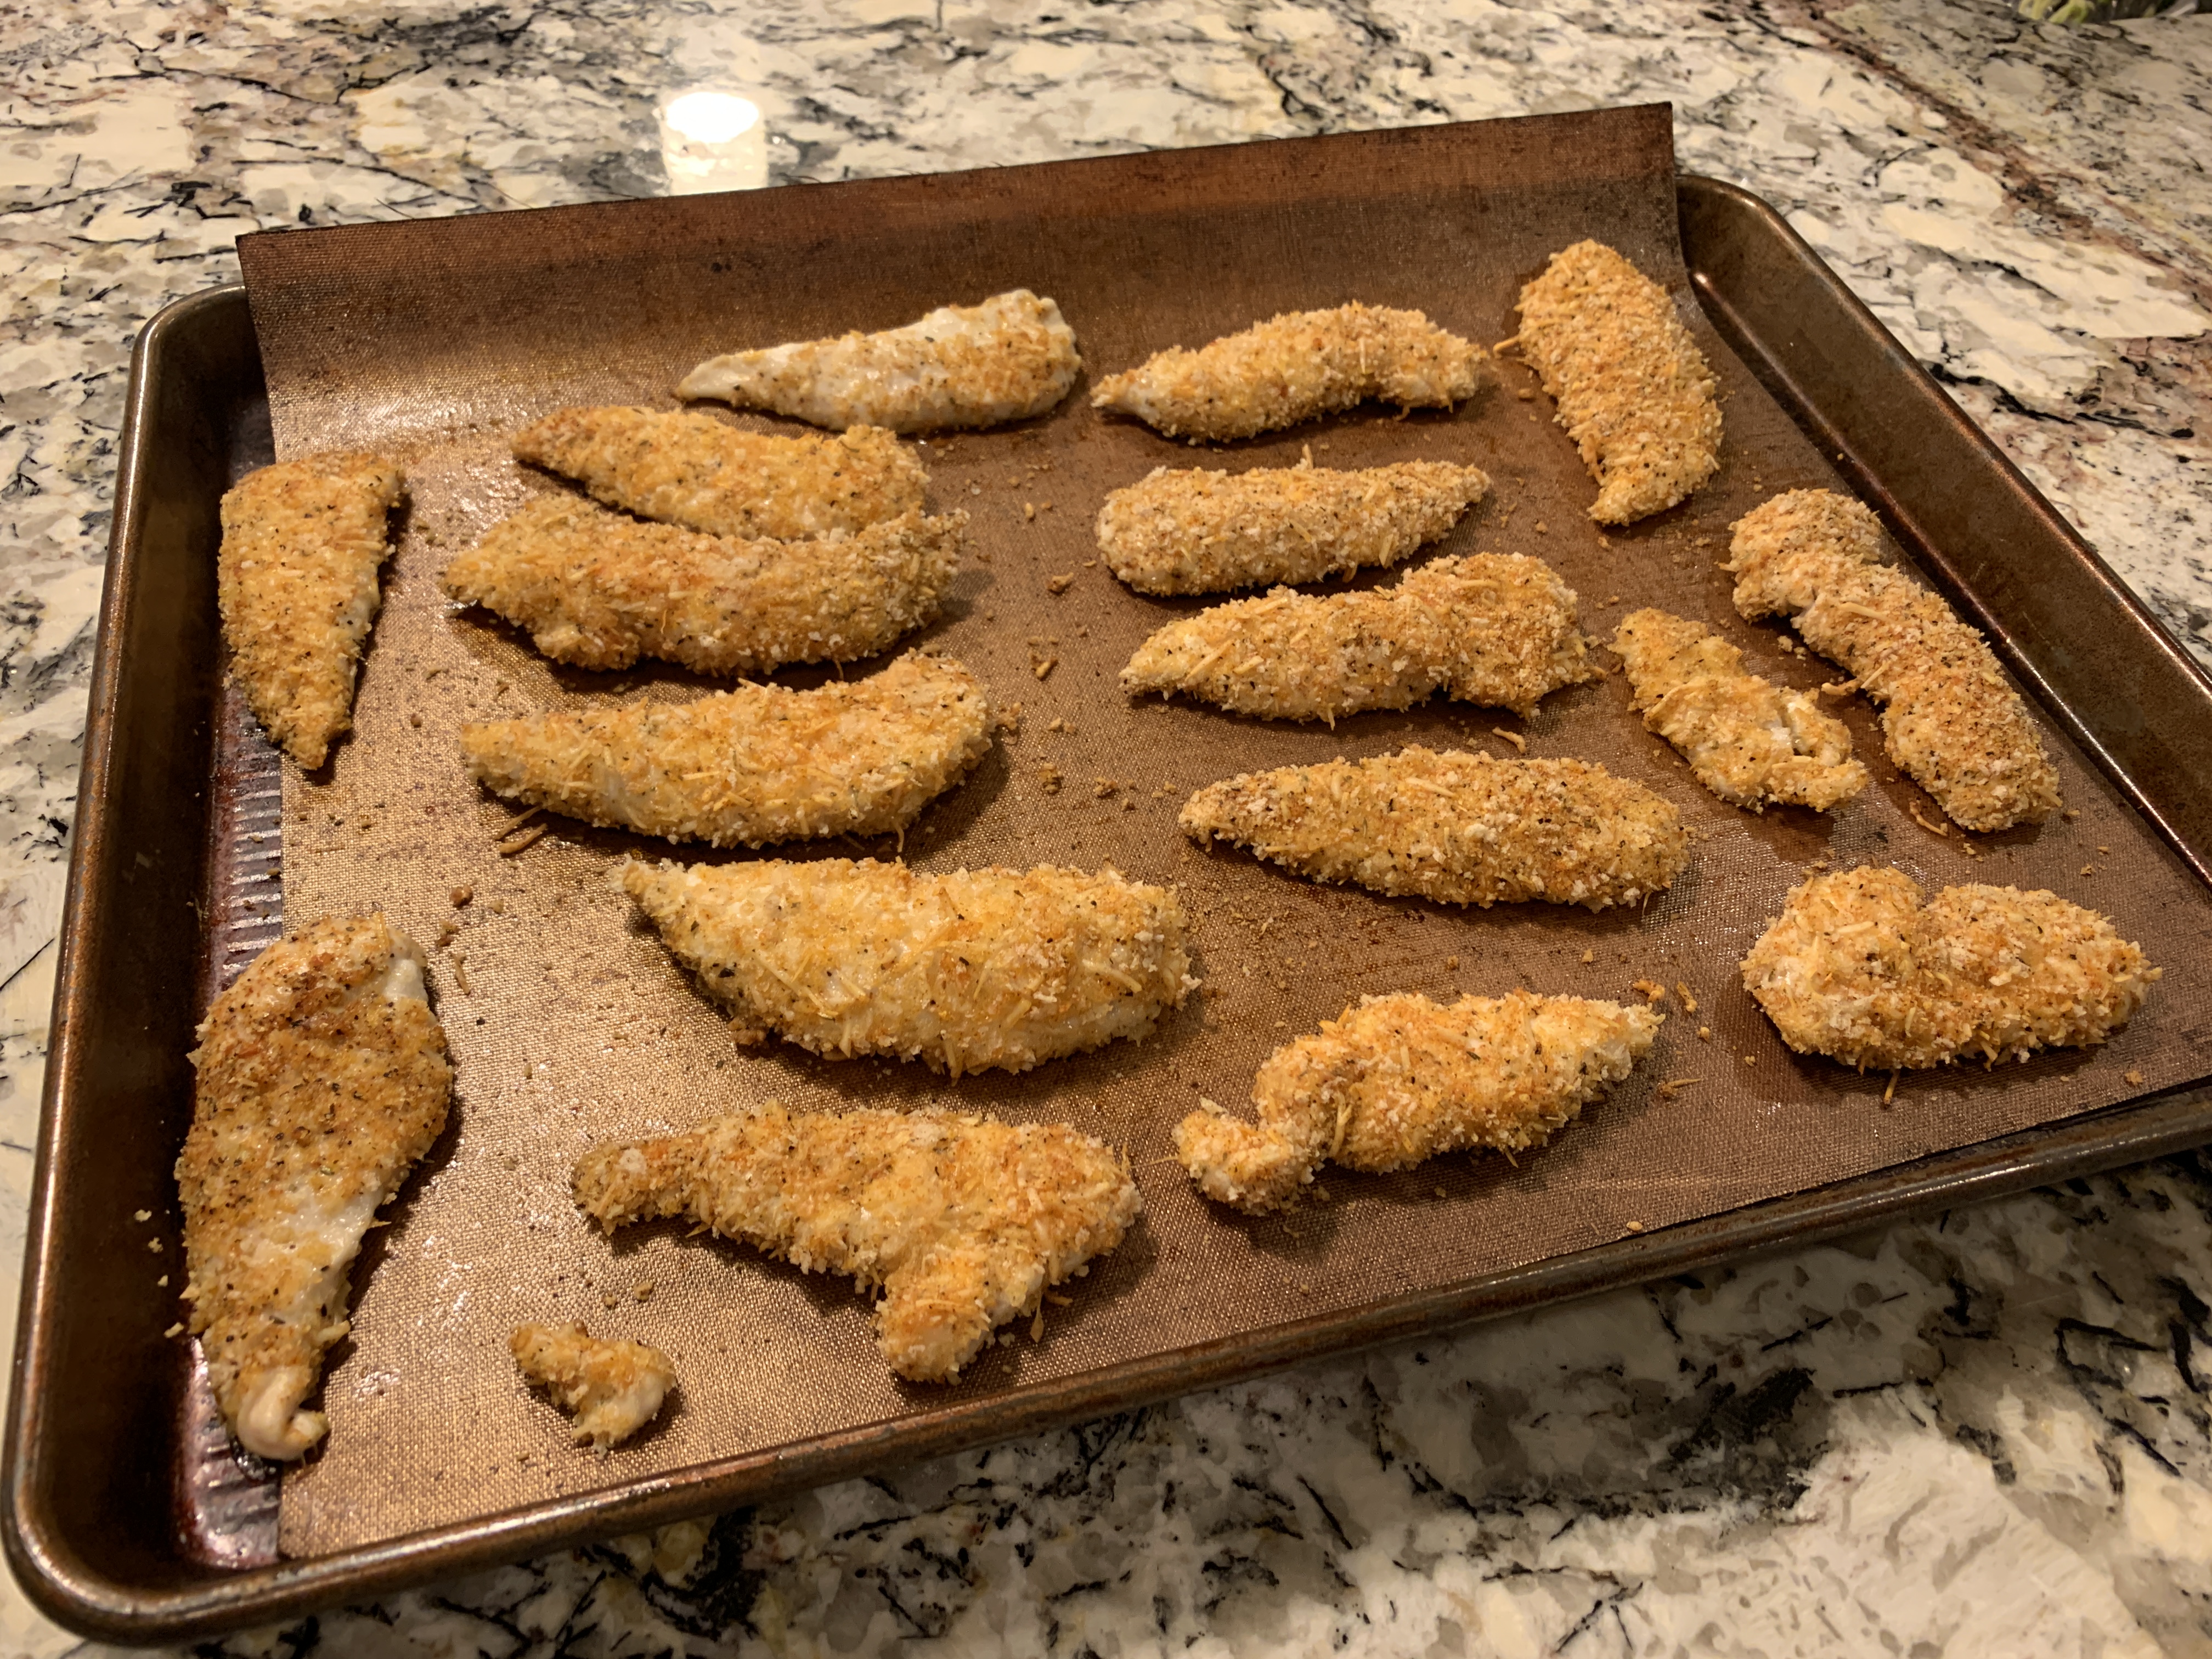
  5. “Paint” mayo on each side of chicken tenders with silicone brush.
  6. On a plate or shallow dish, mix panko, parmesan, salt, pepper, garlic powder, and paprika.
  7. Press each mayo-coated chicken tender one at a time into the panko mixture to coat with breading on both sides.
  8. Place breaded chicken tenders on greased cookie sheet and set aside.
  9. If using mushrooms, cook mushrooms in a large saute pan on medium high heat with additional butter in small batches. Then remove from pan. Brown on each side. Flip once browned, do not stir.
  10. If using zucchini, spiralize in your favorite noodle size and place in colander in the sink. Will cook with pasta water later.
  11. Put a large pot of water on to boil for pasta (per package instructions).
  12. Heat olive oil in large saute pan on medium heat.
  13. Thinly slice shallot and add to hot pan.
  14. Saute shallot until translucent.
  15. Add garlic and saute for 30 seconds (until fragrant).
  16. Add wine and cook until reduced by half (~5 minutes).
  17. While reducing, zest and juice lemons.
  18. Add stock, lemon juice, and lemon zest to saute pan.
  19. Put chicken in preheated oven for 20-25 minutes.
  20. Add capers (and mushrooms and/or artichokes if using) to saute pan and simmer on low for 10-15 minutes.
  21. While sauce is simmering, cook egg noodles according to package directly.
  22. Pour boiling water with noodles through colander with spiralized zucchini (if using). This lightly cooks the zucchini and makes sure the “zoodles” still have a good texture.
  23. Turn off heat on saute pan.
  24. Stir in spinach, if using.
  25. Stir in butter.
  26. Mix cornstarch with water until well combined.
  27. Stir cornstarch mixture into sauce.
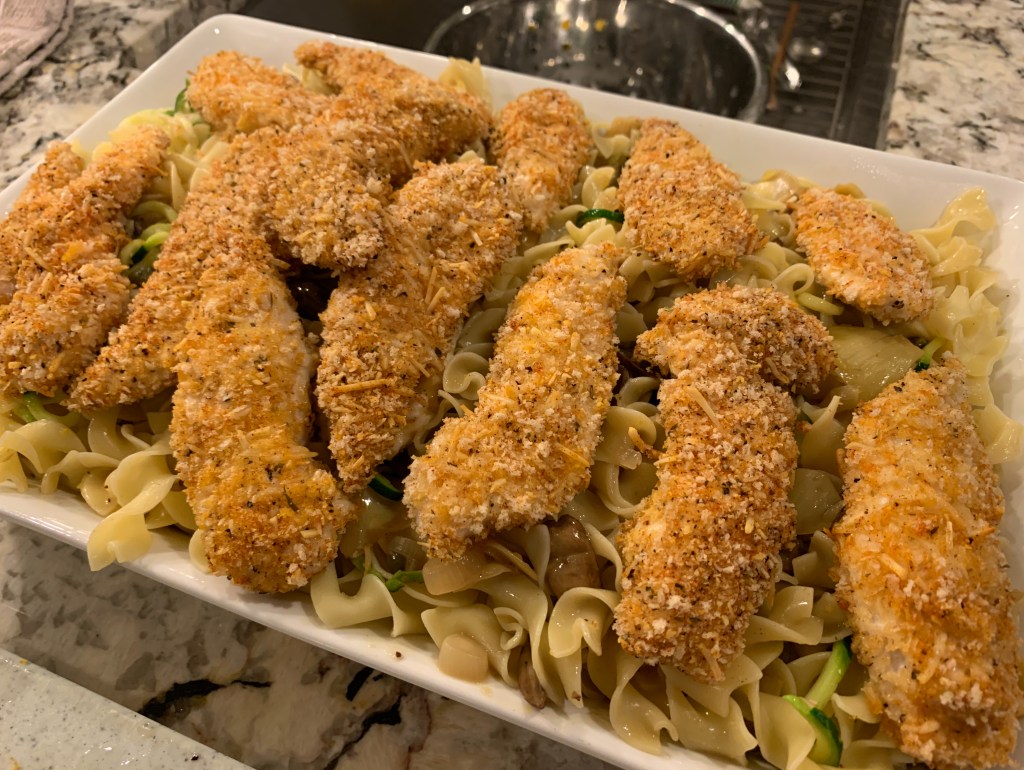
  28. Mix 3/4 of sauce and cooked noodles in large serving dish.
  29. Top noodle/sauce mixture with cooked chicken tenders.
  30. Pour remaining sauce on top.
  31. Sprinkle with chopped fresh parsley.
  32. Serve warm with crusty bread for dipping.

This is one of those meals where I find myself watching my children eat in complete awe. How can they possibly have another serving? They have each eaten more than Beast and I combined!

The sign of a good meal. Serving dish scraped clean and the kids asking “When do we get piccata again?”

I hope your family enjoys this as much as mine!

Happy cooking!

Advertisement

Mama G’s Apple Pie

Fall coming around always makes me excited for several reasons:  Cute layered outfits, boots, Chiefs football, Buffs football, and baking anything and everything.  This year we had another thing to be excited about: apples.IMG_6976

We planted an apple tree a couple of years ago and this was the first year I was supposed to leave a few of the flowers so fruit could actually grow.  The lovely folks at my favorite garden center told me to pick 100% the flowers the first spring, 75% the second spring, 50% the third and so on.  The reason for this is so that the tree can use its energy to put down solid roots instead of growing fruit.  Even after picking 75% of the flowers off this year we had gobs of apples!  This means that I have been able to work on my apple pie recipe…

IMG_3876
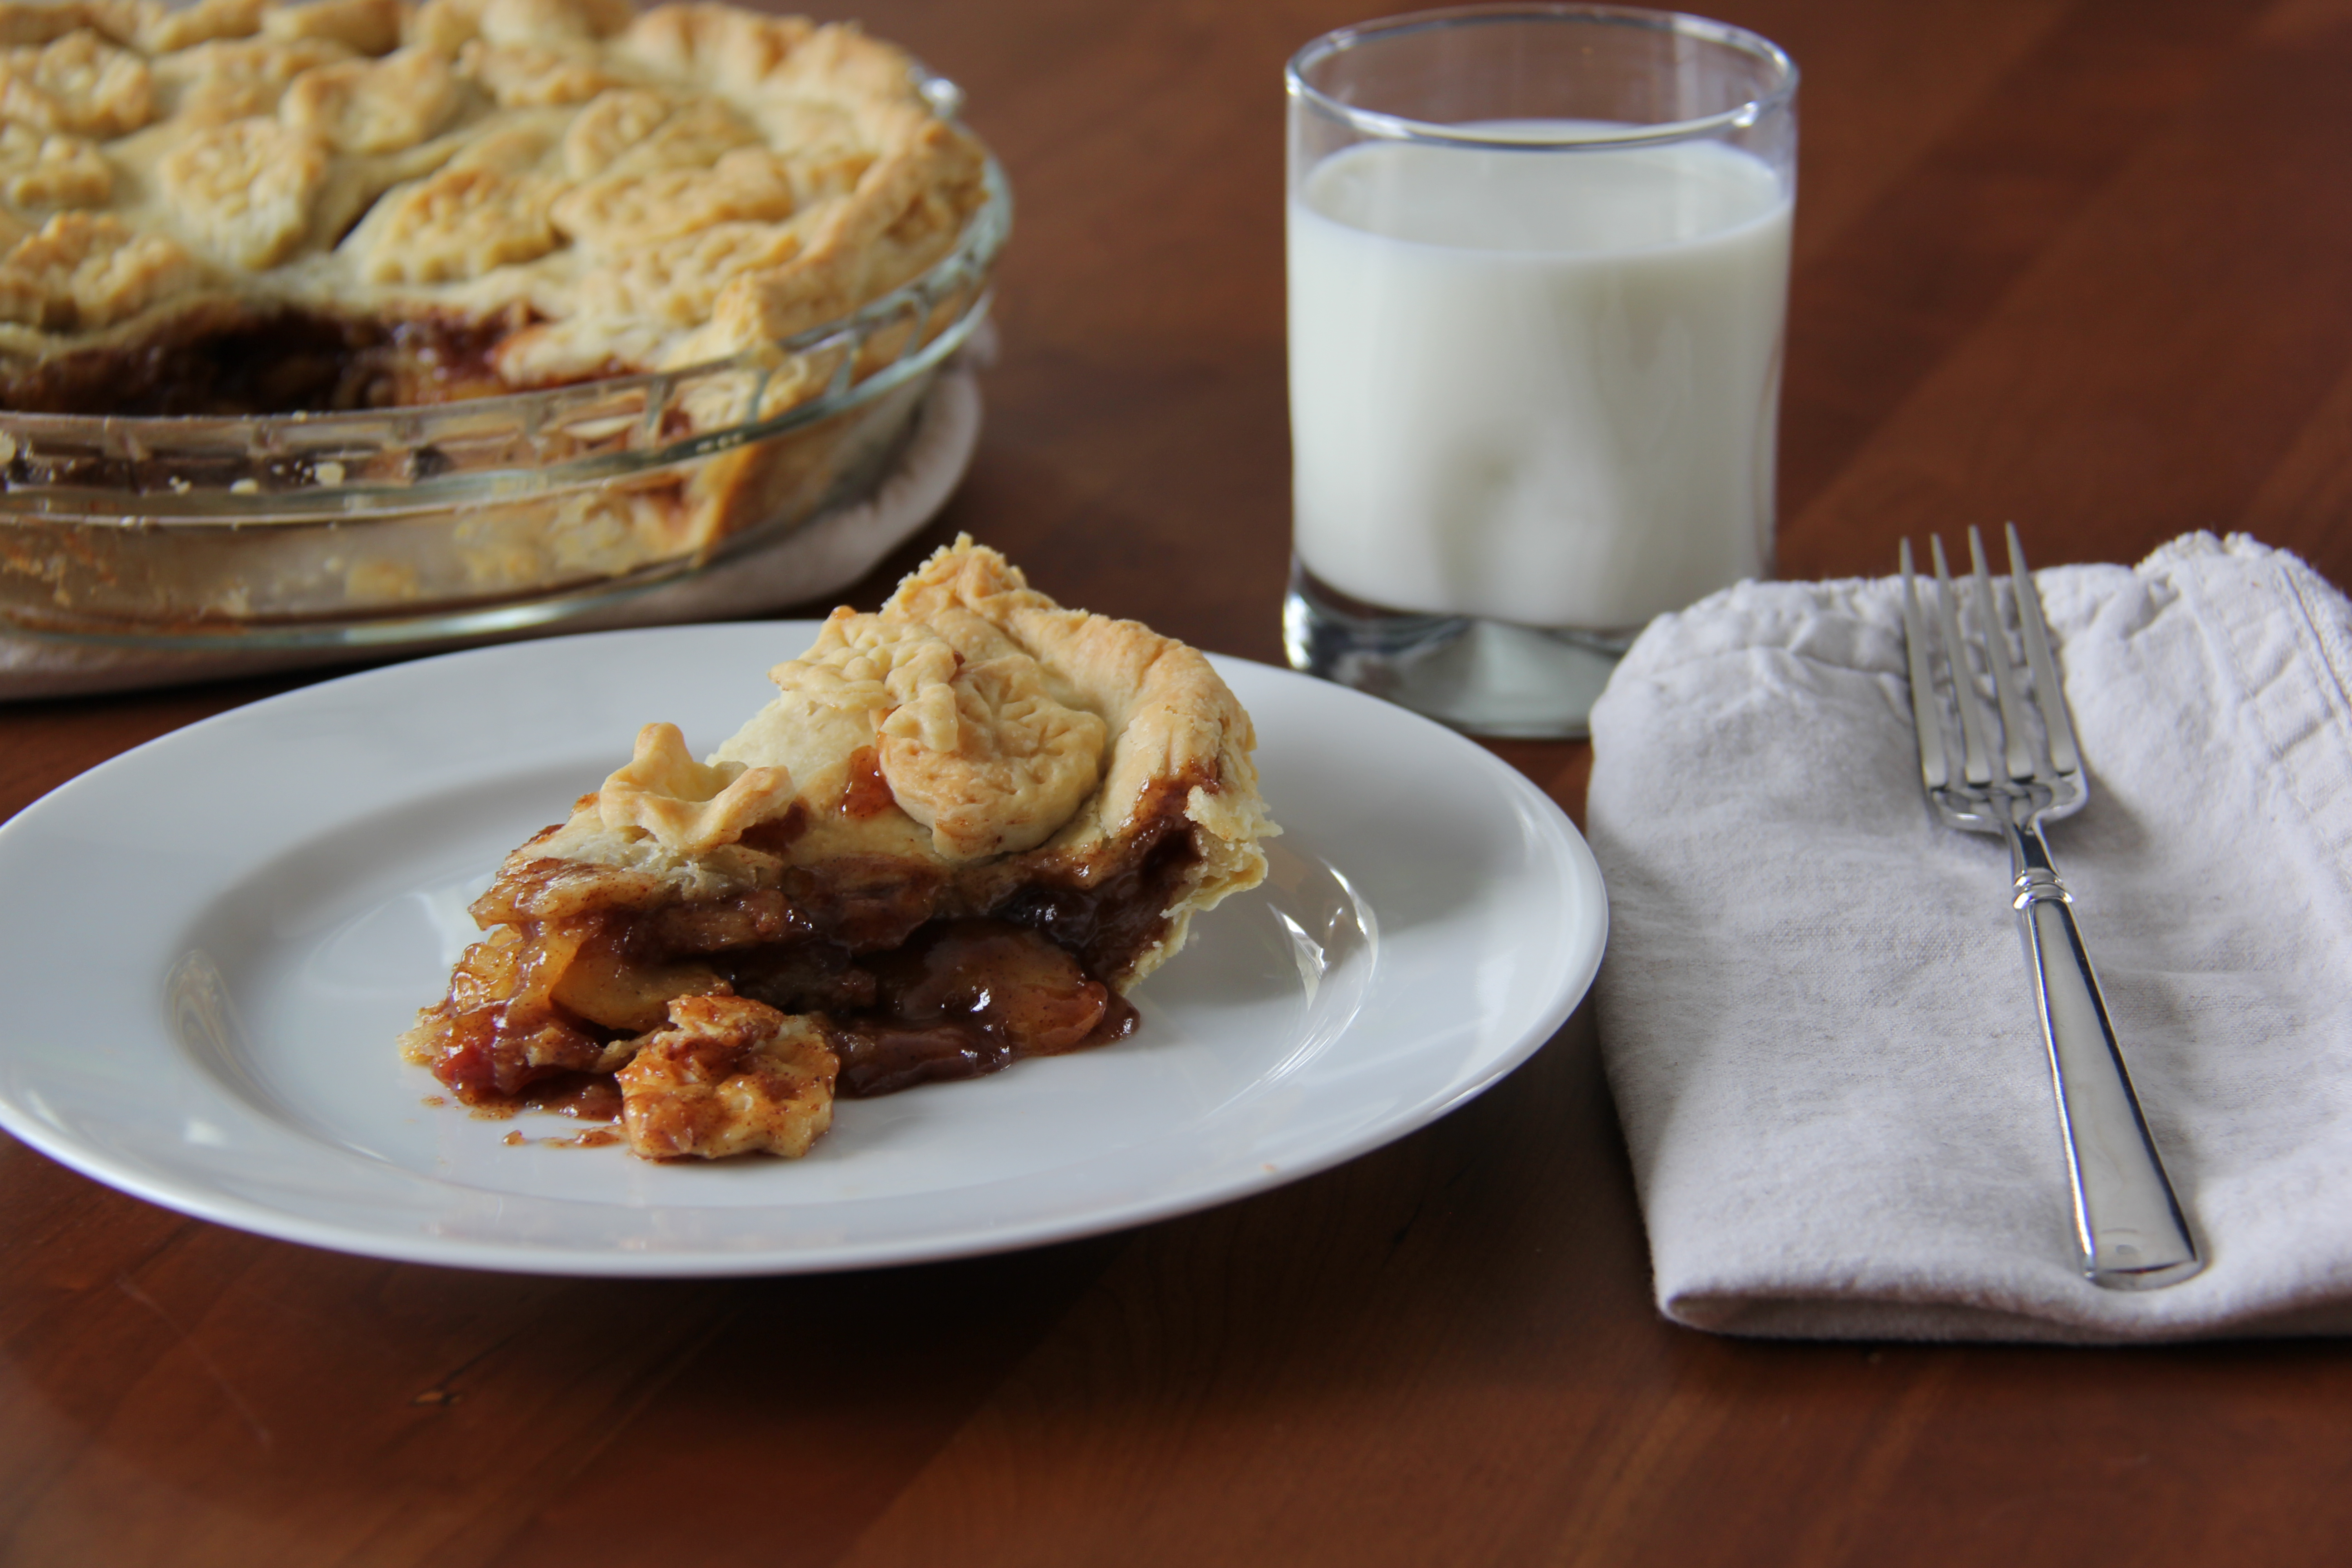
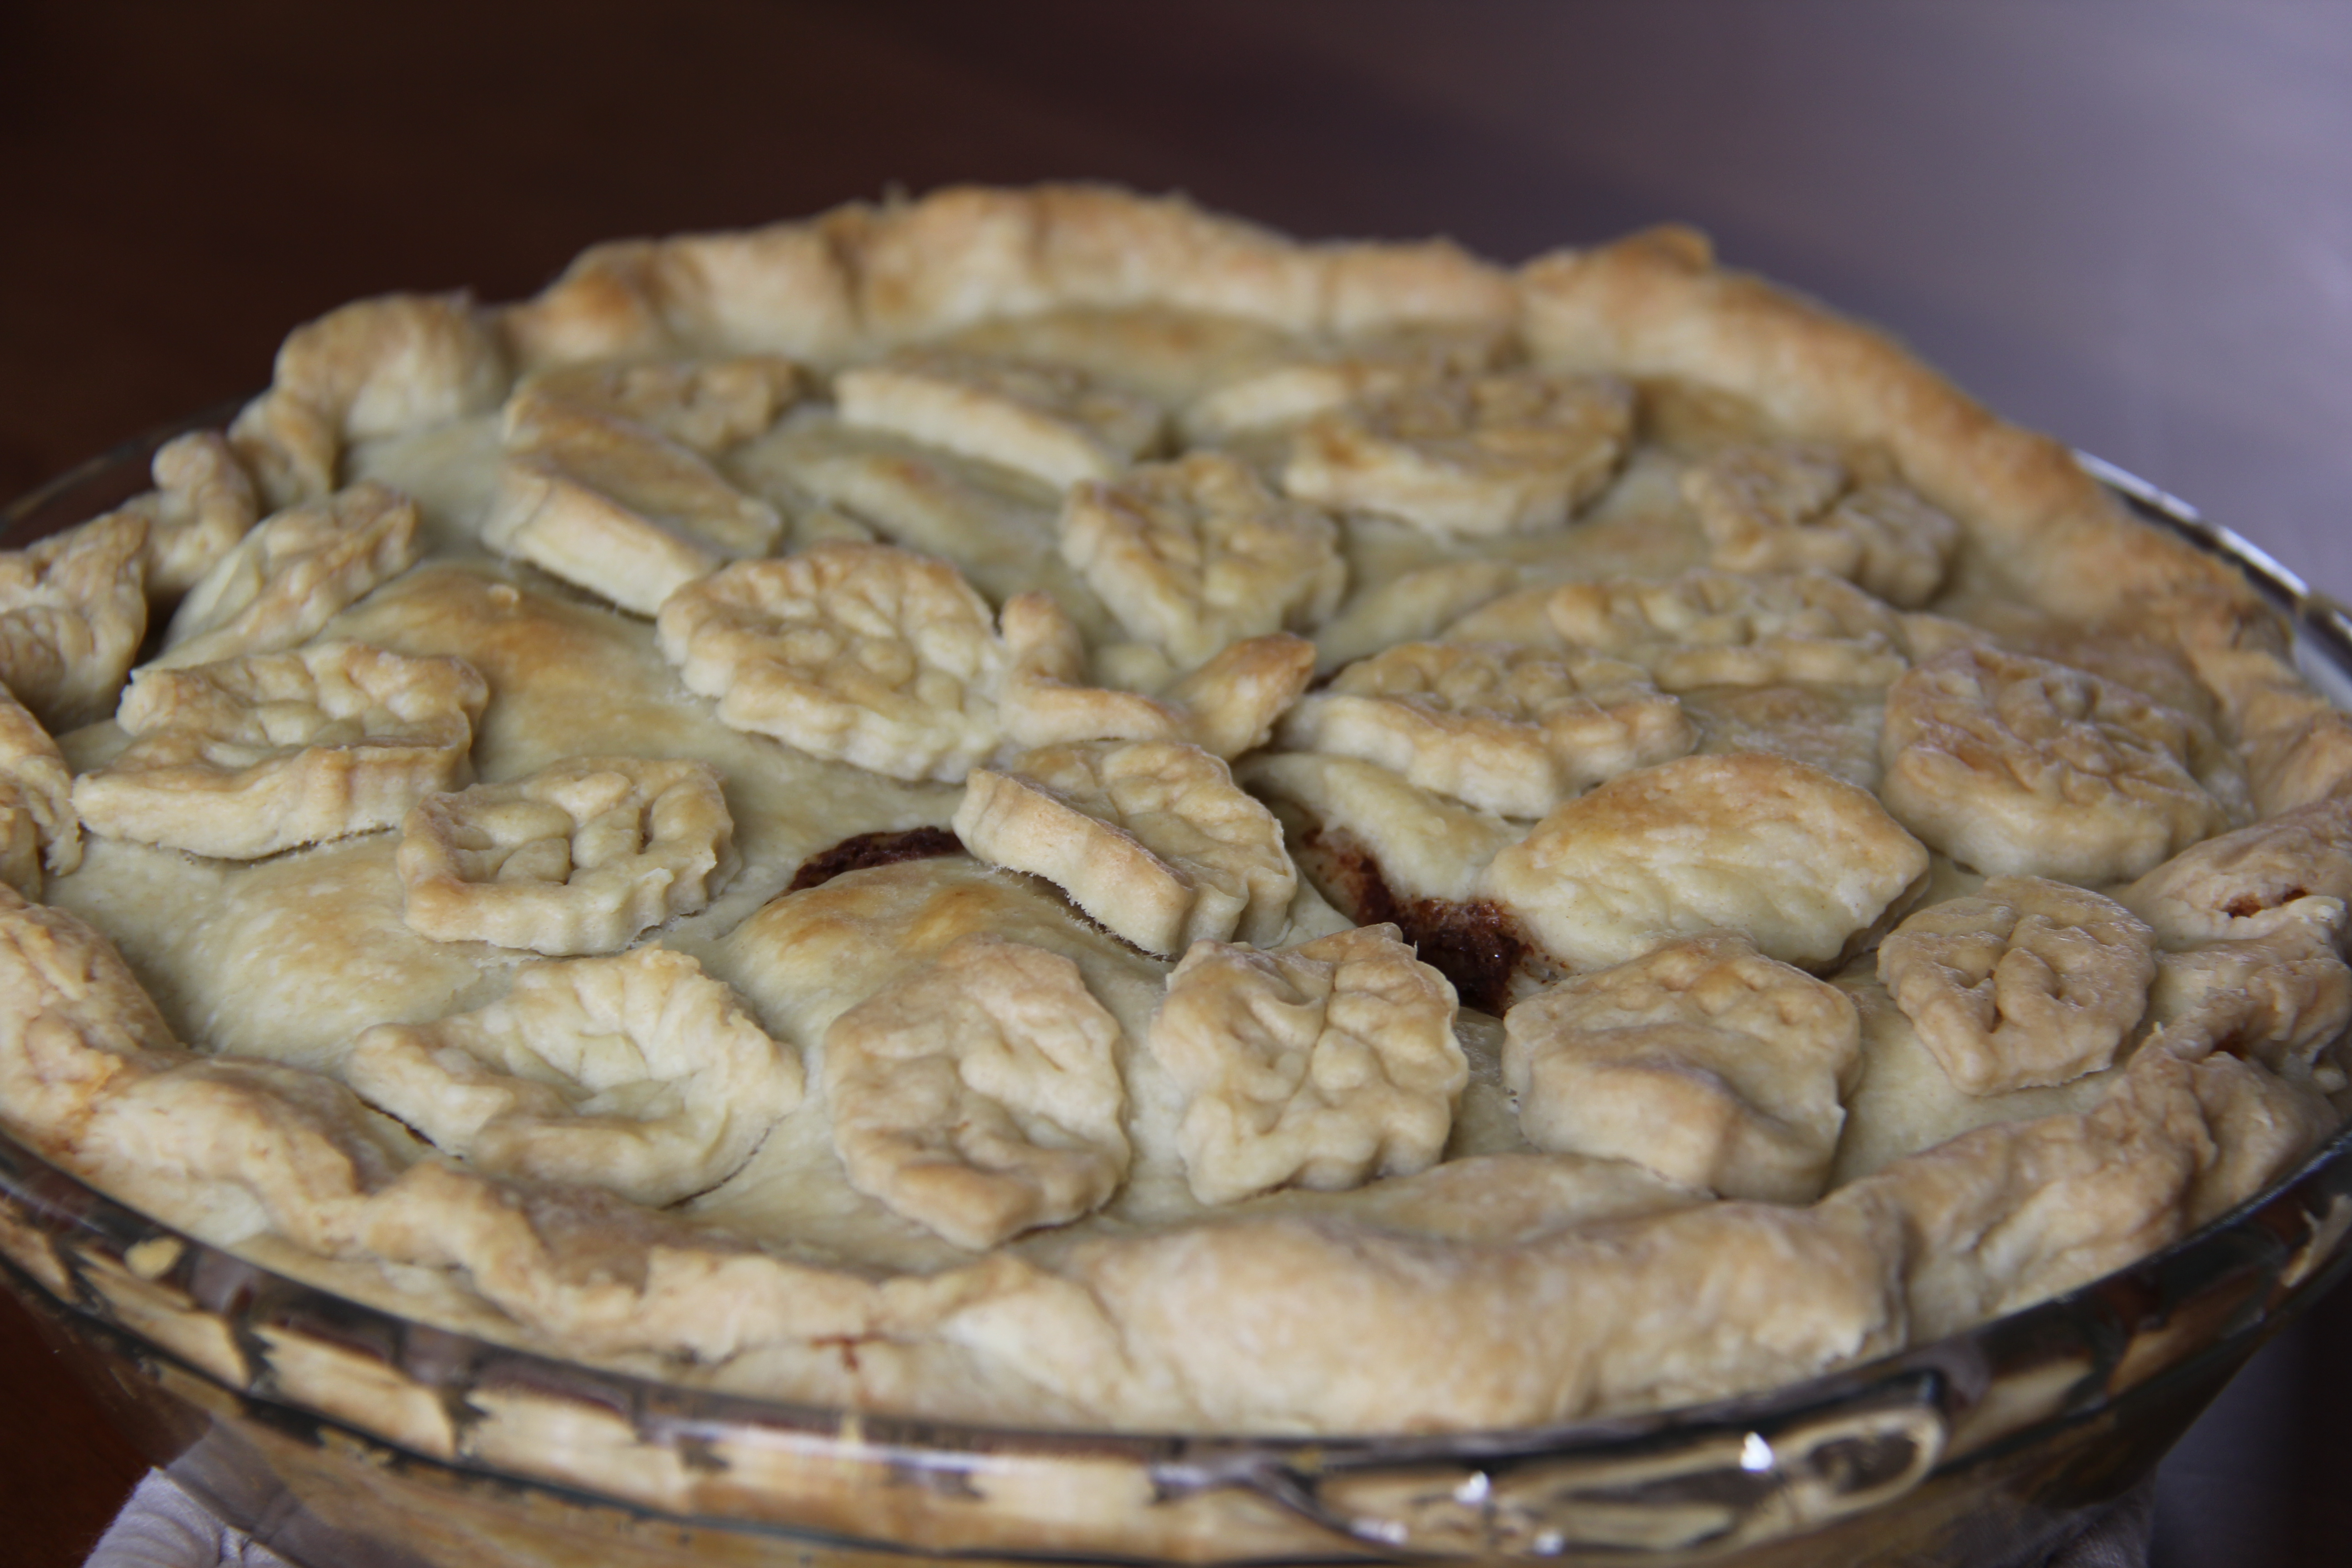
I like a classic, flaky crust that is not too thick and an apple mixture that has a good amount of spice to it.  I also like the apples to be cut nice and thin so that they stack up together and stay in place while you are enjoying a slice.  Random thing that drives me crazy: When you take a bite of pie and the giant apple quarter comes out in one piece with the crust just collapsing on everything.  I want the perfect combo of apple and crust in every bite.

When it comes to crust, I do not think you can beat the King Arthur Flour Recipes:

Double Crust Recipe here.

Single Crust Recipe here.

I use the double crust recipe for this pie.  My kids love helping with the “squishy part” which is what they call squeezing the shortening and butter into the flour.  For my fellow Coloradans and others at high altitude/dry climates: I find myself adding much more water to this recipe than what is called for.  Just keep adding a tablespoon at a time until it all comes together without being sticky.

IMG_3835
Yes, we sometimes bake in PJs and dress up attire.

Now for the apples…IMG_3840

Ingredients:

  • 5-6 apples depending on size
  • 1 Tablespoon cinnamon
  • 1/8 teaspoon ground cloves
  • 1/2 teaspoon ground ginger
  • 1/2 teaspoon ground nutmeg
  • 1 cup sugar
  • 1/4 cup flour

This slideshow requires JavaScript.

Recipe:

  1. Make the crusts first as directed in the recipe above, wrap them with plastic wrap, and put them in the fridge to cool.
  2. Preheat oven to 425 degrees.
  3. Peel, core, and thinly slice the apples.  I like to use my apple corer/peeler/slicer to do this all in one step.
  4. Cut the apples in half.  Apples come off my corer/peeler/slicer looking like a whole apple.  A quick slice from top to bottom makes perfect thin slices.
  5. Mix the apples, spices, sugar, and flour in a bowl.
  6. Roll out your pie crusts and put one in the pie dish.  I like to use a silicon mat and plastic wrap to make this easy and to keep the dough from sticking to the counter or rolling pin.
  7. Paint the first crust with an egg white.  This keeps the bottom from getting soggy.
  8. Dump the apple mix in the pie crust and push the apples around to make sure there are not any empty pockets.IMG_3862
  9. Top the apple mix with the next pie crust.
  10. Seal the edges of the crust.
  11. Cut a few slits in the top crust.  I like to top my pies with a few crust cut outs and the kids really enjoy helping with this part.  You could use small cookie cutters but I love these little crust stampers.

  12. Cover the pie completely with foil.
  13. Bake for 30 minutes then turn temperature down to 375 degrees and remove foil.
  14. Bake for 30 minutes uncovered or until crust is golden brown.
  15. Let cool for 5-10 minutes then serve with ice-cream, whipped cream, or just by itself.  Enjoy!

IMG_3886

Happy Cooking!

Mel

Lemony salmon and Greek zucchini pasta

During the week, getting dinner on the table ASAP is often my goal but Sundays are different.  Sundays we can take our time prepping and cooking which means my Sunday suppers are often a bit more involved.

Bear is currently on a salmon kick where the boy, I kid you not, can sit down and eat a half pound of salmon or more.  At age 3 1/2.  It is kind of impressive.  And I absolutely love cooking him something he gets so excited about so I’ve been trying to make sure he gets his salmon every 1-2 weeks.

Lucky for me, our local grocery chain King Soopers does an awesome fish program called “Easy for You” where they put the seafood of your choice in an oven ready foil bag with tons of great seasonings and herbs.  It even tells you on the back of the bag the appropriate temperature and time to cook it based on the weight.  Our favorite right now is salmon with butter, dill, lemon, and the lemon pepper seasoning.  For 2 lbs of salmon, you bake it at 380 degrees for 40 minutes and it comes out perfect every time.


When cooking fish, it is always better to err on being underdone and sticking it back in the oven for a few minutes.  If you overcook it, it will often have that not so pleasant fishy taste that makes people think they don’t like fish.  In reality, they don’t like overcooked fish.


If your grocery store doesn’t offer a similar program, you could make your own foil envelope and just top the salmon with the following:

  • 2 Tablespoons of butter
  • Healthy shakes of lemon pepper seasoning
  • Slices of lemon
  • Sprigs of dill

While my salmon was cooking, I got to work on the pasta.

Ingredients:

  • 3 zucchini (small, spiralized to about twice as thick as typical spaghetti)
  • 1 bunch of asparagus (cut into 1 inch pieces)
  • 1/2 cup of pitted kalamata olives (cut in half lengthwise)
  • 1 cup cherry tomatoes (cut in half)
  • 1/2 cucumber (cut in slices and quartered)
  • 1 small jar pesto sauce

Directions:

  1. Spiralize and cut all veggies, keeping the zucchini noodles and asparagus separate from everything else.
  2. Put a large pot of boiling water on to boil.
  3. When the salmon has 5 minutes left to cook, drop the zucchini noodles and asparagus in the boiling water.
  4. Boil for 3 minutes.
  5. While the asparagus and noodles are boiling, stir the pesto into the other veggies with some freshly cracked pepper.
  6. Drain the asparagus and noodles in a large colander.
  7. Push down on the asparagus and noodles with a paper towel or clean dish towel to release some of the excess water.
  8. Mix the asparagus and noodles into the other veggies.
  9. Plate the pasta with the salmon and top the pasta with a little bit of crumbled feta.

My kids can’t tell the difference between zucchini noodles and regular pasta, especially once it has a sauce on it, so this is a great way to sneak some extra veggies in.  When serving this up, I made sure Bear got extra tomatoes and Beast had as few olives as possible since those are their preferences.  I left the feta off the top of the kids’ plates because my kids gag on “weird white stuff” (feta, cottage cheese, and mashed potatoes).  Not a battle I wish to fight since they are great about eating virtually everything else including their veggies.  The feta and cottage cheese I can understand but I think they are really missing out on the mashed potatoes.

This went over well in our house and I hope it will in yours as well!

Happy cooking!